|
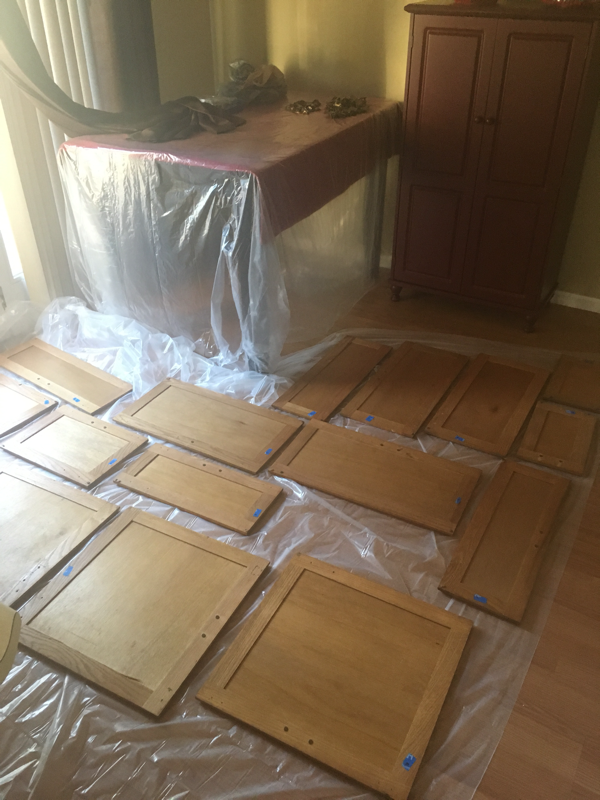
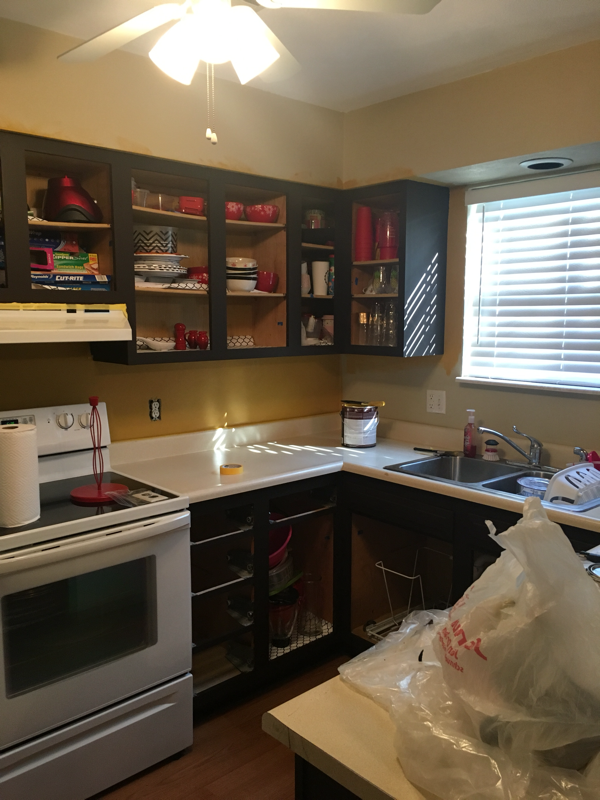
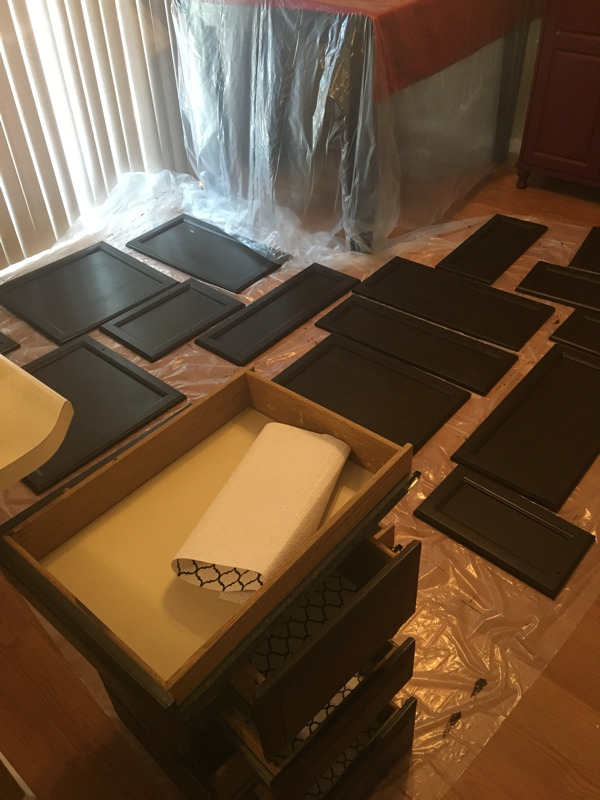
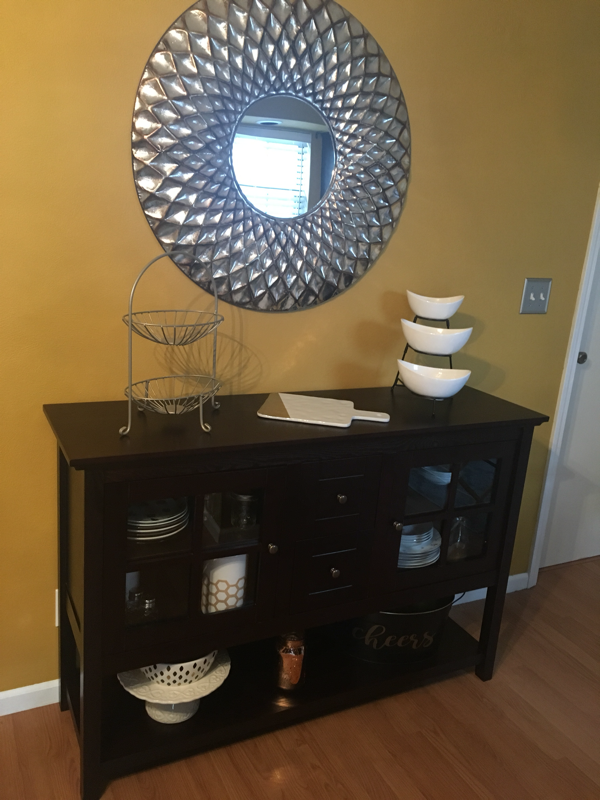
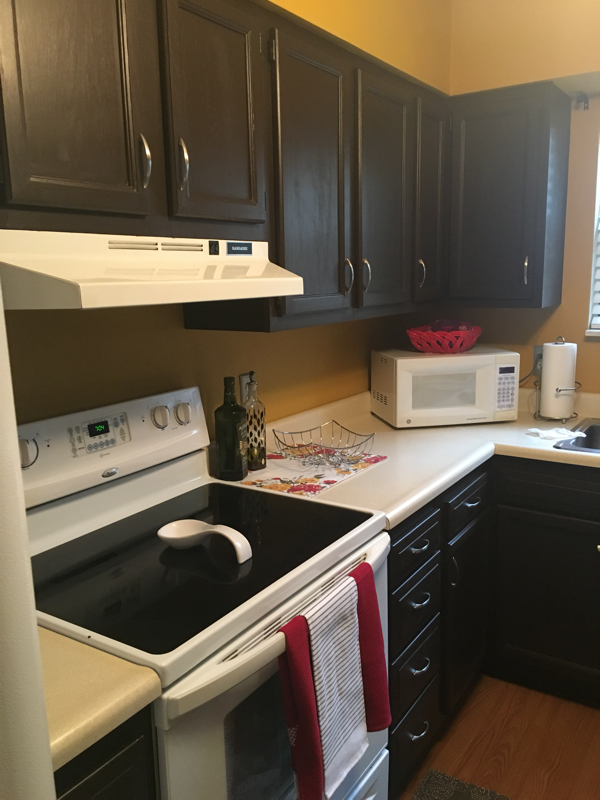
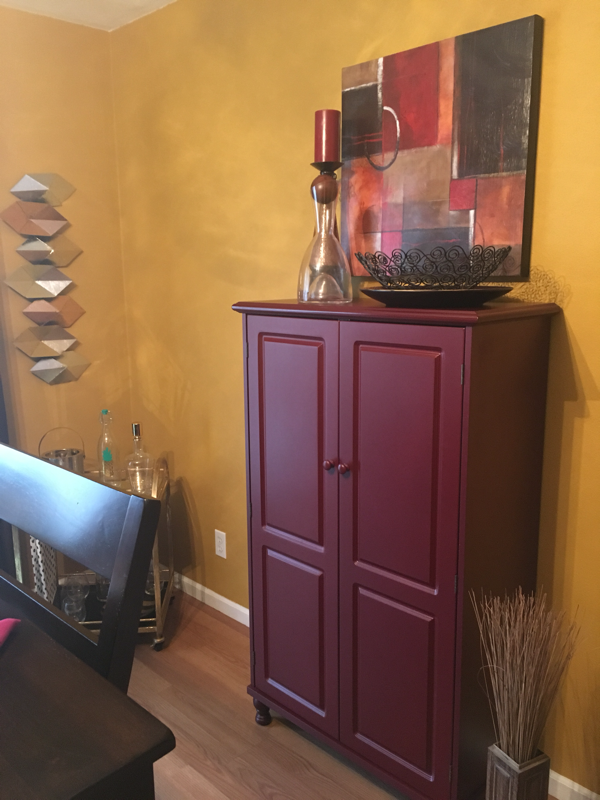
I adore my sweet little condo but the kitchen wasn't really my style...until now. About a month ago I decided to give my kitchen a little facelift. After much research, many paint samples, and lots of almost talking myself out of this project I decided to take the plunge and use the Rustoleum Cabinet Transformation kit. I'm so thrilled with how this project turned out! It was quite a bit of work, but totally worth it in the end! Here's a quick before and after. It really does feel like a different kitchen . 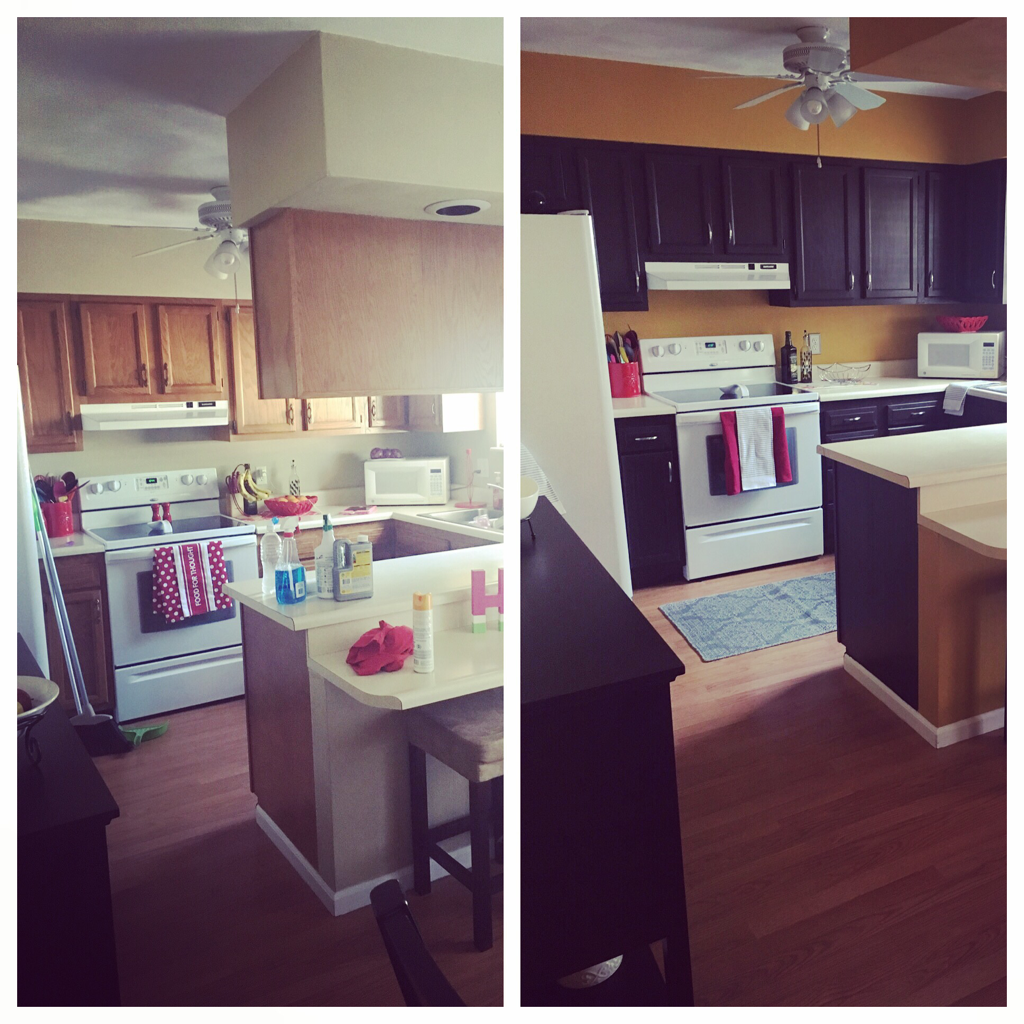 For this project, I used the 100 square foot cabinet kit which I purchased at Menards. There are two types of kits depending on if you are transforming your cabinets to a light or dark color. You will also have to take the kit to the paint counter in order for them to tint your bond coat the specific color you're wanting. I used the dark kit in espresso. The cabinet kit includes all the supplies needed for your transformation including an instructional DVD (you can also find this on YouTube in case you want to get an idea of the process before purchasing the kit). There are also recommended supplies listed on the box (gloves, paintbrushes, disposable containers, etc.) - I purchased and used all of the recommended supplies. The paint color I picked is Behr Marquee in Saffron Strands; it's a fantastic gold that I just adore!  To start, I moved everything I could to my living room and some of my large heavy furniture was covered with drop cloths. I also removed the cabinets above my island/bar area; it really helped open up the space! You need a decent size workspace for painting and also drying. A garage is recommended by Rustoleum but since I don't have one, my dining room became my drying space. All your cabinet doors, hinges, and hardware need to be removed and wiped down. As you are removing cabinet doors and drawers, make sure to label them so you know where they go when finished. I numbered mine using painters tape and put the corresponding number inside the cabinet. The first step in the kit is a deglosser - this is tedious but helps to clean everything and prepares your surface for the bond coat. It's really important that you use the deglosser so that your bond coat (which is your color) will stick to the cabinetry. Step number 2 is the bond coat. This is your color coat and really makes you feel like you've made some progress! Everything receives 2 coats of bond coat with 2-3 hours dry time between each coat. The kit comes with enough bond coat to cover the frame of your cabinets as well as the front and back of each door. I allowed my bond coat to dry overnight before moving on to step 3. Step 3 is an optional glaze which darkens and adds more character. I tried this on one of the cabinet door backs and it didn't make a difference because my color was already very dark. This helped me make the decision to skip this step. Step 4 is a top coat which helps to protect all of your hard work. It needed to dry overnight before putting the cabinets and hardware back together. At at some point during all this madness, I also managed to paint my kitchen and dining room. Finally moving everything back was such a huge relief! I am so happy with the Rustoleum Cabinet Transformation Kit; I highly recommend it. In order to complete my kitchen, I only used about half the 100 square foot kit. I had enough leftover to complete both of my bathroom vanities! The bathroom vanities turned out great too! 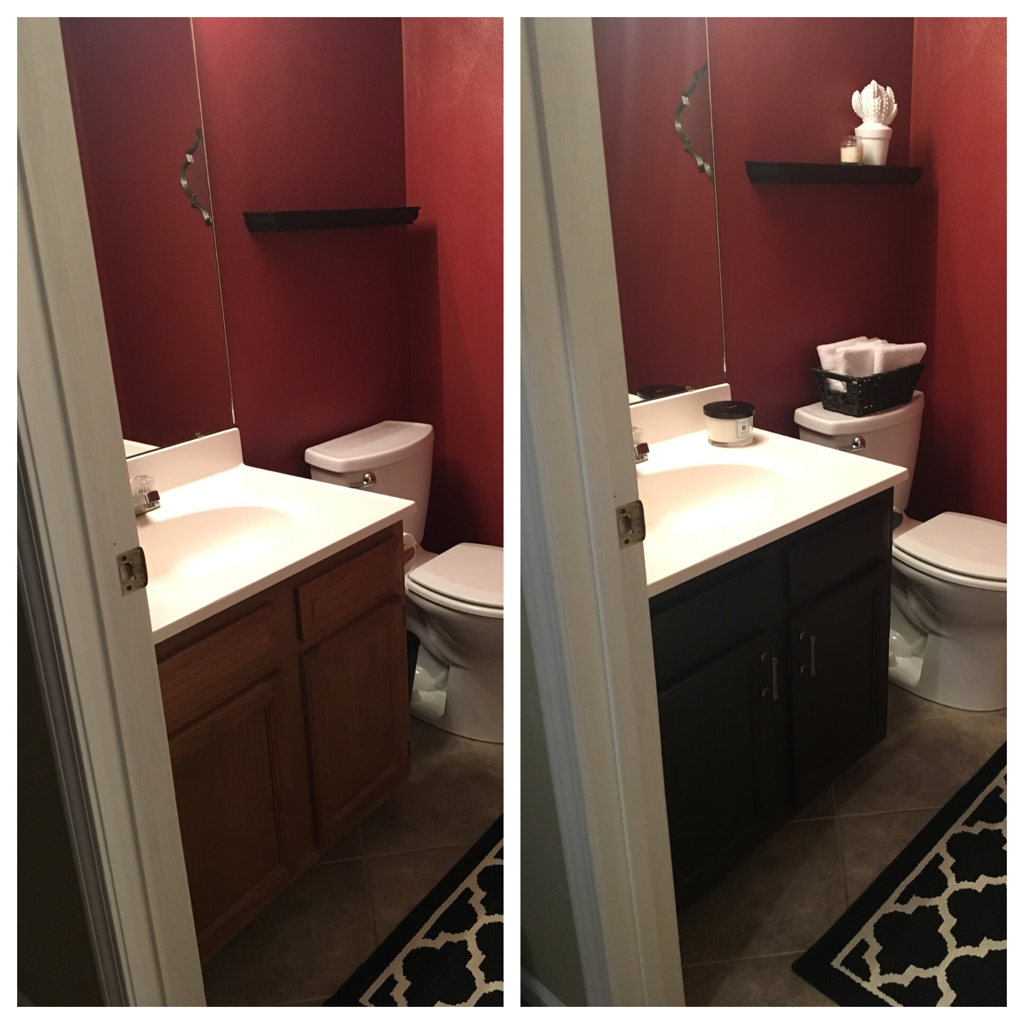 Best of luck to those of you who decide to tackle this project in your own home! It's messy, it's time consuming, and it's a lot of work but it's also very worth it! I hope your enjoy your kitchen transformations as much as I enjoy mine!
0 Comments
Leave a Reply. |
Archives
April 2020
Categories
All
|


 RSS Feed
