|
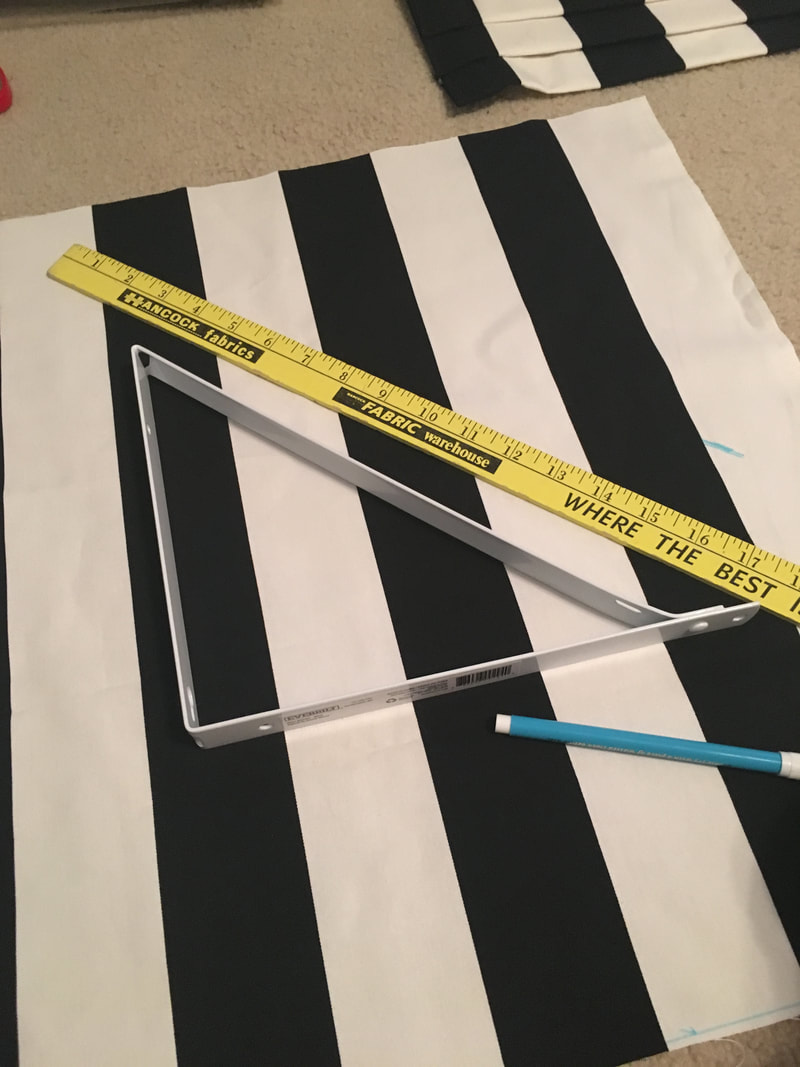
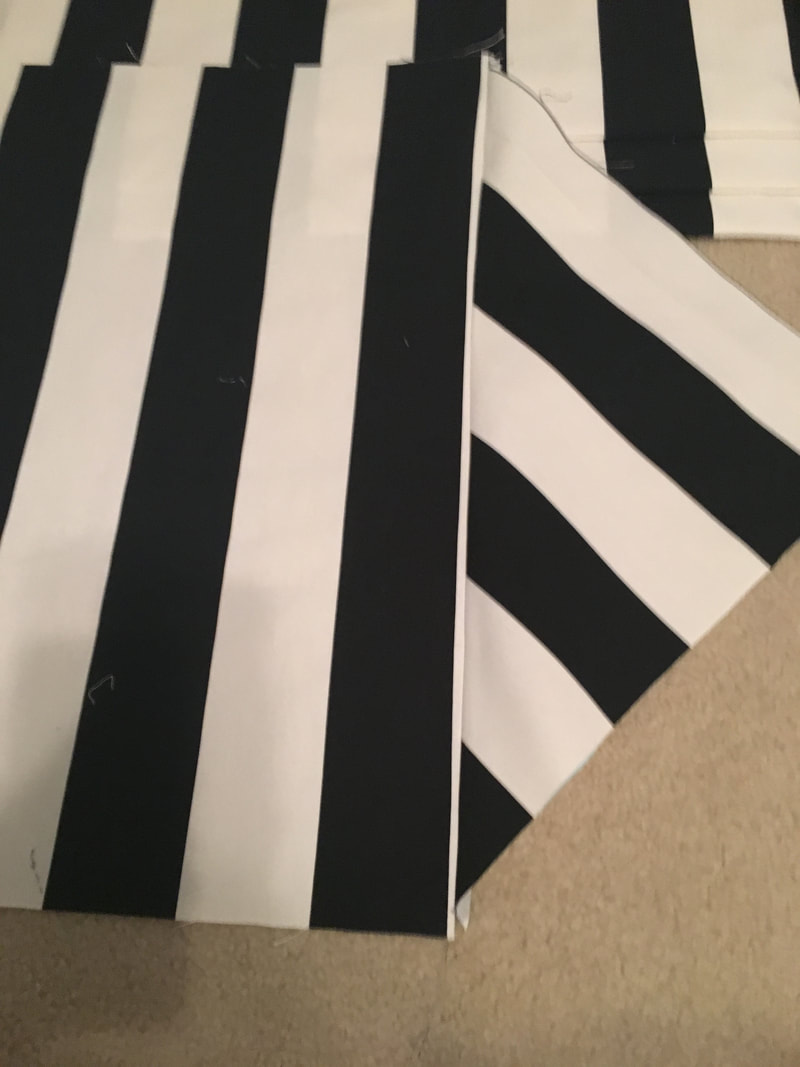
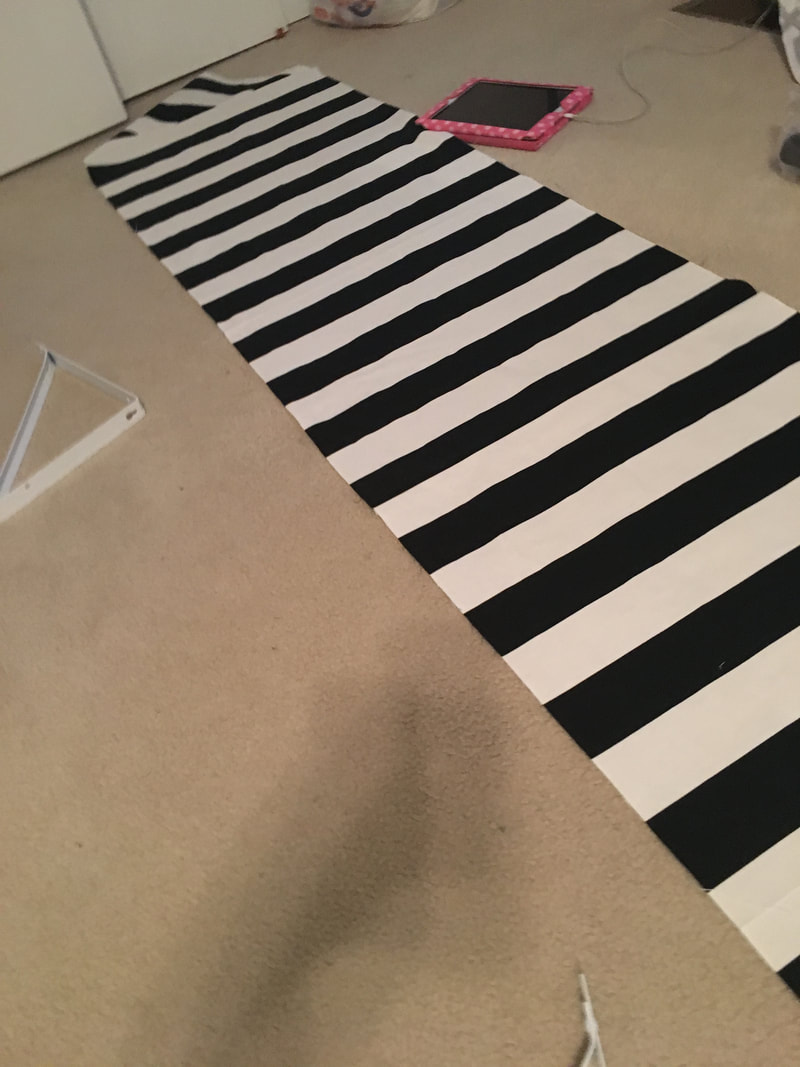
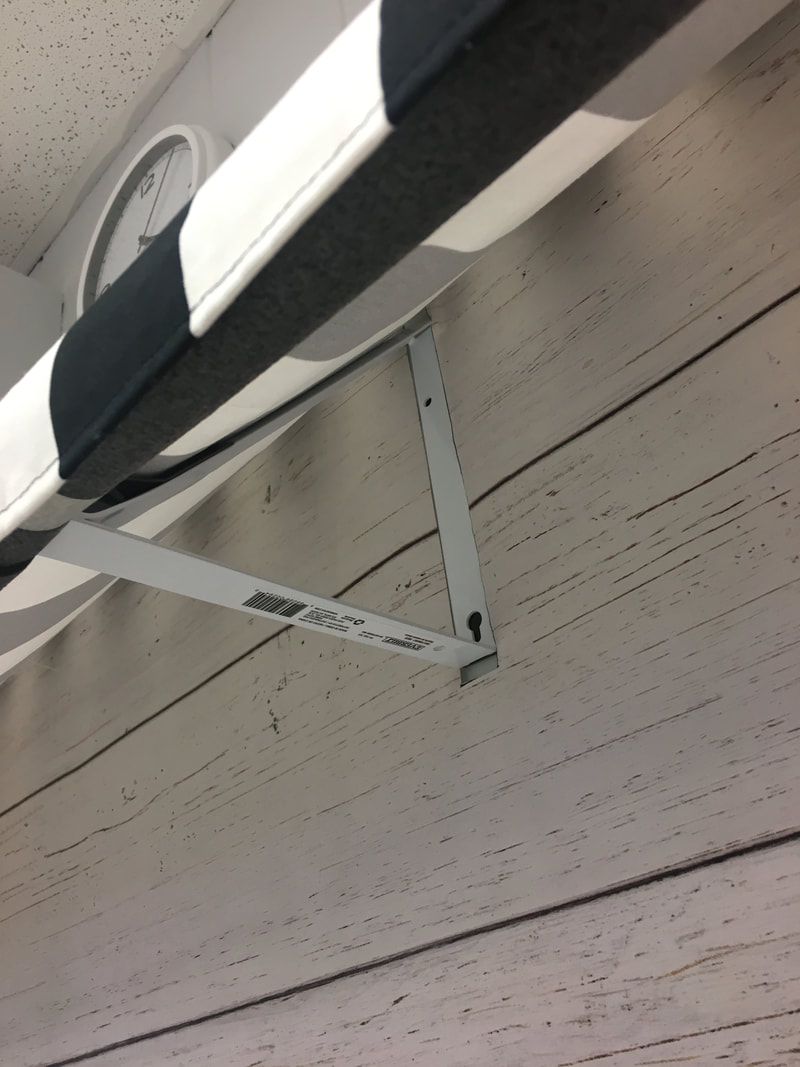
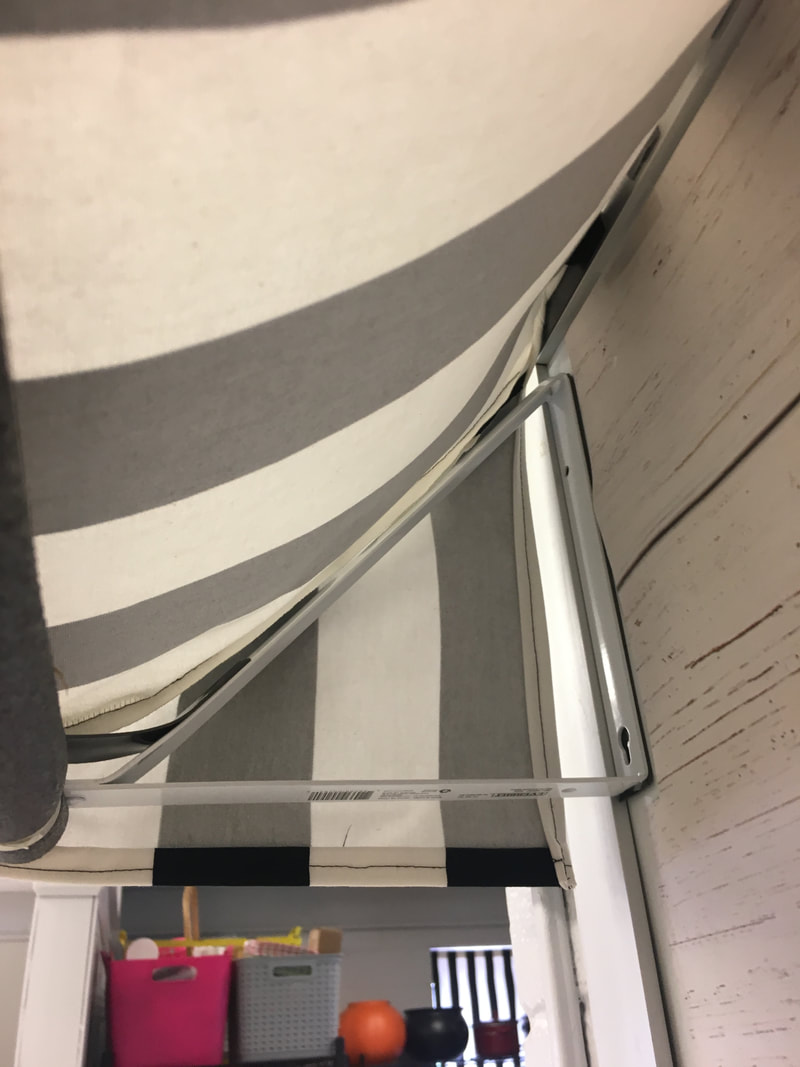
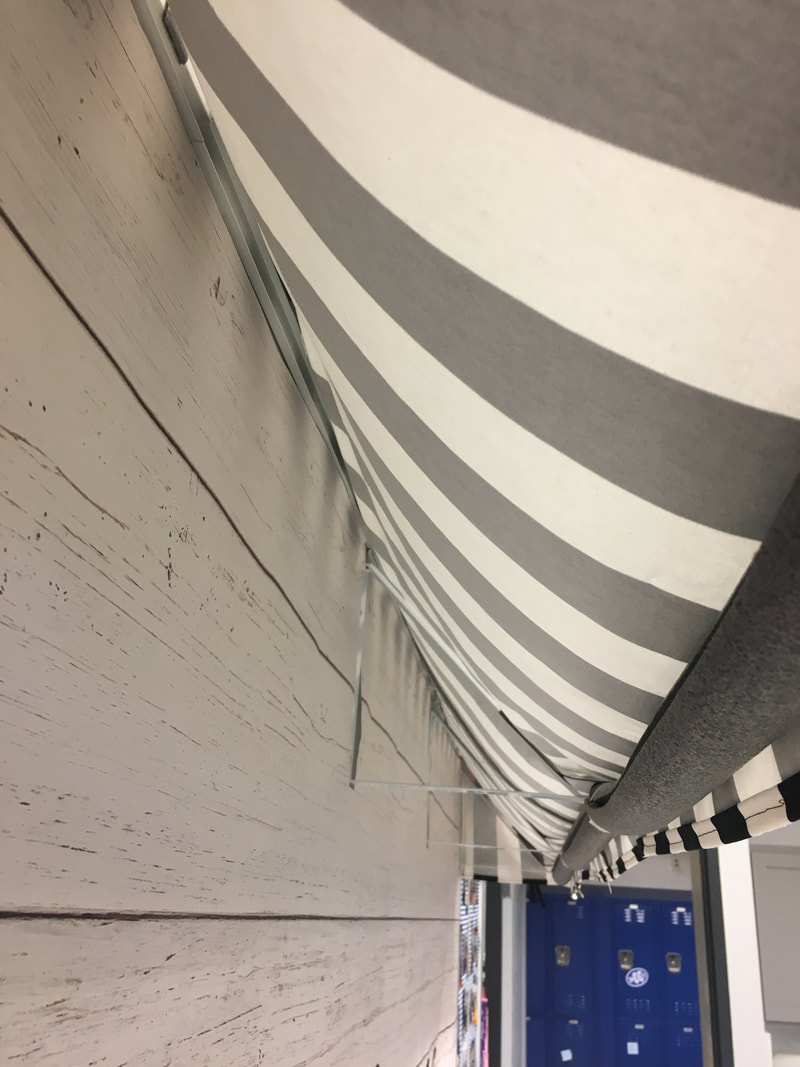
I have a dry erase board in my classroom kitchen that rarely gets used. It’s basically a giant white space that occasionally gets written on when students get ahold of a marker. Last summer I started thinking: if my classroom is getting a transformation, shouldn’t my dry erase board get a facelift too? I considered many options for the blank space including banners, garlands, and paper flowers but nothing really seemed to fit in the updated space. I had a moment of brilliance in the middle of Hobby Lobby and the awning idea was born. I was inspired by visions of sweet little French patisseries adorned with black and white stripes. It took a little planning but was actually very easy to put together! Supplies needed: 3-4 closet shelf brackets (depending on the length of your space. I used 4) fabric or paper of your choice mounting tape or screws to attach brackets to the wall (I used gorilla tape since this was going on my dry erase board) pvc pipe/insulation pipe/dowel rod - Any will work to support and create the correct shape. 1. Measure the length of your space. Add 1-2 inches to accommodate seam allowance. 2. I decided to have an awning with a length of 16 inches. My brackets were 14 inches tall. 3. Cut the fabric the length and width desired. To make the panels for the sides, I used the bracket as a diagram. Cut the triangle slightly larger that the bracket in order to have room for the seam allowances. 4. Attach the side panels to the main portion of the fabric. I placed mine right sides together and stitched. I aligned the side of the fabric with the long edge of the side panel. 5. I also hemmed all edges of the fabric for a finished look. If you are using paper, you can staple or glue paper to attach and finish edges. 6. To attach the awning, I taped the brackets to my dry erase board placing 1 on each end and 2 in the center of each half for additional support. 7. The fabric awning is taped directly to the dry erase board and rests against the brackets. 8. In order to create the correct "rolled edge" shape, I used a pipe insulator. It rests against the brackets and fabric and creates the appropriate shape. 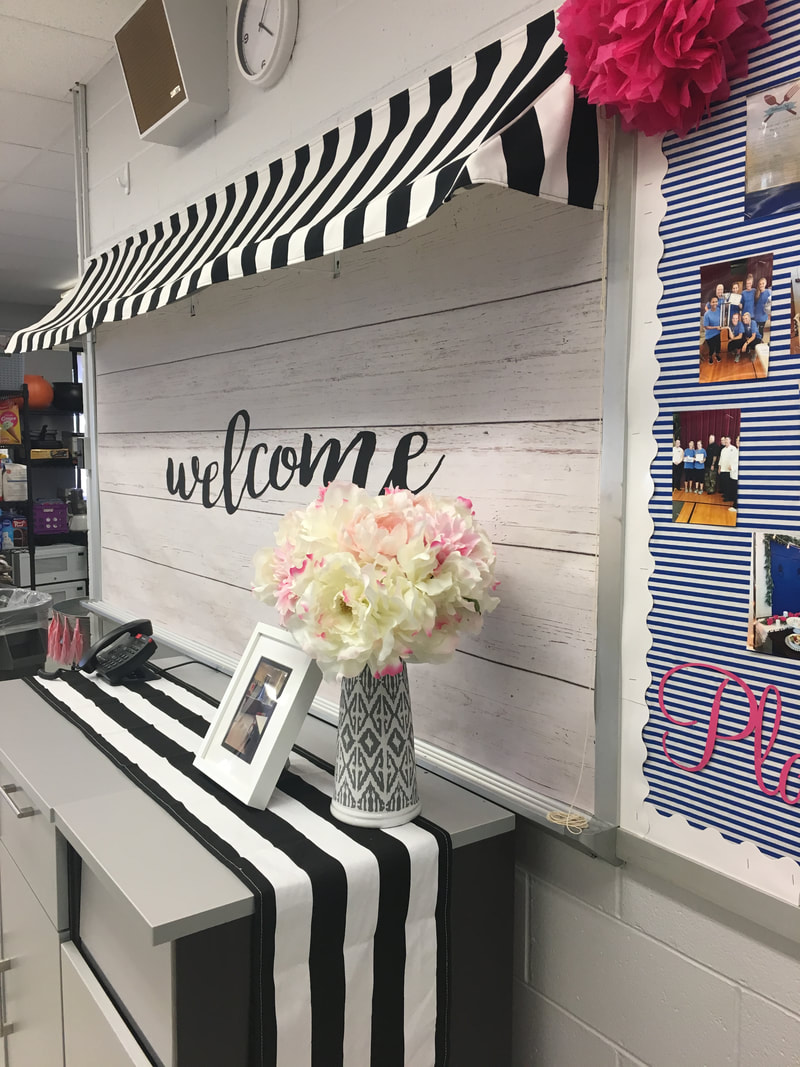 How easy was that? I'm so excited that it made such a big impact with a little price tag. Have you made your own classroom awning? Share your photos below!
3 Comments
|
Archives
April 2020
Categories
All
|
 RSS Feed
