|
Do you guys know how much I love open shelves in a kitchen?? They are so popular right now and add the perfect amount of style to your living space. They definitely have the potential to get messy and are probably more perfect on Instagram than they ever are in real life but I still love them. I applaud those of you who are brave enough to have all open shelving in your kitchen; I’m definitely not tidy enough for that. My approach to open styling is simplistic and beautiful. Open shelves are the perfect place to showcase stylish or seasonal items. I have a set of two open shelves in my dining room; I change them frequently to display favorite glassware, cake pedestals, and serving pieces. I practically squealed when I found out that we were getting a small section of open shelving in my classroom kitchen! I spent all summer planning and shopping for them. I’m so excited to show you all the things I found! 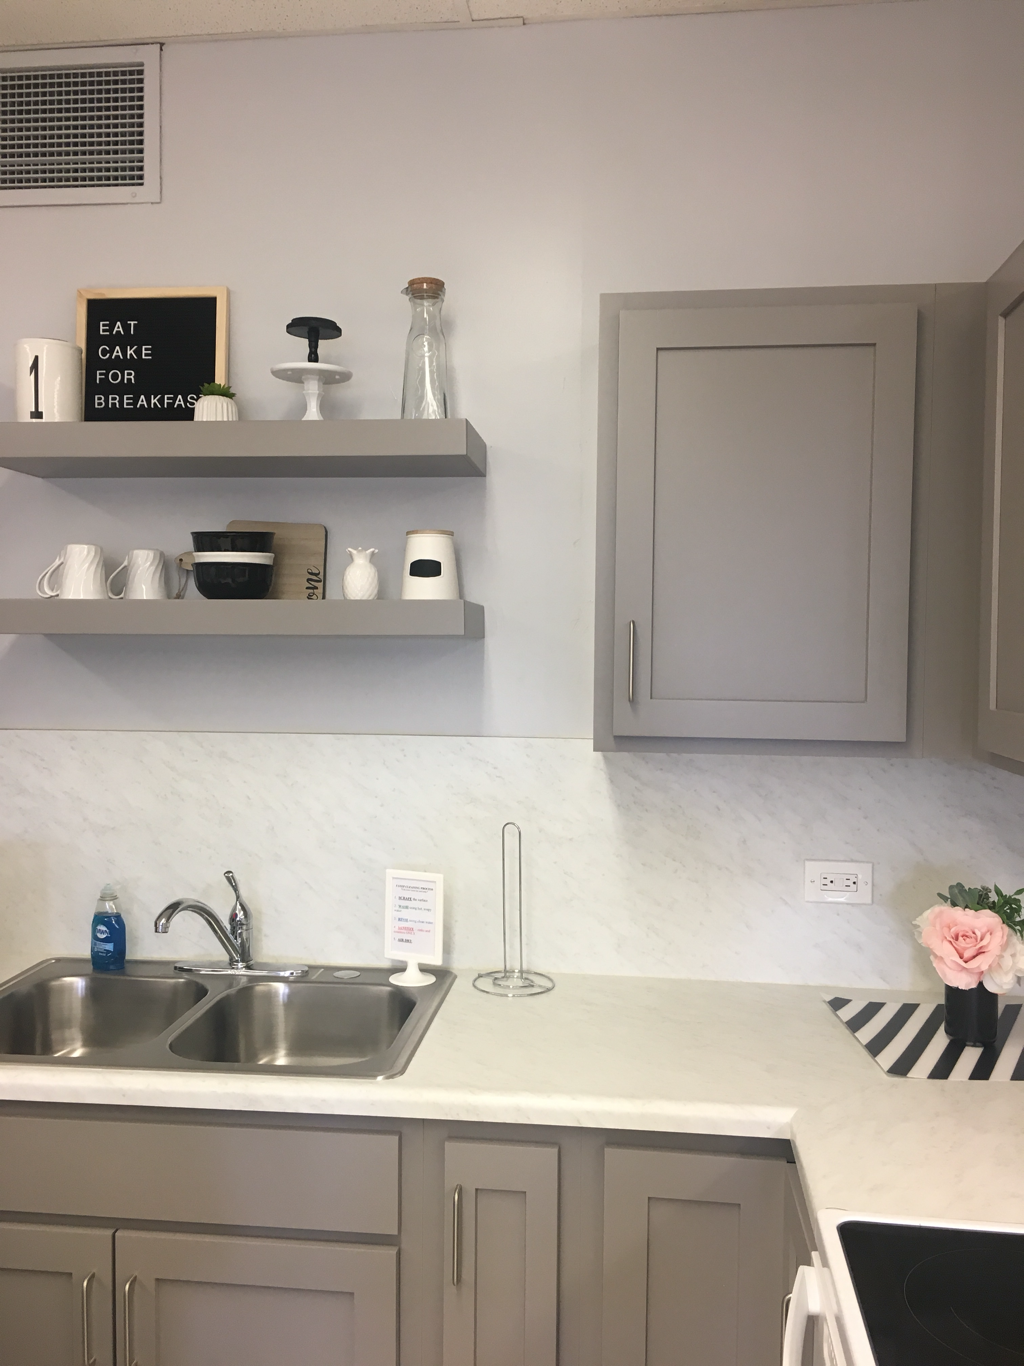 We all know I’m in love with the letterboard trend so I started with the square one from Hobby Lobby. I’m looking forward to changing it to coordinate with the season or recipe for the week. The large white canister is also from Hobby Lobby and I cut a black vinyl number on my silhouette machine to correspond with each kitchen. The mini succulent is from At Home. I just love the combination of those three pieces together! The letterboard and canister give height to the top shelf while plant makes it still feel cozy and natural. The other her top shelf items were also used to add height, color, and variety of texture. The glass carafe was found in the Target dollar section - I loved that it had the cork lid to coordinate with the canister. I always stack my cake stands. It may be my favorite way to decorate! It adds height to your shelf or table and is such a fun way to display them! The two cupcake pedestals were quick DIY projects made by yours truly. It’s amazing what happens when you combine a candlestick, a candle plate (or wood circle for the black one), and some spray paint! This candle stick and candle drip plate were both from Dollar Tree. I used super glue to hold them together and glossy white paint for the finish. Super easy! 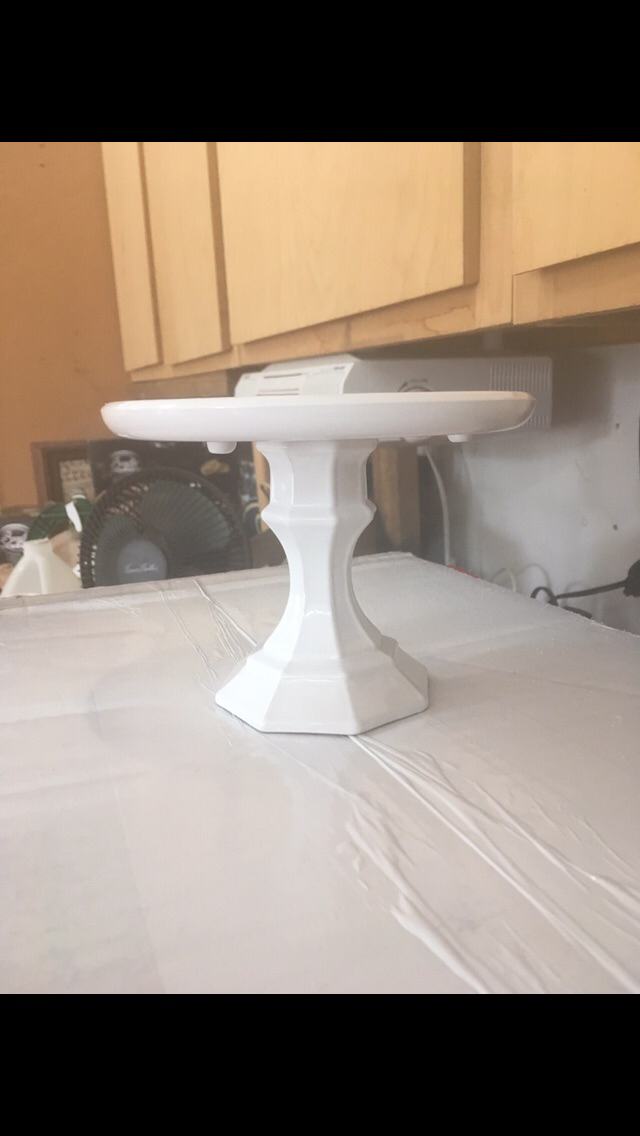 The bottom shelf in each kitchen holds some of the items that will be used more frequently. Stacking dishes creates height and using the two different colors creates an interesting pattern and focal point. The mugs are arranged in a line which creates some width for the shelf as well. The wooden cutting board and small white canister are also from the Target dollar spot. The tiny pineapple is from Dollar Tree! I will be switching it out for seasonal items when the time comes. I have already bought pumpkins and tiny Christmas trees that I can’t wait to use! If you are lucky enough to have some open shelves in your space, here are my suggestions for styling: -Choose items you love, you’re going to look at them a lot! - Use a variety of height, width, color, and texture. It’s very visually appealing! - Layer items together to create more depth (stacking things, placing the cutting board behind the dishes). - Pick items that also serve a purpose. Think serving pieces and dinnerware! - Save those receipts! You never know what you’re going to love until you get it home and look at it with your other stuff. If I like it even a little bit, I buy it and try it at home. If it doesn’t work, return it and keep searching! - Have fun shopping! The treasure hunt is my favorite part! Best of of luck with your open shelf styling! 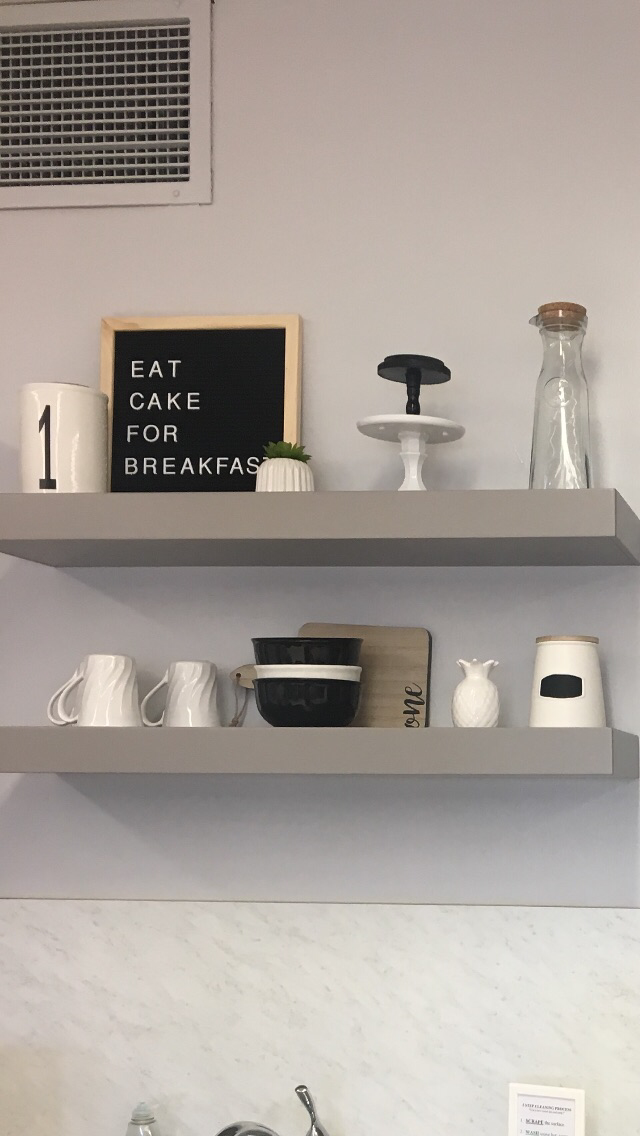
0 Comments
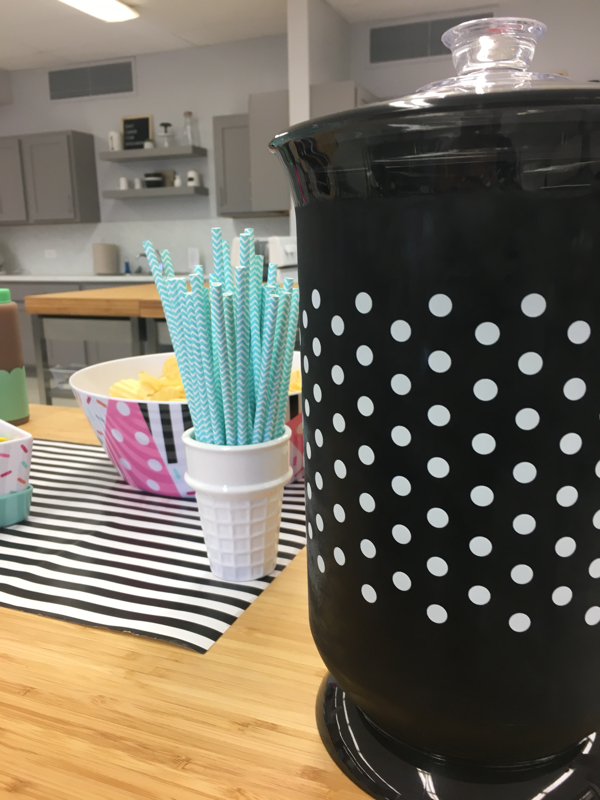
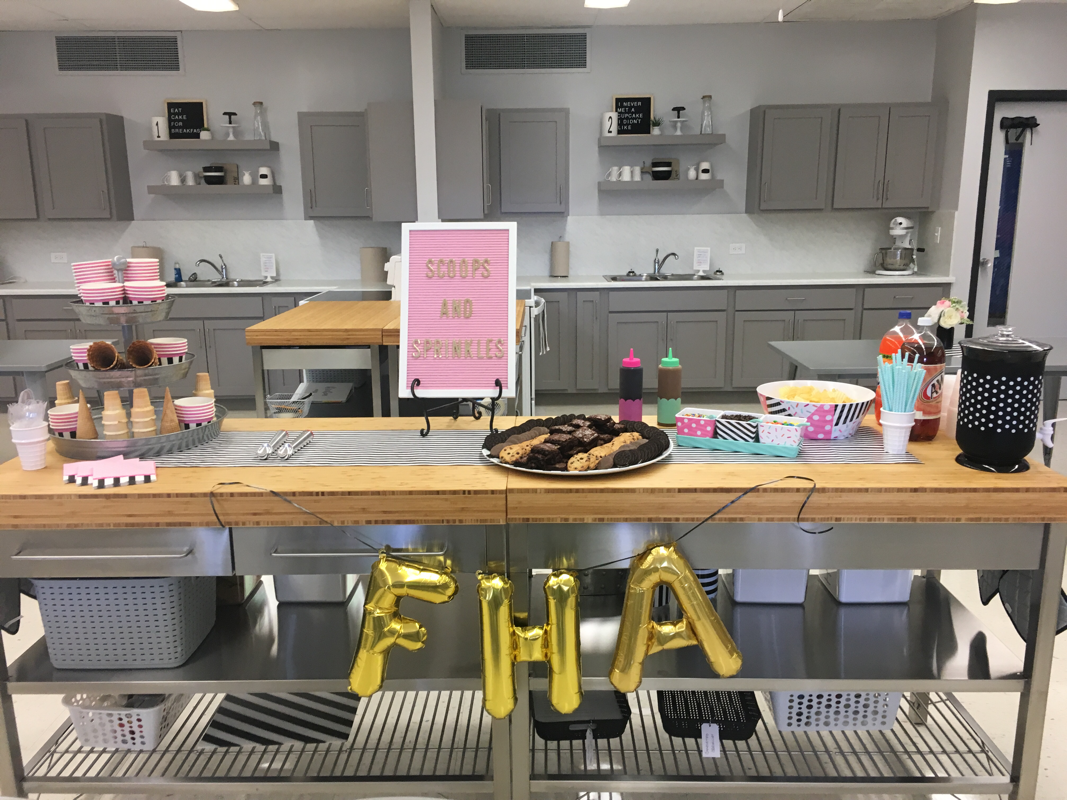
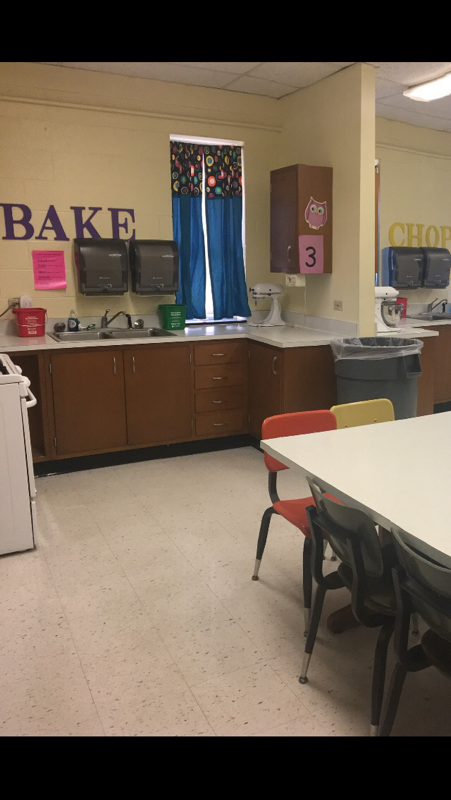
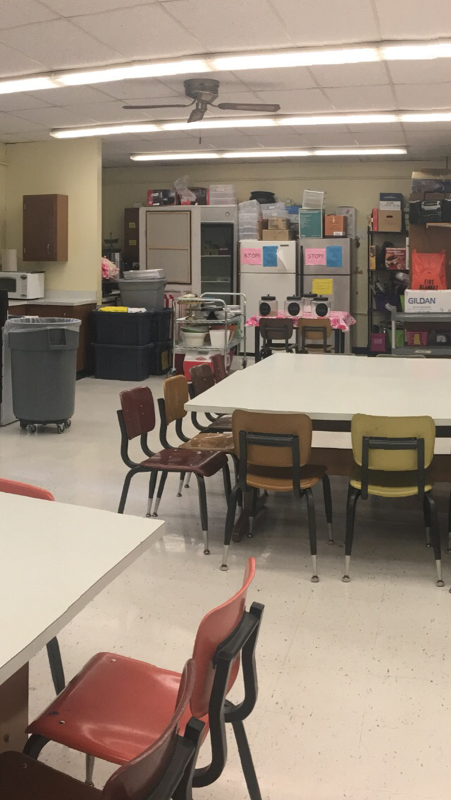
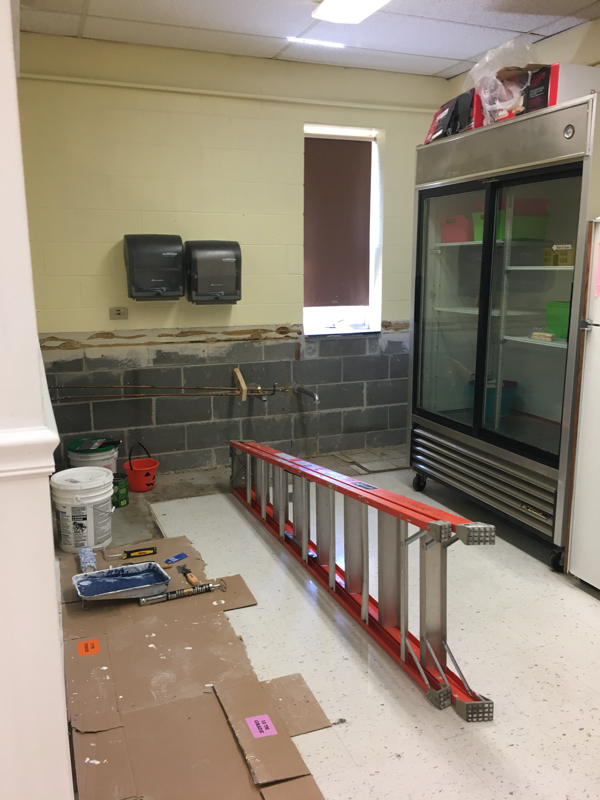
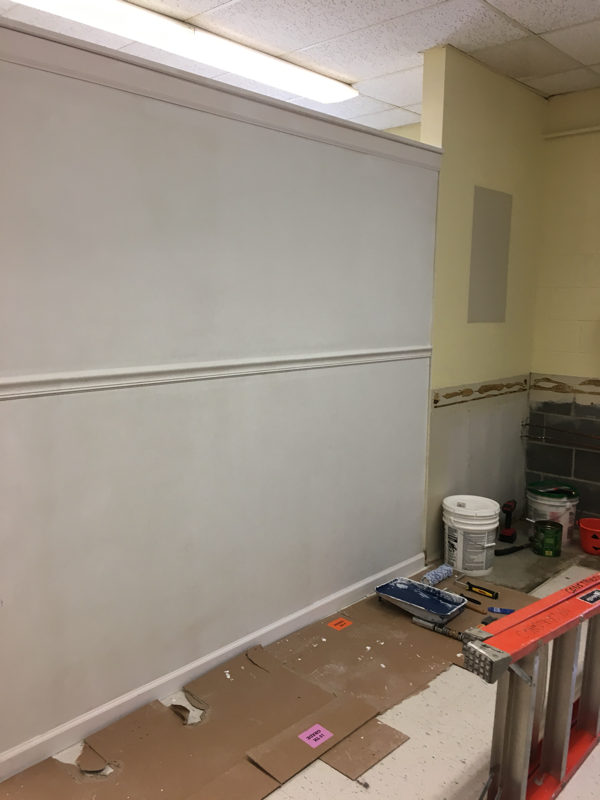
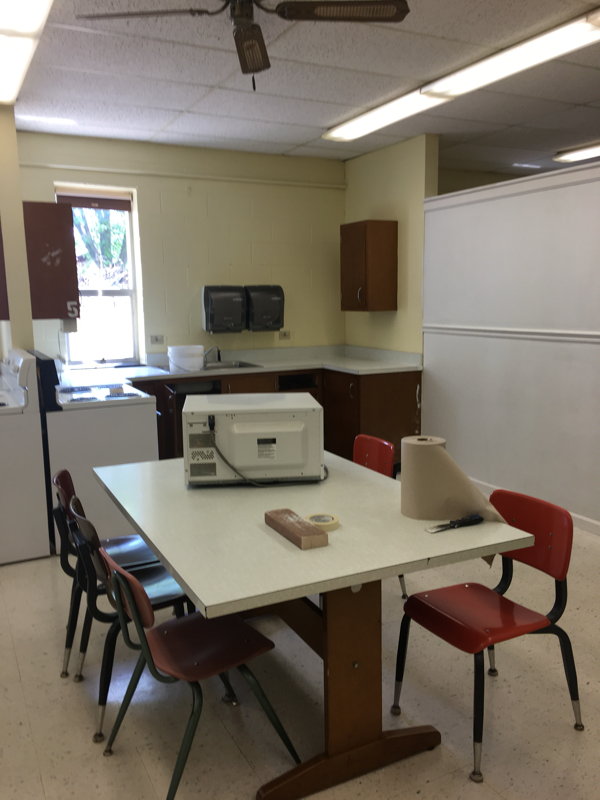
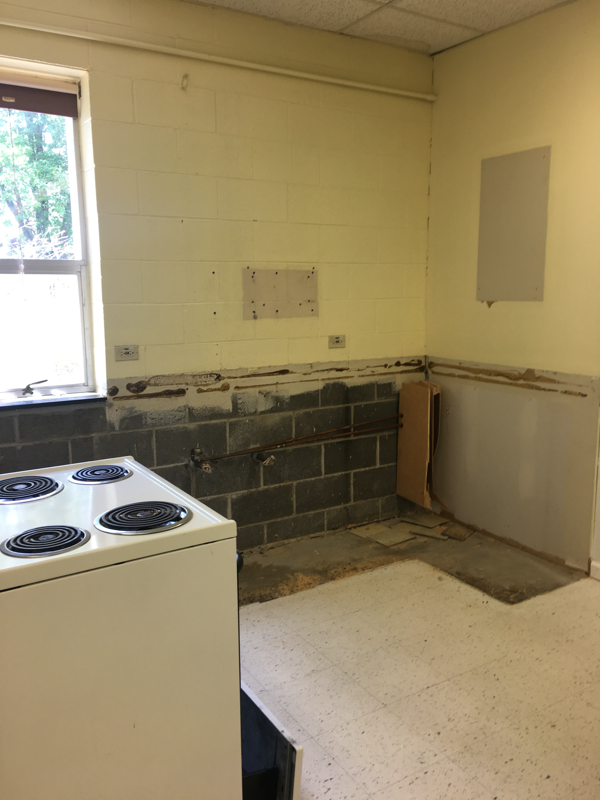
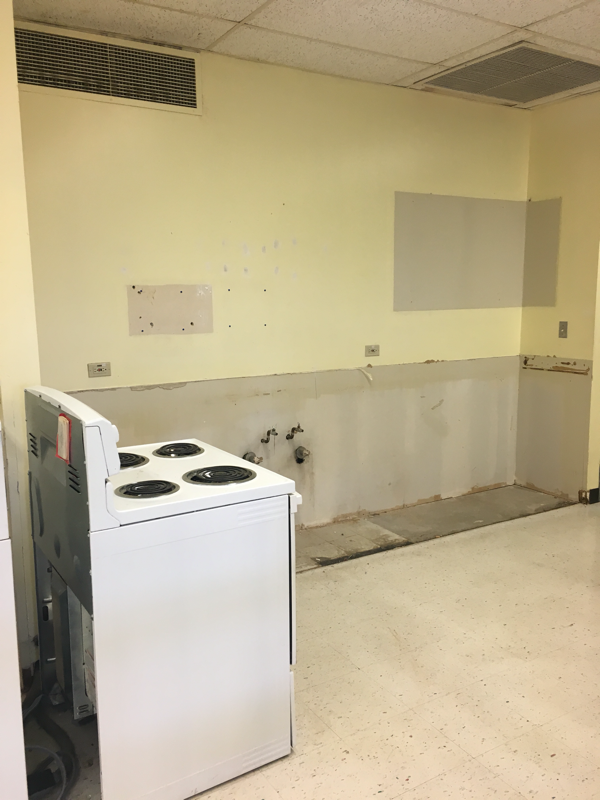
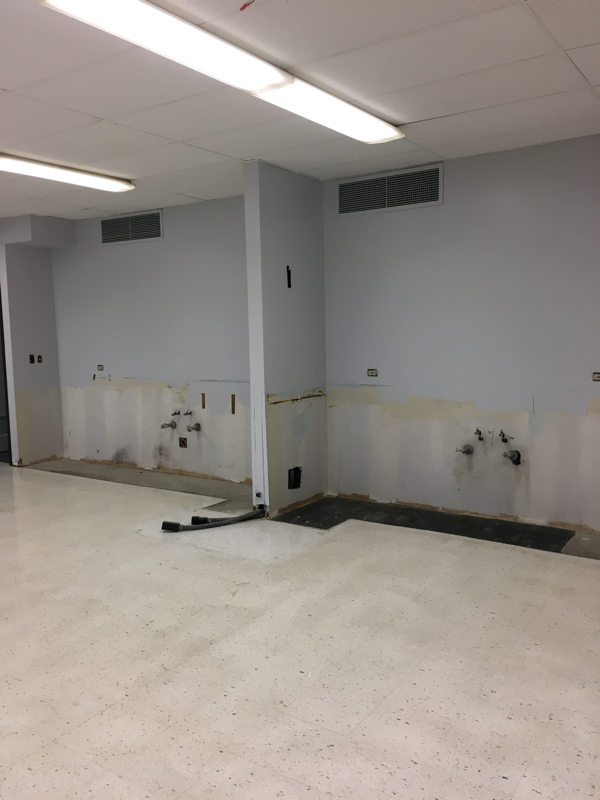
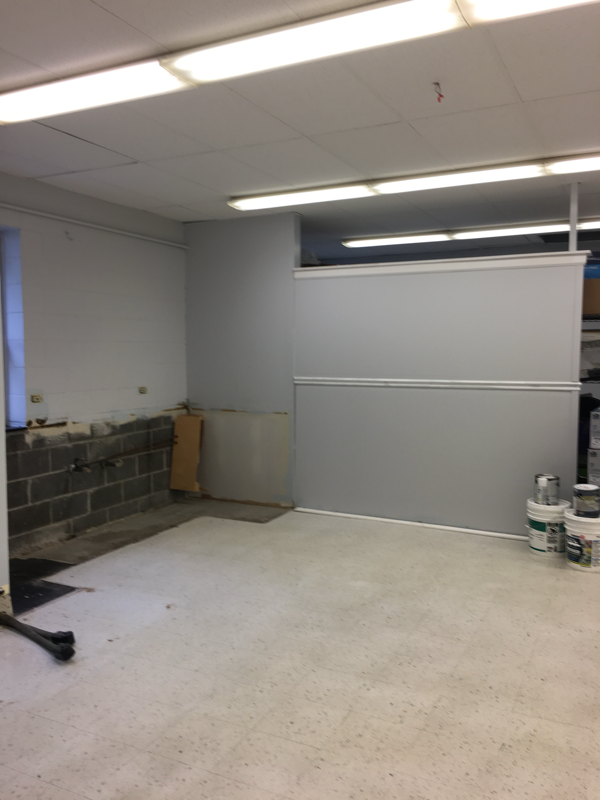
An ice cream party is just about my favorite party to host. It can be over the top or super simple, but either way people will always love it! Everyone loves ice cream, right? Each August, I host an ice cream social for the FHA girls to kick off our school year. An ice cream sundae bar is perfect for this crew; everyone gets to build the treat of their choice! We kept things simple this year with chocolate and vanilla ice cream and a few toppings. I have found in the past that excessive toppings aren’t necessary. Most people prefer the classics (cookies, chocolate syrup, brownies, and sprinkles); previously I bought things like marshmallows and gummy bears but they just didn’t get used. We we started our sundae bar with my very favorite metal serving stand - I’ve had this thing for years and I use it all the time. If you host many parties, I highly suggest you buy one if you come across them! Home Goods, TJ Maxx, and Marshall’s often have them in store. I stocked my serving stand with various ice cream cones (waffle, sugar, and classic) and bowls. The adorable striped bowls are from Hobby Lobby along with the matching napkins. Spoons were located close by in this ceramic ice cream cone - this was a $1 find in the Target dollar spot last spring. 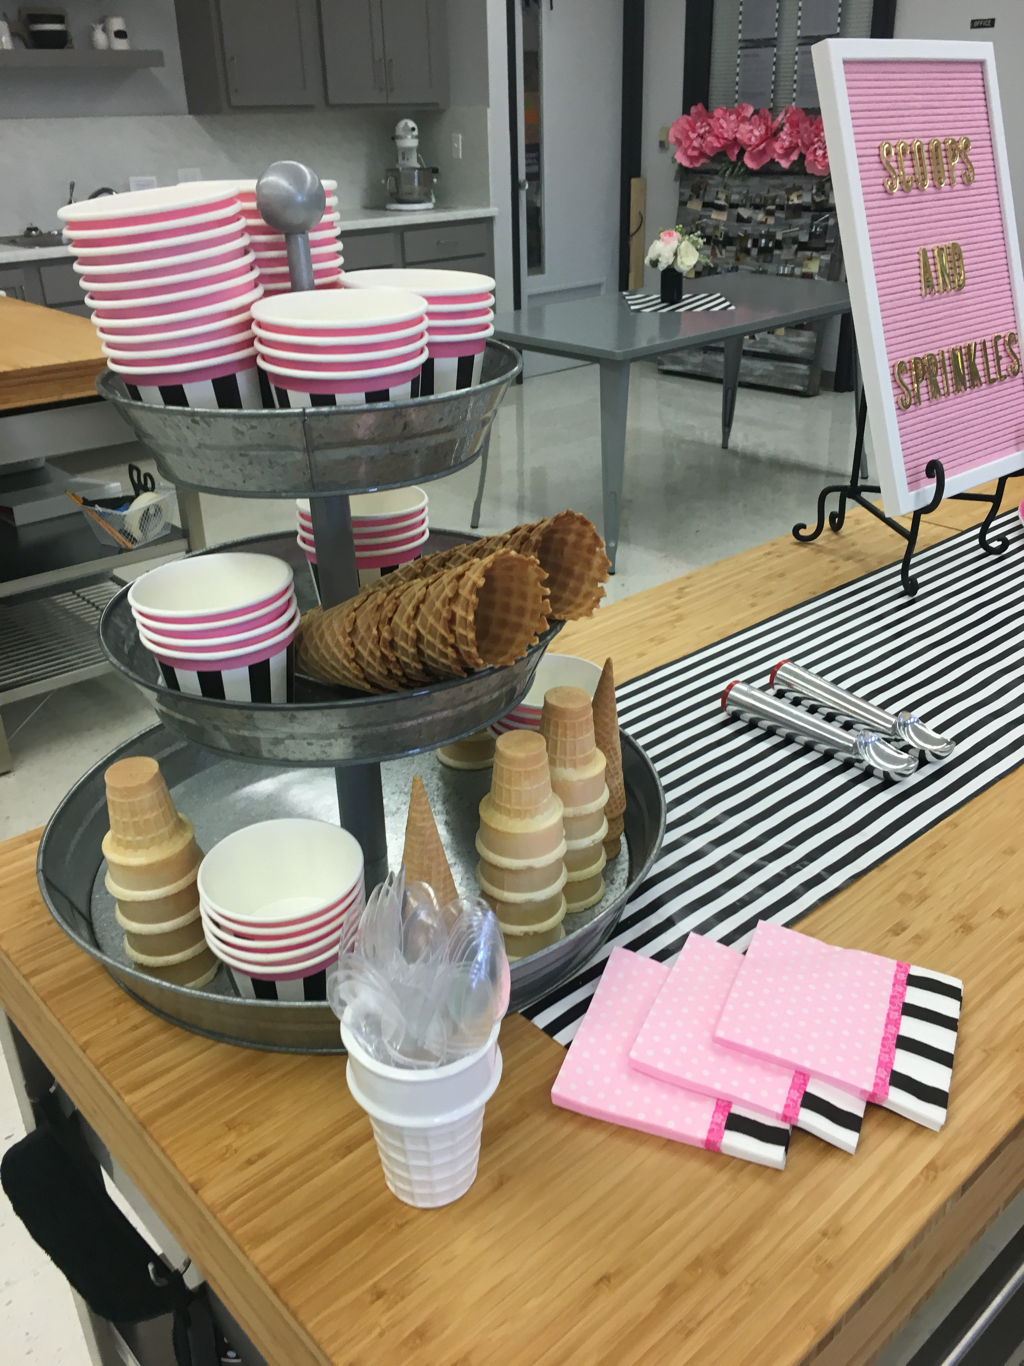 My students are old enough to scoop their own ice cream so I served the ice cream choices in the carton I purchased them in. If you are serving younger children, I absolutely love the idea of pre-scooping the ice cream and freezing it in bowls so your serving line moves quicker and there is less mess. I’m a big fan of the letterboard trend. This pink one and the gold letters are both from Hobby Lobby. 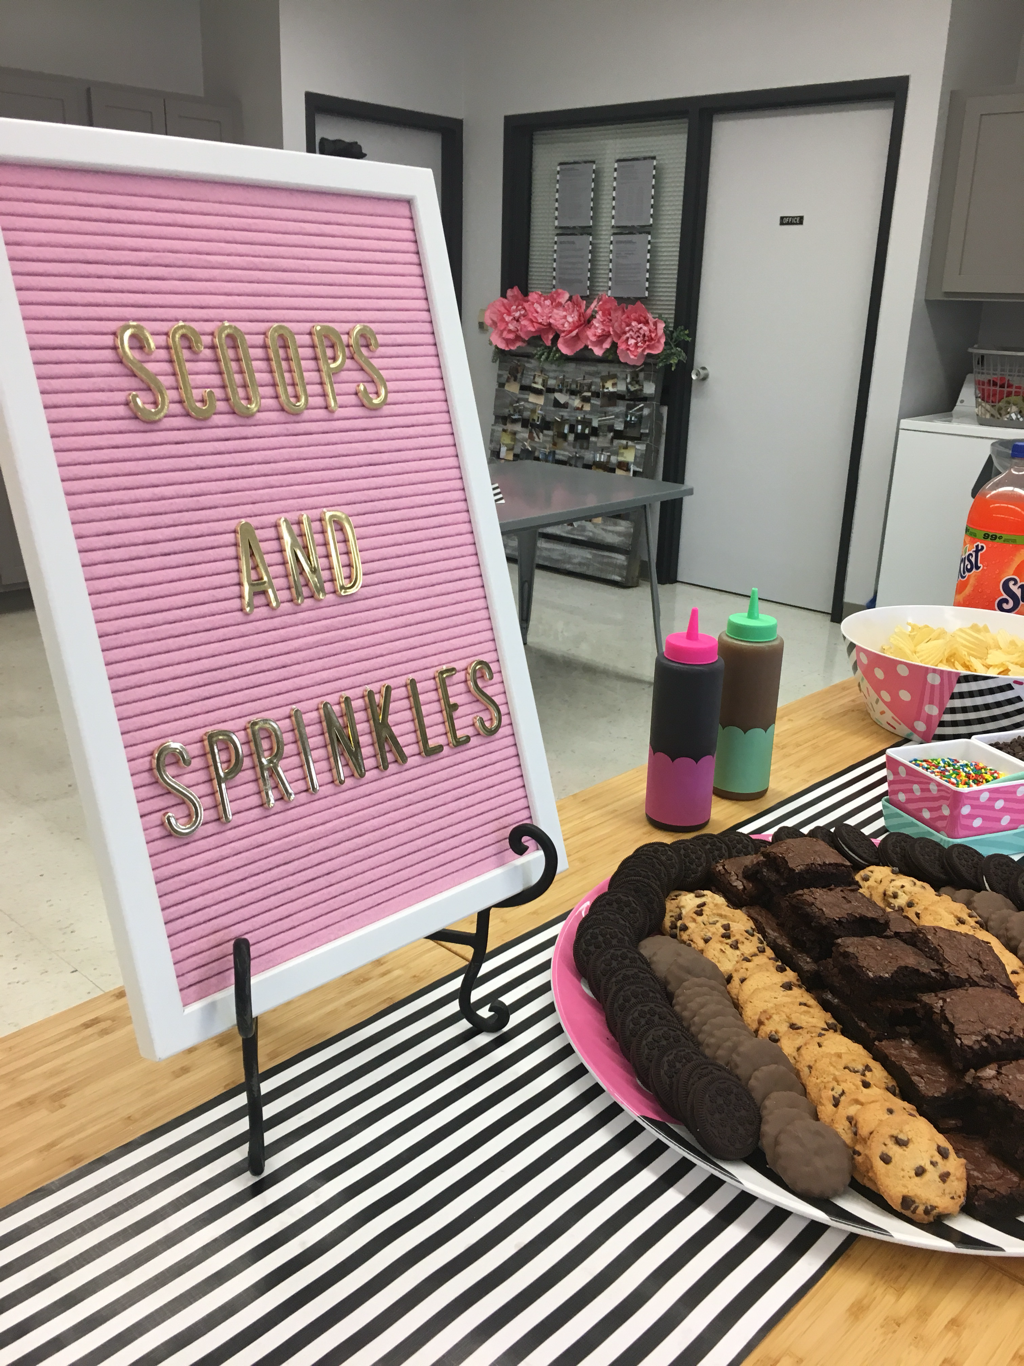 My students could also choose from a variety of brownies and cookies to top their sundaes. Chocolate and caramel syrups were served in squeeze bottles from the Target dollar spot- aren’t they just the perfect colors? Our other toppings included mini chocolate chips, m & m’s, and sprinkles. This adorable serving dish, the chip bowl, and the cookie platter are all from At Home and were party of their summer entertaining collection. 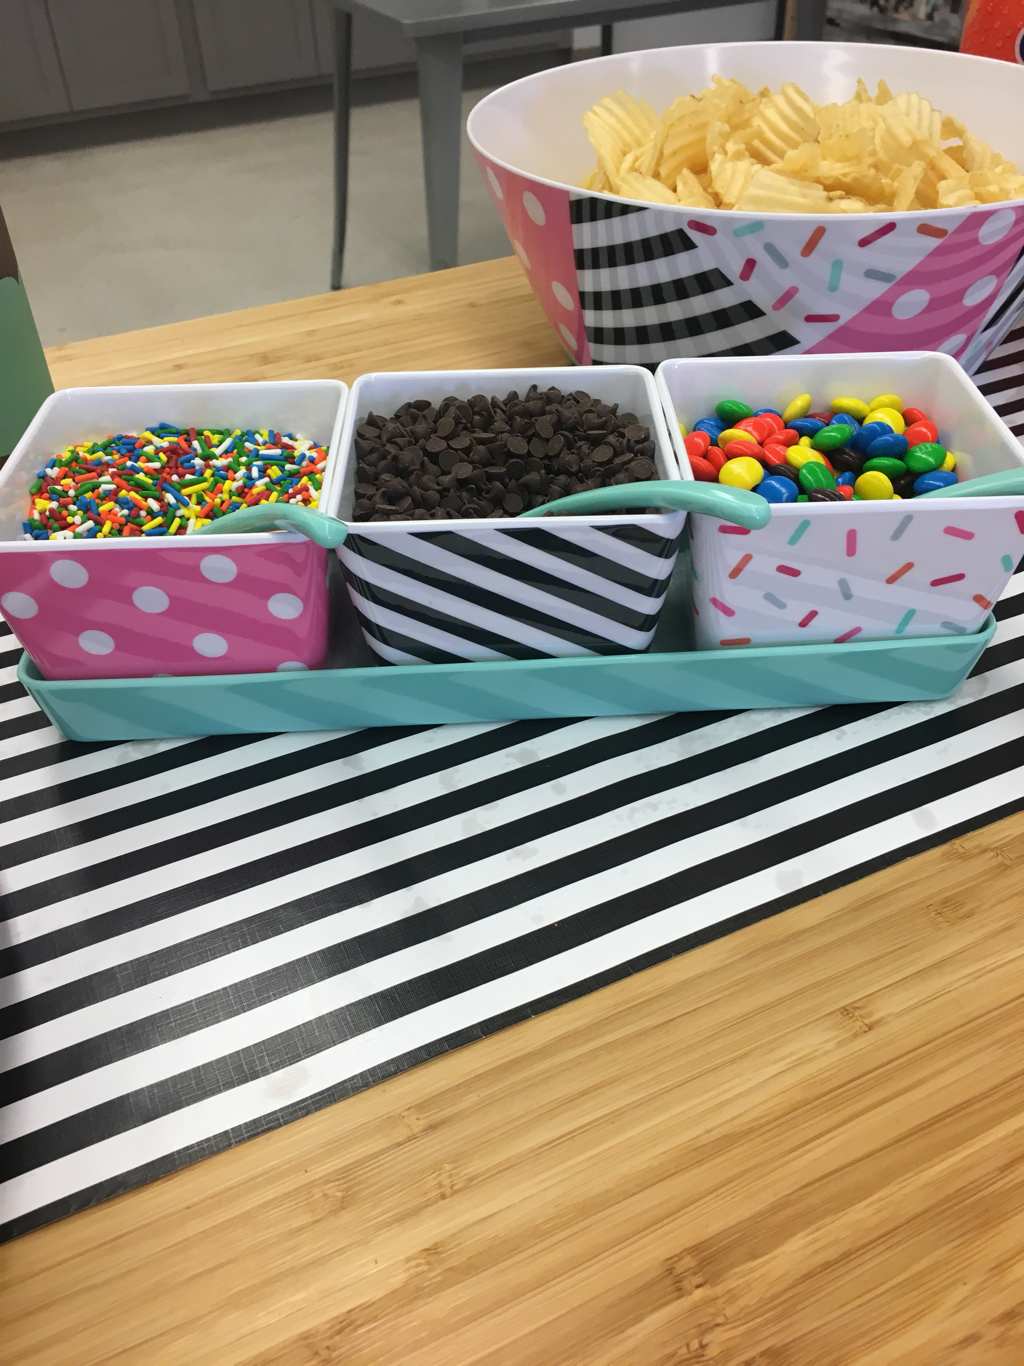 I also picked up a few bottles of soda in case anyone wanted to make an ice cream float. Paper party straws are also always a favorite for my kiddos and I just love all of the fun colors you can find them in! My polka dot drink dispenser is also from At Home and is part of their everyday melamine collection. You can find it any time of year! We used some of our IKEA prep tables for serving, I just love the beautiful bamboo top! The striped runner is wrapping paper from the Home Goods checkout lane. The gold letter balloons on the front of the table are from Hobby Lobby. They are on clearance for only 64 cents right now! Fair warning - if you’re looking for any in the St. Louis area, I probably already bought them all :) I think everyone is looking forward to a very fun school year! Throw an ice cream party sometime, I promise your guests won’t be disappointed. 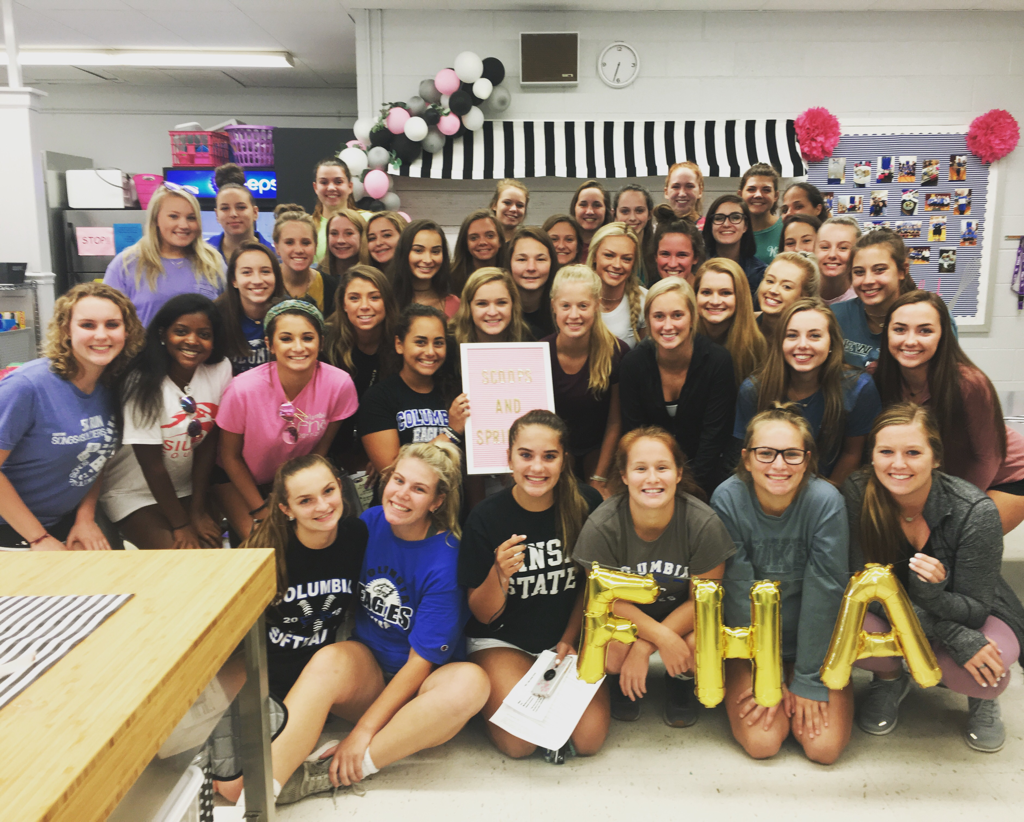 Hey guys! It’s back to school time and it sure has been a busy summer. My classroom kitchen got a huge update and I am finally ready to show you all the great things we did. The old kitchen was very well loved and served its’ purpose for many years. Aside from a facelift, my primary goal was making the space more functional for my students. The existing space had cabinets and counters that offered limited space and storage, they were in poor condition, and were extremely out of date. In the last 10 years, my class sizes have grown considerably and as a result we have added a lot more equipment. We also purchase a much larger volume of groceries and supplies to be used on a daily basis; we were desperate for more efficient storage. With the assistance of some extremely talented people, we were able to really identify and meet all of our classroom needs. Here was our previous space... Priority number one for us was creating more storage. We had a really small station that was in an awkward spot and rarely used by students; it had become a landing zone for junk and items that had no other home. With the assistance of our construction class, the station was removed and a dividing wall was added. This space has now become our pantry and storage area. Our three refrigerators are kept in this location along with our original pantry cabinet that received a fresh coat of black paint this summer. We had one wire shelving unit that worked well for storage of small appliances and equipment - 4 more of these were purchased from Menards and placed end to end to create a giant open storage unit. I’m so excited for all of the organization but I’m equally excited for the additional storage. Buying products in bulk or ordering extra supplies will now be a reality since we have somewhere to store those items. Here is a look into our storage area now: 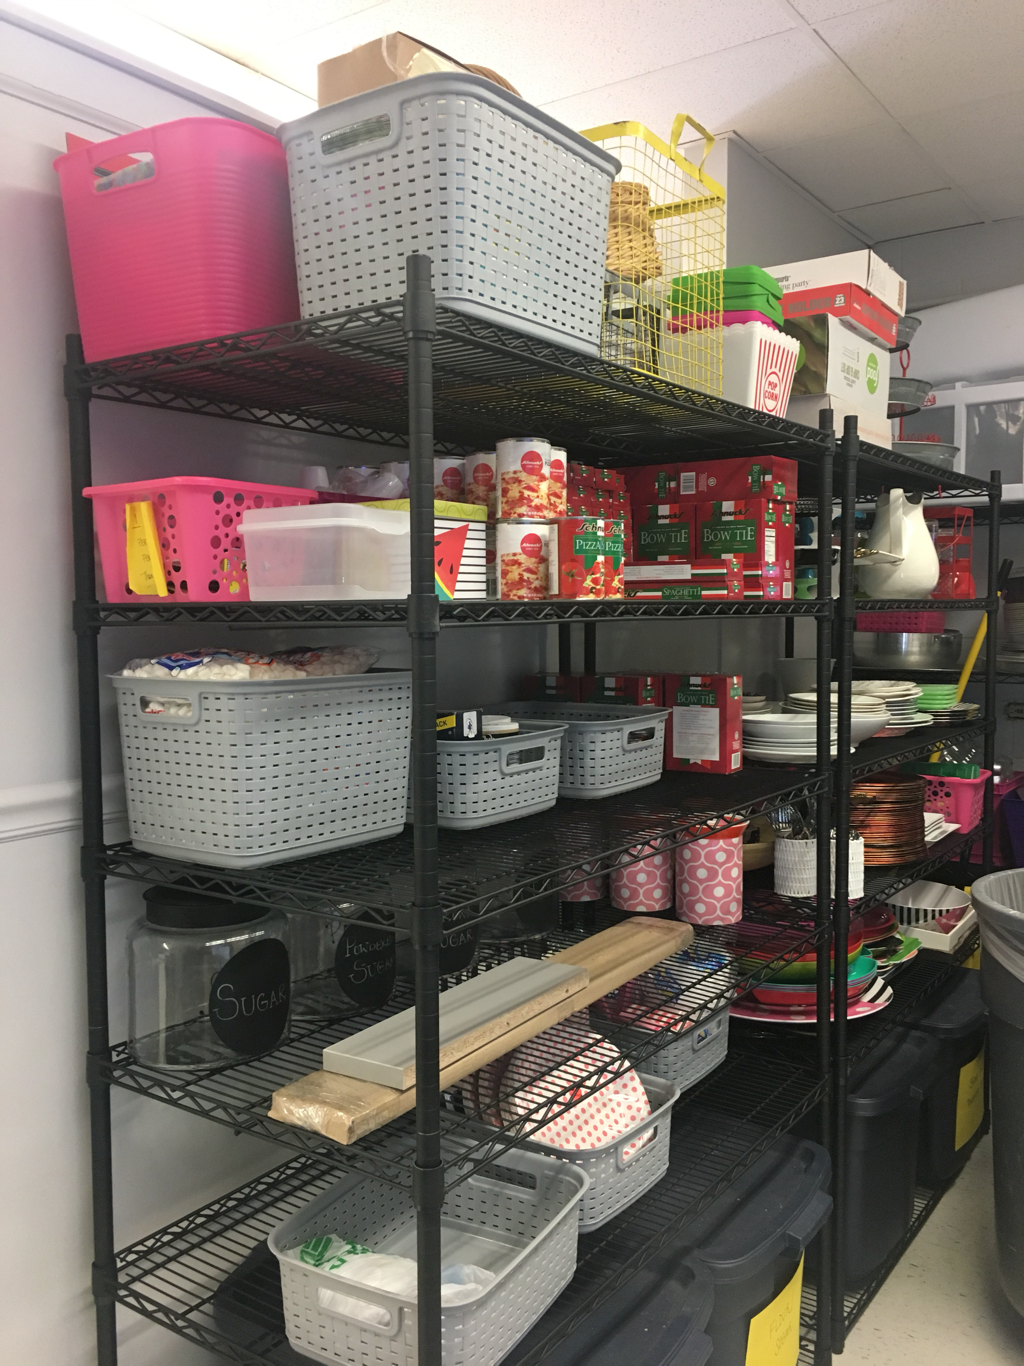 In our student stations, all of the old cabinets, countertops, and sinks were removed. The room was painted with Behr paint in Halation. We reconfigured the existing space and utilized cabinet shapes and sizes that fit our needs the most. This included adding cabinets and drawers in each station, placing a corner cabinet where the previous lazy Susan had been, and adding a tray table for storage of baking pans and cutting boards. Each kitchen received a new double-basin sink and faucet without a sprayer (if you’ve ever worked with kids in the kitchen, you know how dangerous a water sprayer can be). Previously we had the standard 4 inch countertop backsplash which didn’t give much protection to the wall/paint from things like food splatter and food coloring. The countertops were replaced using Wilsonart laminate in White Carrara finish and instead of using the standard 4 inch height, we decided to extend the counter 18 inches. It now meets the top cabinets and completely protects the wall. The laminate surface on the wall is much easier to clean than paint and is a beautiful addition to our space. Above the beautiful laminate and new sink are 2 floating shelves that offer even more storage in each student station. I am really looking forward to styling these for future seasons and holidays. Next weeks post will feature all of the open shelf styling secrets! Additional tables from IKEA were placed in each kitchen for students to use as a prep/work space. Underneath, they offer drawer and open shelving space as well. Students will dine at metal tables in groups of 6. The metal tables replaced large wooden/laminate tables that have been used for years. The new metal tables are much slimmer and offer plenty of space for students to sit and enjoy their meal but are much more appropriate size for our space. The curtains in each station are a Roman shade made from IKEA fabric. More details on curtains in a future post! 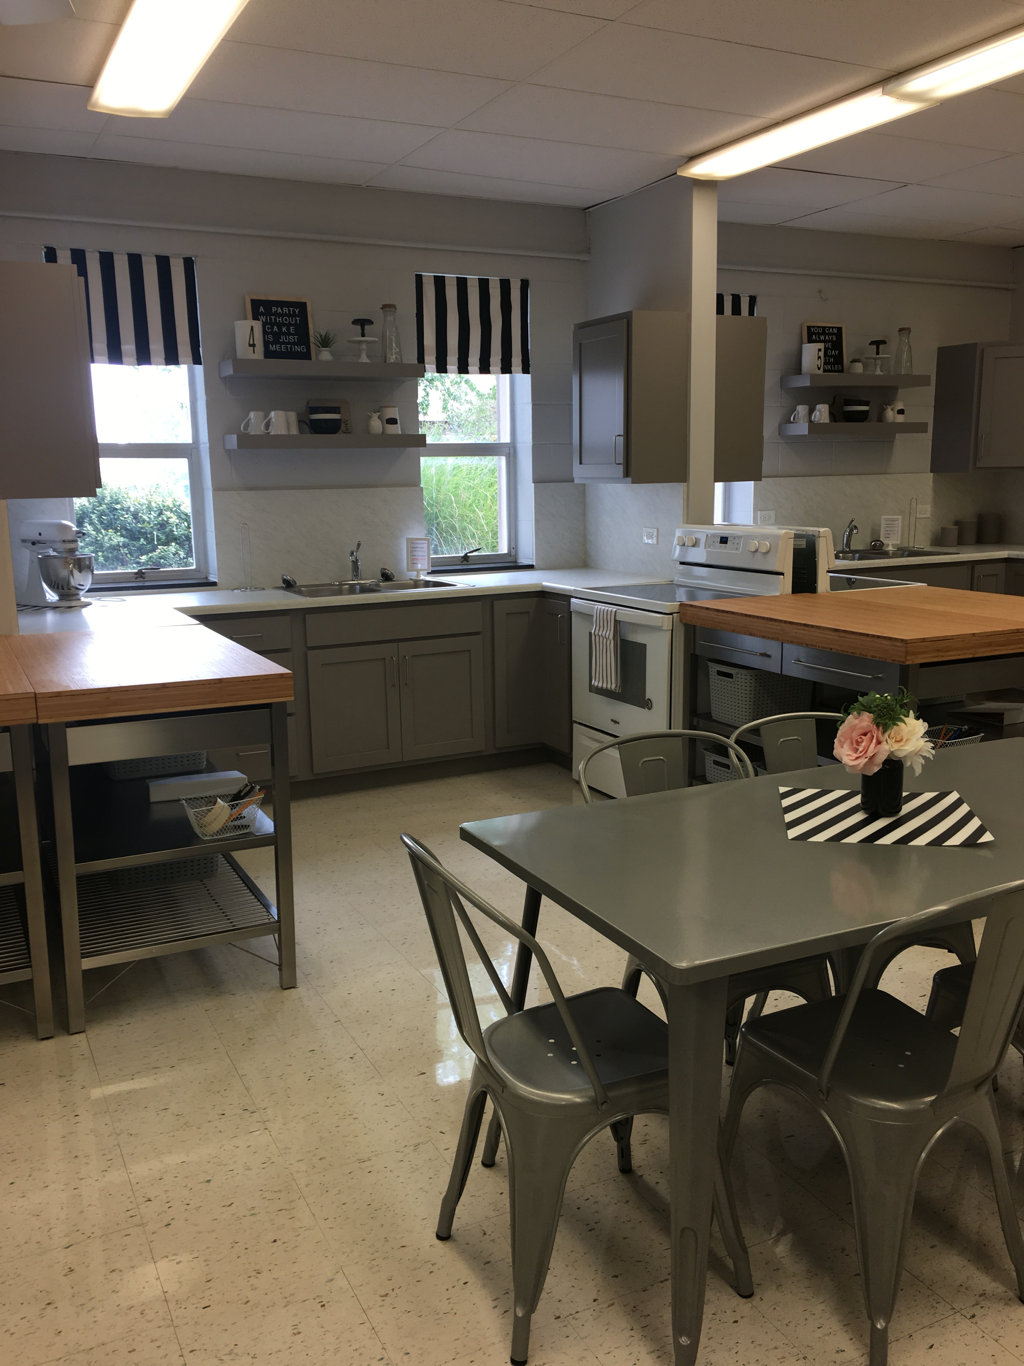 Instead of leaving microwaves in each kitchen and taking up valuable space, students will now be able to use the microwave station. This cabinet was purchased from Wayfair and the microwaves will be kept on top; our recycling center is also underneath! I made the sweet little awning using the same IKEA fabric as I used on the curtains. Details on the awning, shiplap, and balloon garland soon! 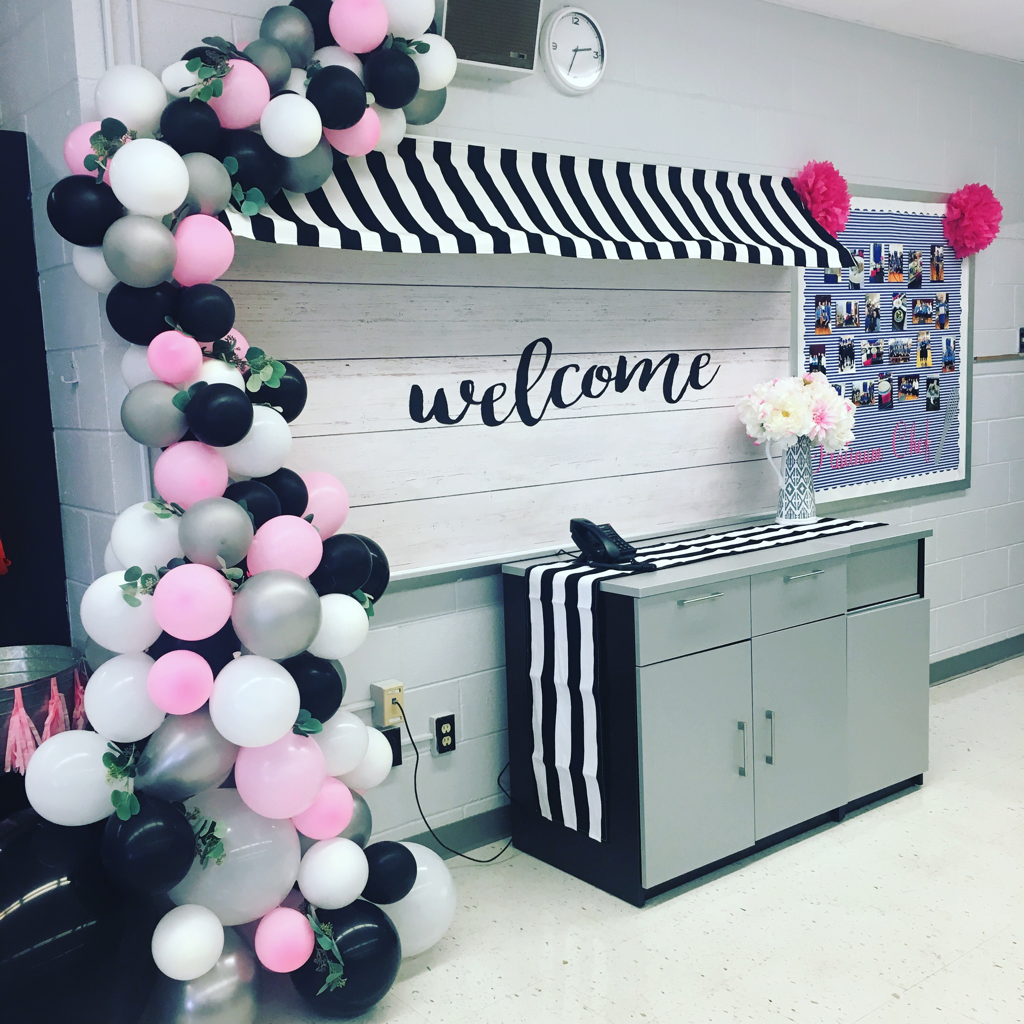 Can you believe how lucky I am? I’m so in love with every detail in this space! I’m excited for all of the classroom adventures we are going to have in here for years to come. Check out pictures from the whole process below! |
Archives
April 2020
Categories
All
|


 RSS Feed
