|
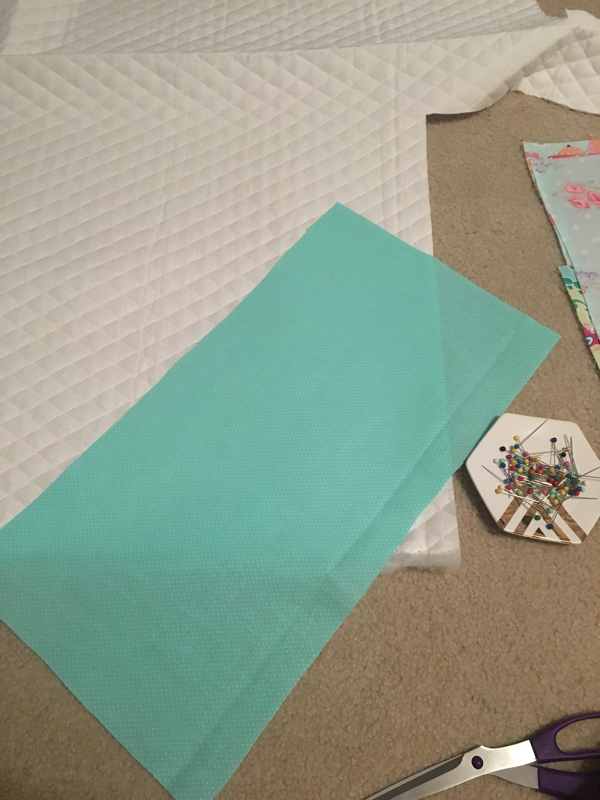
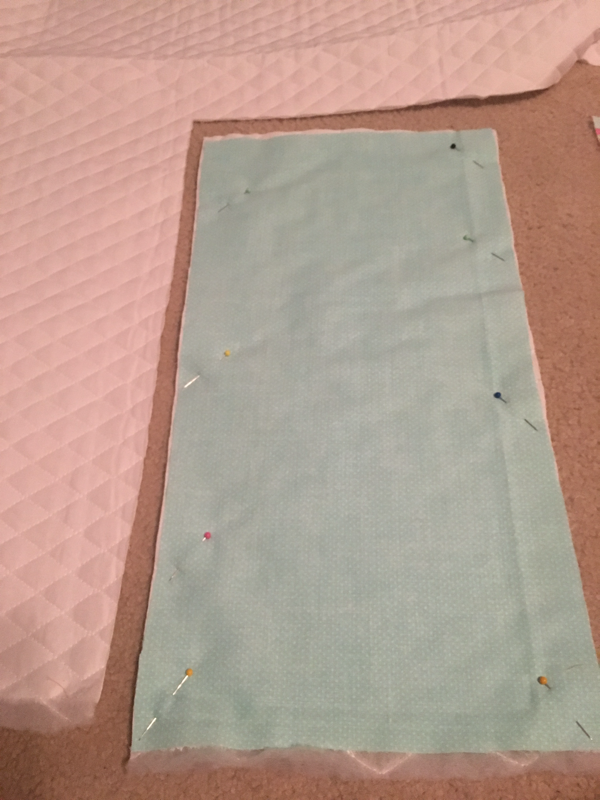
Remember those sweet little baby bibs we made a few weeks ago?? Do you need a burp cloth to match? If so, this tutorial is for you! Materials needed: pre-washed cotton fabric (cut to 10"x 18") backing material - I used the same pre quilted material I used for the bibs ( cut to 10"x 18") thread, scissors, sewing machine, and an iron 1. Begin by cutting your front and back material to the correct size. 2. Place the two materials right sides together and pin all around the perimeter. 3. Stitch all around the edge leaving a 2"-3" opening for turning right side out. 4. Trim the excess material on the edges and clip the corners. 5. Turn the burpcloth right side out and press making sure to press the opening closed. Top stitch the entire edge and press one last time. You're all finished! This is such a quick and easy project to complete. Combine it with a baby bib from part 1 and it also makes the sweetest little baby gift! 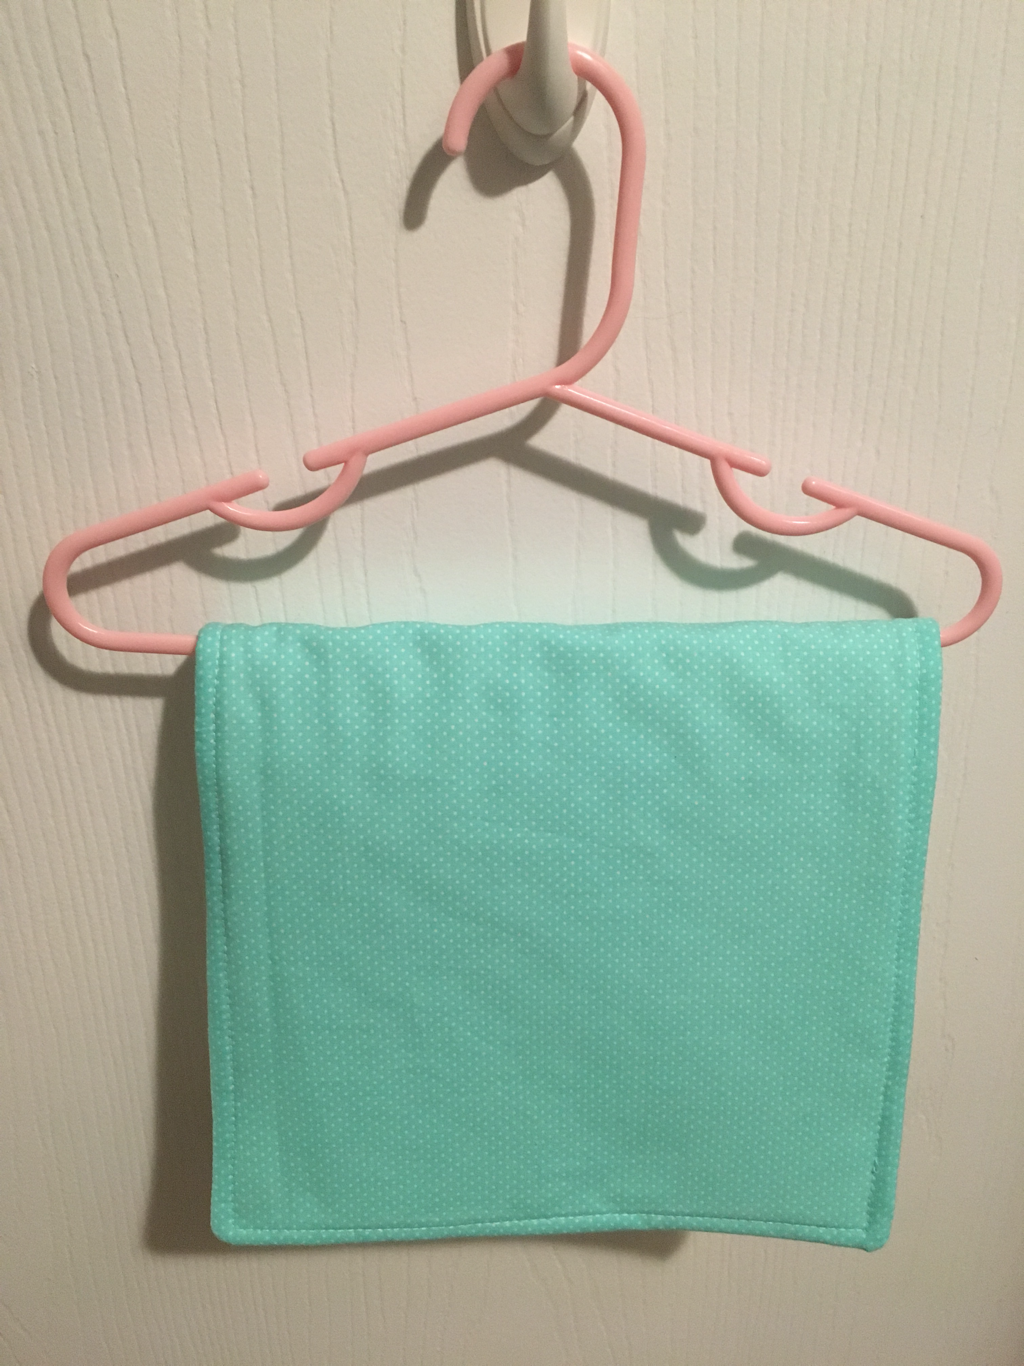
0 Comments
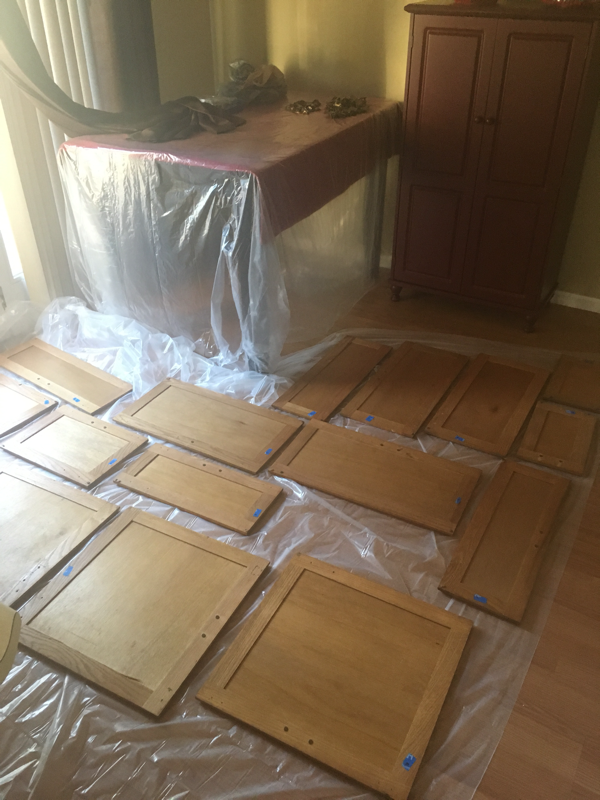
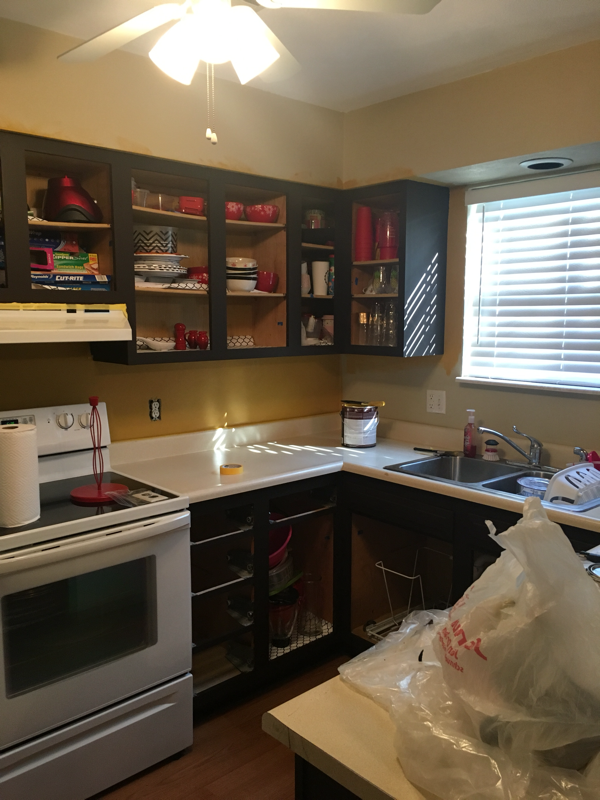
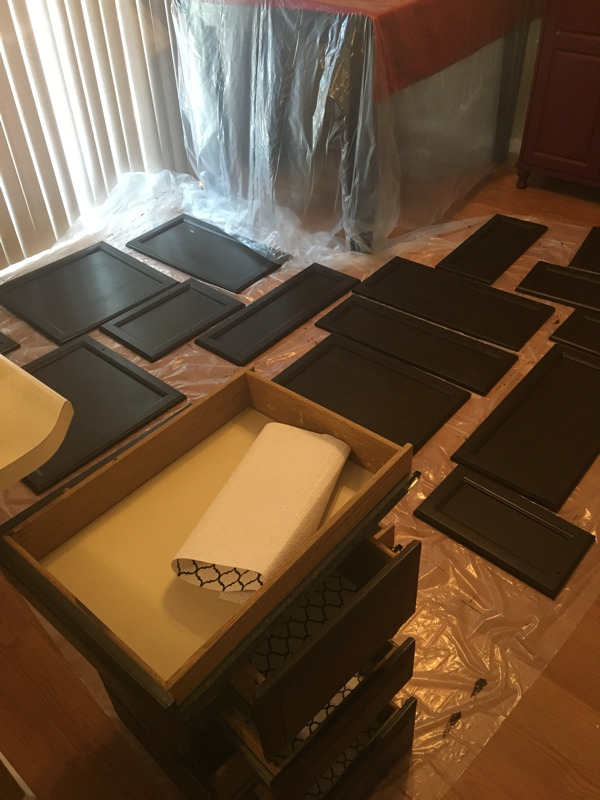
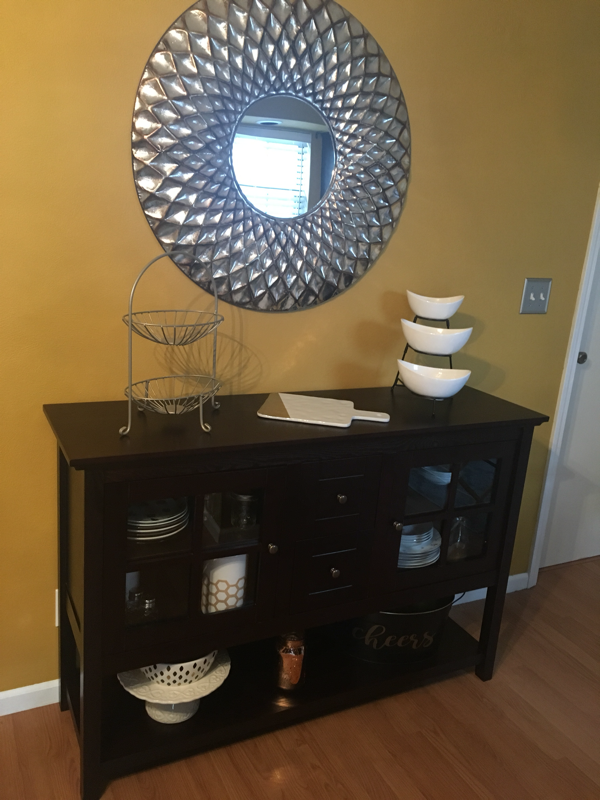
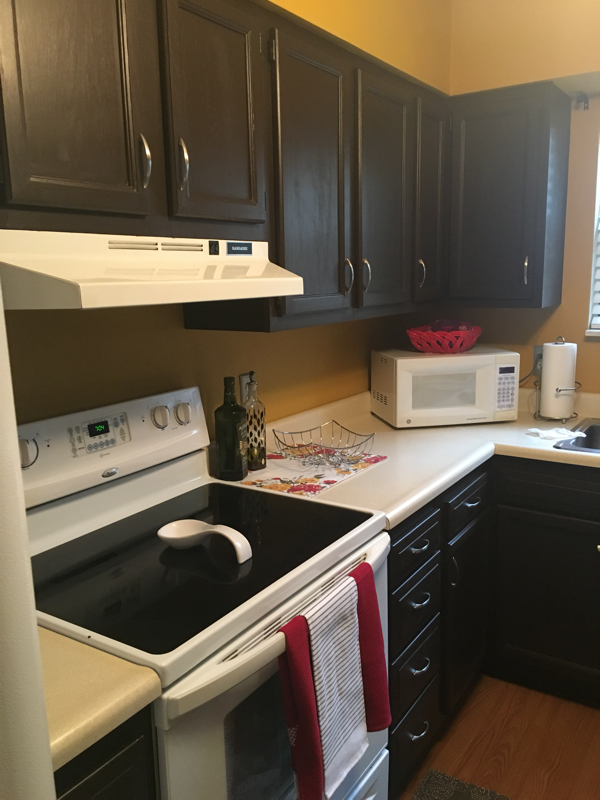
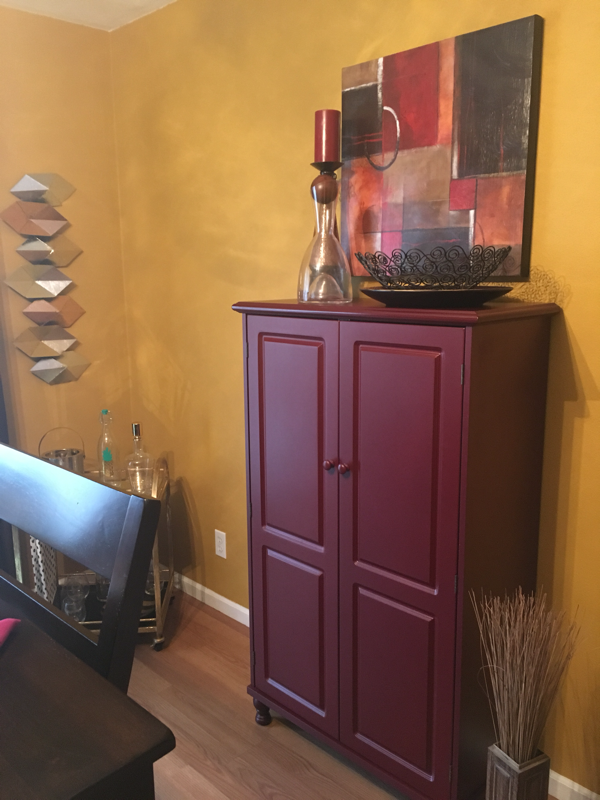
I adore my sweet little condo but the kitchen wasn't really my style...until now. About a month ago I decided to give my kitchen a little facelift. After much research, many paint samples, and lots of almost talking myself out of this project I decided to take the plunge and use the Rustoleum Cabinet Transformation kit. I'm so thrilled with how this project turned out! It was quite a bit of work, but totally worth it in the end! Here's a quick before and after. It really does feel like a different kitchen . 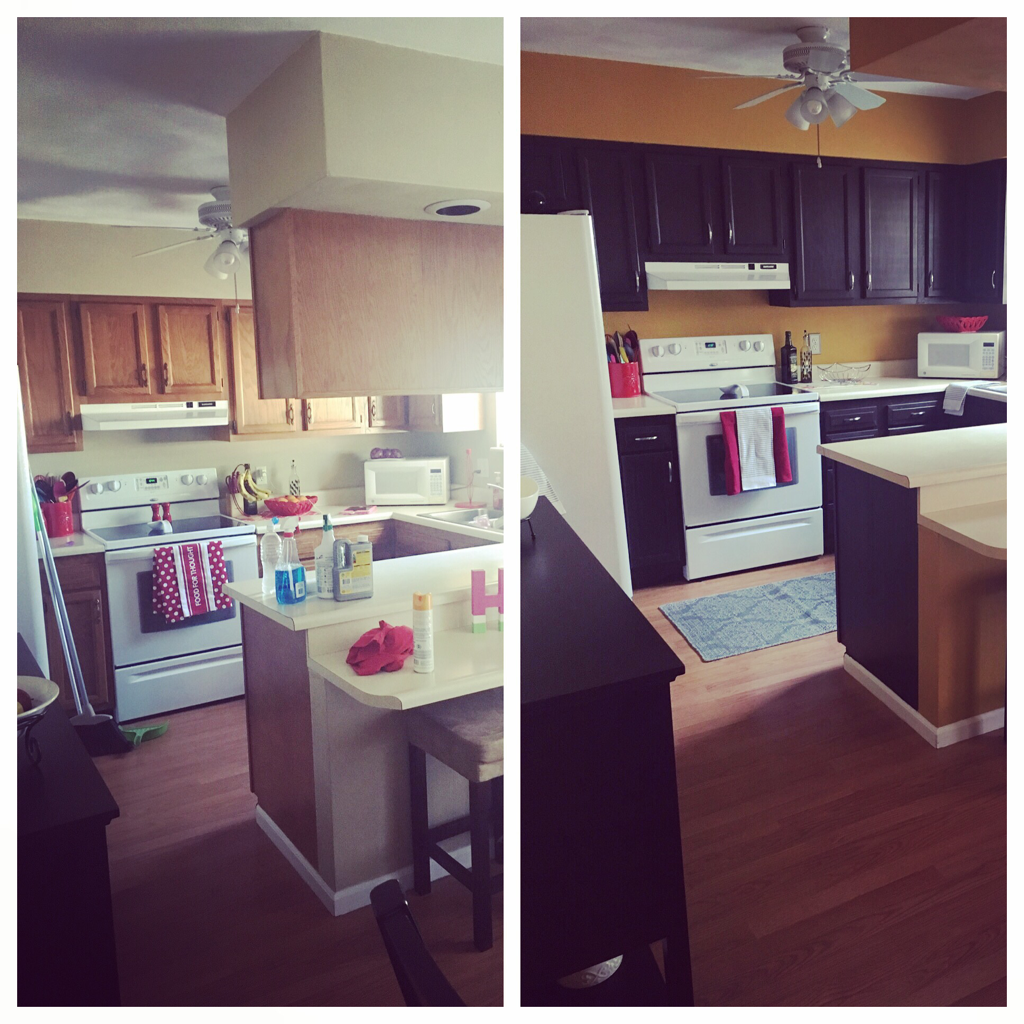 For this project, I used the 100 square foot cabinet kit which I purchased at Menards. There are two types of kits depending on if you are transforming your cabinets to a light or dark color. You will also have to take the kit to the paint counter in order for them to tint your bond coat the specific color you're wanting. I used the dark kit in espresso. The cabinet kit includes all the supplies needed for your transformation including an instructional DVD (you can also find this on YouTube in case you want to get an idea of the process before purchasing the kit). There are also recommended supplies listed on the box (gloves, paintbrushes, disposable containers, etc.) - I purchased and used all of the recommended supplies. The paint color I picked is Behr Marquee in Saffron Strands; it's a fantastic gold that I just adore!  To start, I moved everything I could to my living room and some of my large heavy furniture was covered with drop cloths. I also removed the cabinets above my island/bar area; it really helped open up the space! You need a decent size workspace for painting and also drying. A garage is recommended by Rustoleum but since I don't have one, my dining room became my drying space. All your cabinet doors, hinges, and hardware need to be removed and wiped down. As you are removing cabinet doors and drawers, make sure to label them so you know where they go when finished. I numbered mine using painters tape and put the corresponding number inside the cabinet. The first step in the kit is a deglosser - this is tedious but helps to clean everything and prepares your surface for the bond coat. It's really important that you use the deglosser so that your bond coat (which is your color) will stick to the cabinetry. Step number 2 is the bond coat. This is your color coat and really makes you feel like you've made some progress! Everything receives 2 coats of bond coat with 2-3 hours dry time between each coat. The kit comes with enough bond coat to cover the frame of your cabinets as well as the front and back of each door. I allowed my bond coat to dry overnight before moving on to step 3. Step 3 is an optional glaze which darkens and adds more character. I tried this on one of the cabinet door backs and it didn't make a difference because my color was already very dark. This helped me make the decision to skip this step. Step 4 is a top coat which helps to protect all of your hard work. It needed to dry overnight before putting the cabinets and hardware back together. At at some point during all this madness, I also managed to paint my kitchen and dining room. Finally moving everything back was such a huge relief! I am so happy with the Rustoleum Cabinet Transformation Kit; I highly recommend it. In order to complete my kitchen, I only used about half the 100 square foot kit. I had enough leftover to complete both of my bathroom vanities! The bathroom vanities turned out great too! 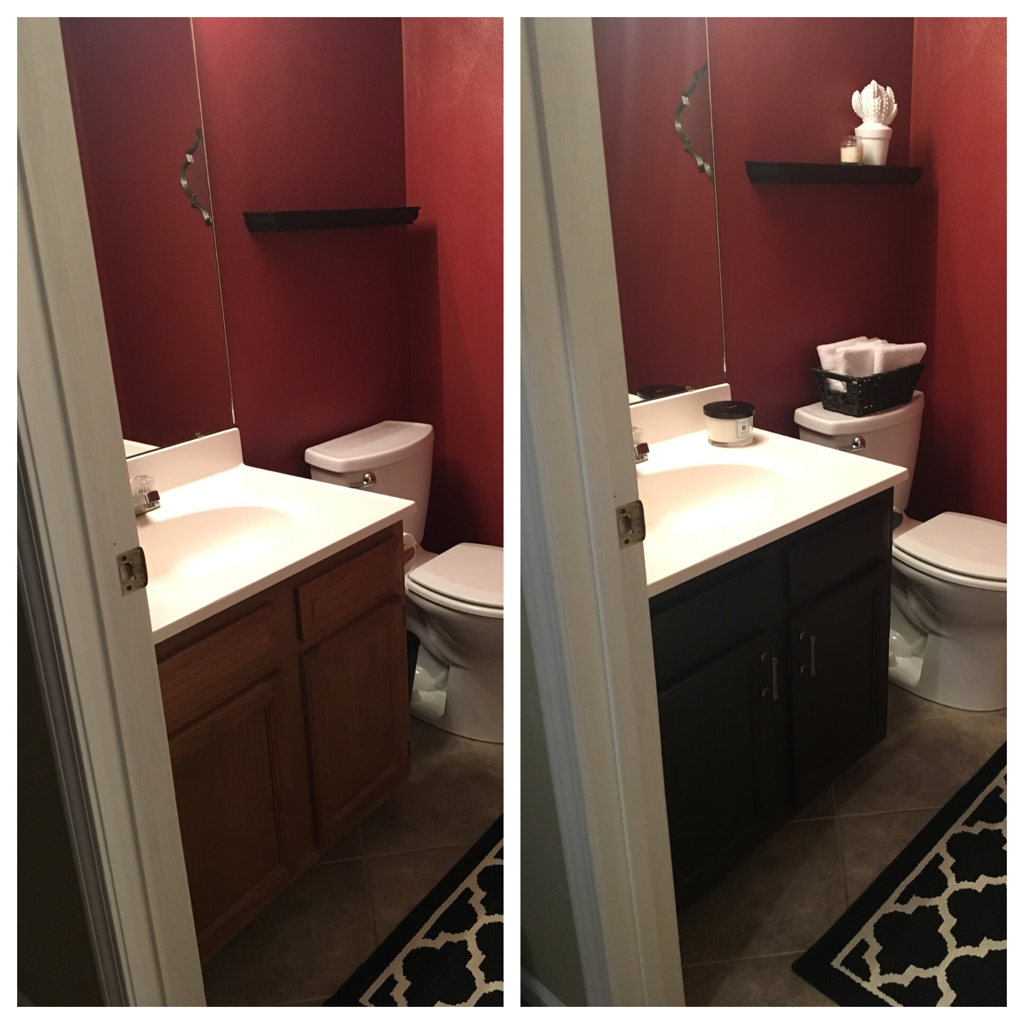 Best of luck to those of you who decide to tackle this project in your own home! It's messy, it's time consuming, and it's a lot of work but it's also very worth it! I hope your enjoy your kitchen transformations as much as I enjoy mine!
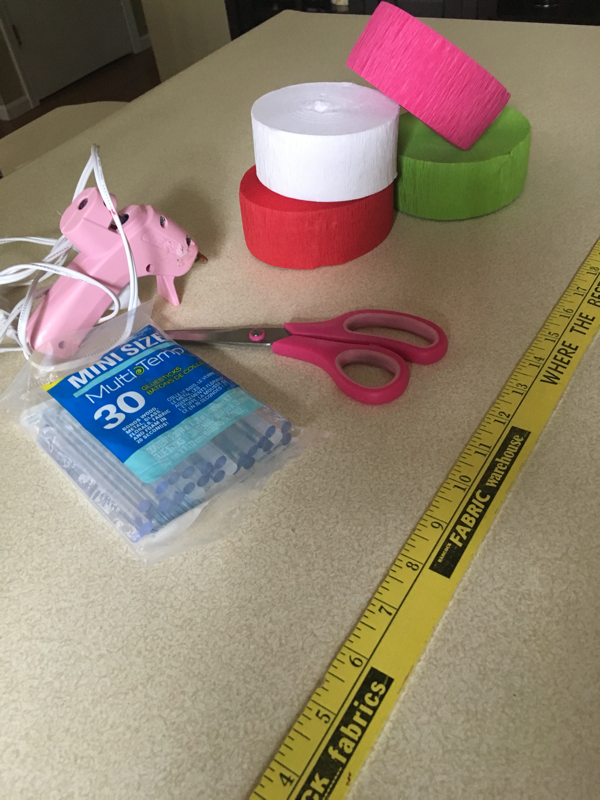
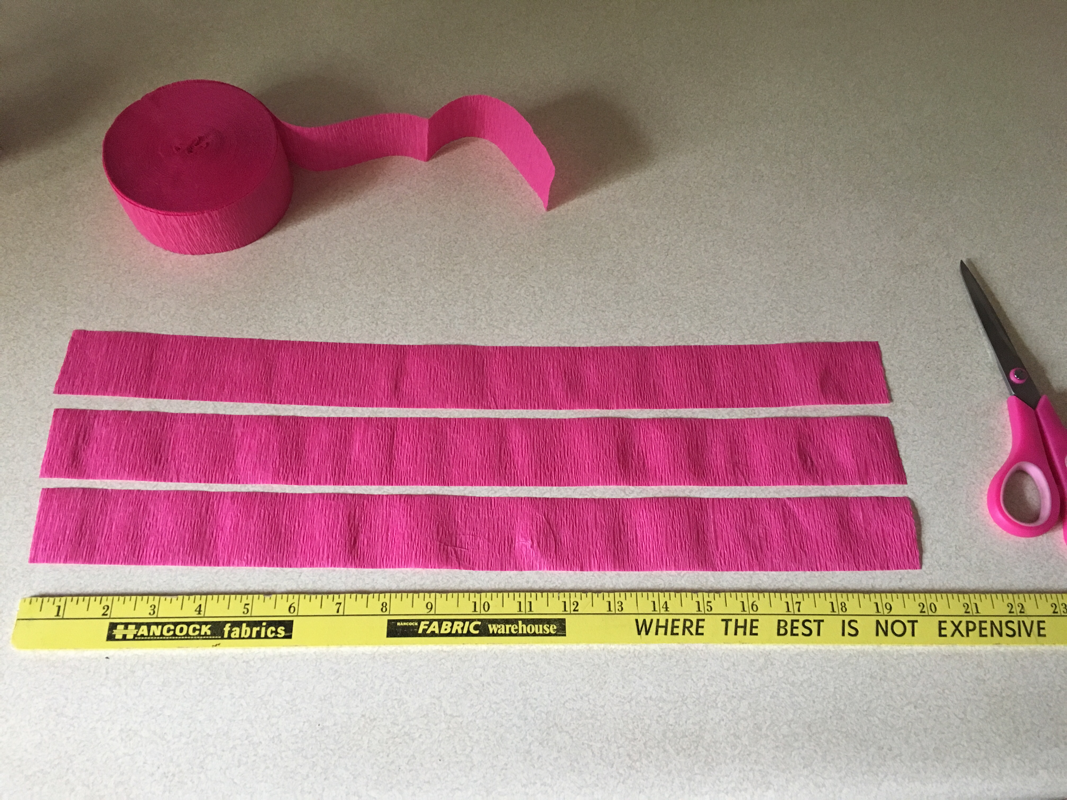
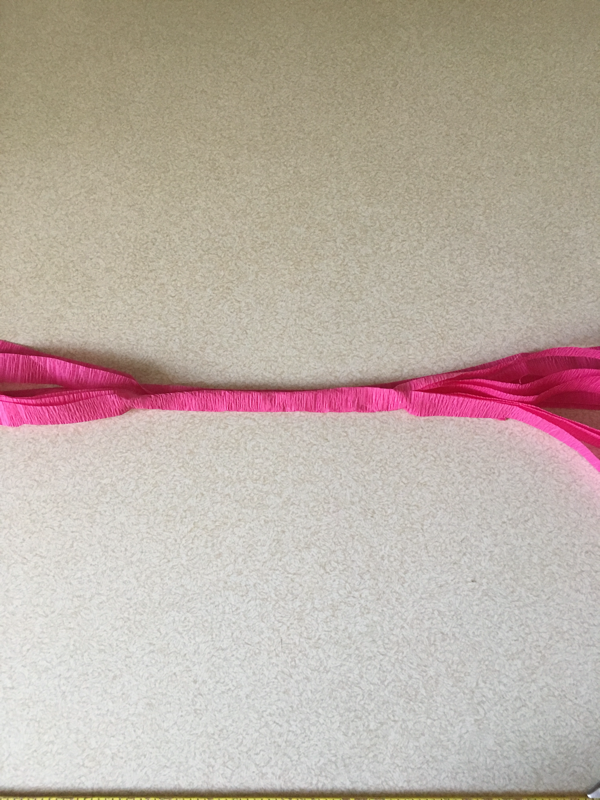
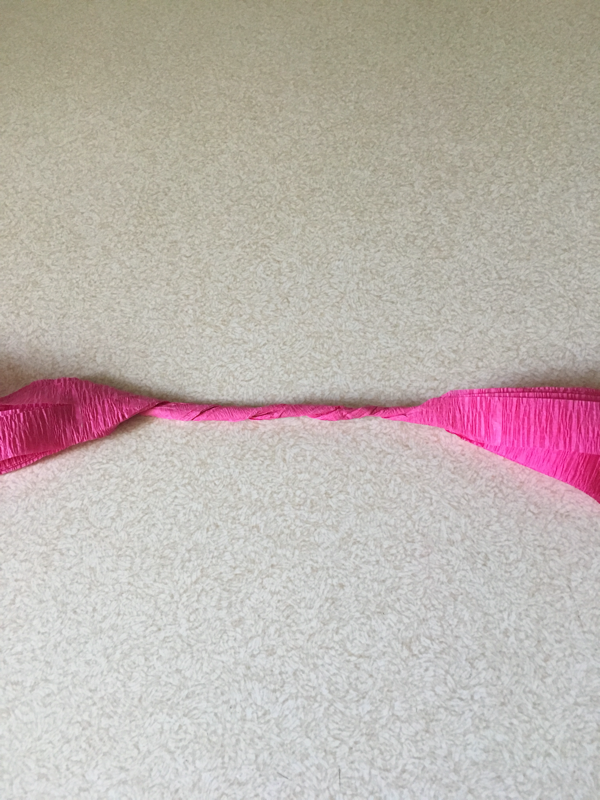
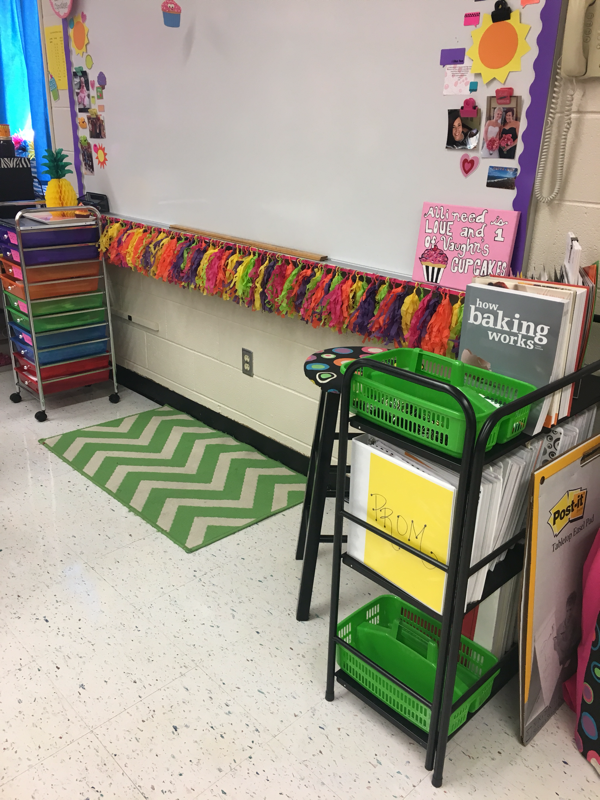
 Don't you just love a tassel garland?? They're so easy to make and they always add a little fun to your day! Supplies needed: crepe paper in various colors scissors hot glue/gun ribbon ruler To begin, cut 3 strips of crepe paper the same length for each tassel. I typically cut strips 18-20 inches long but sizes can be changed based on how long or short you want your garland. Stack your crepe paper in groups of 3. Once the 3 strips are stacked together, find the center and fold the stack of 3 in half. Cut the folded stack of three from the ends towards the center leaving the center uncut. I usually cut about 1/2 to 3/4 of the way up. I also cut two strips to create three pieces of fringe. Unfold the center and lay flat. 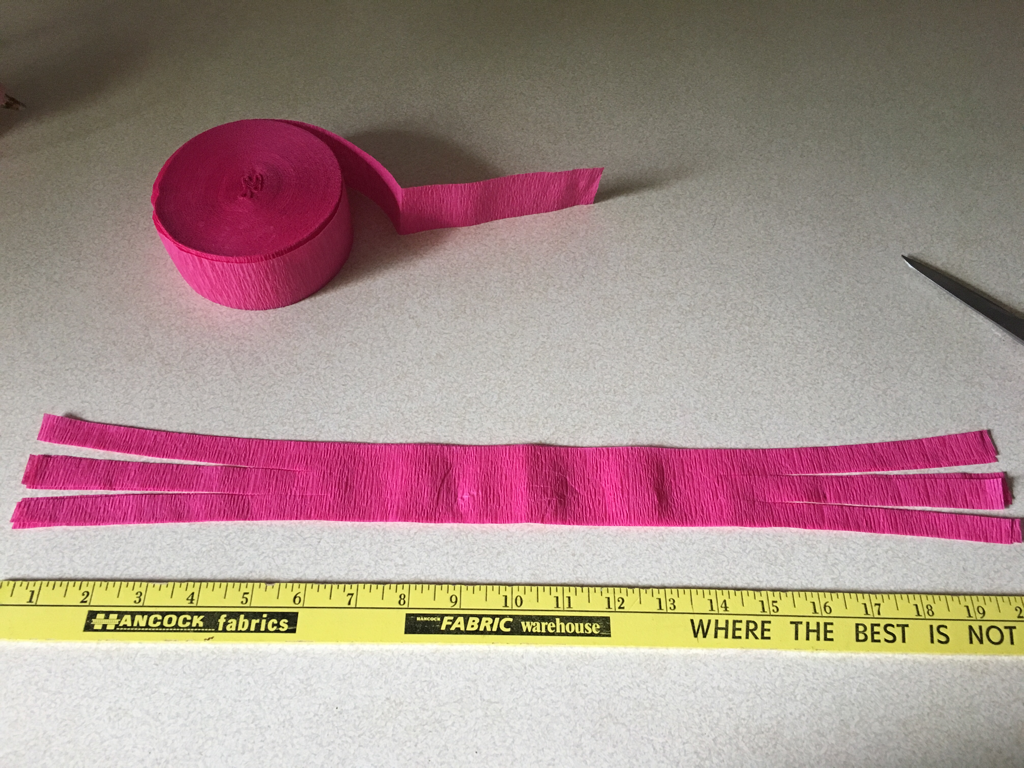 Now fold the center in small sections to bring it together leaving the ends free. Once the middle is folded, twist the center to create a tighter center. Pick up the center of the rolled section and twist to form a loop. To secure the loop, use a small amount of hot glue.  Once your tassels are all formed, slide onto a piece of ribbon to form your garland. Thicker ribbon will help the tassels stay in place but you can also glue individual tassels to your ribbon in order to keep them where you want them. There are so many possibilities with this garland! I use them for holidays, parties, and all over my classroom! Have fun! 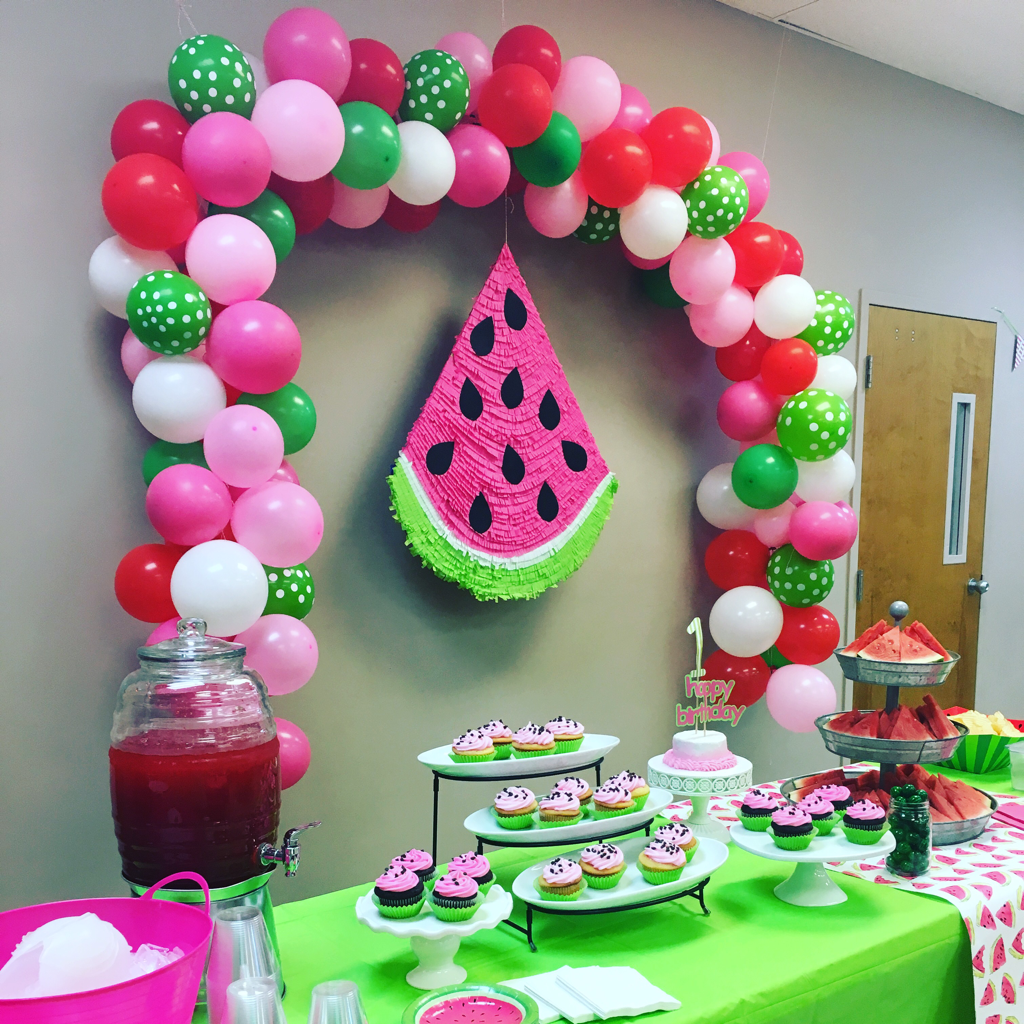
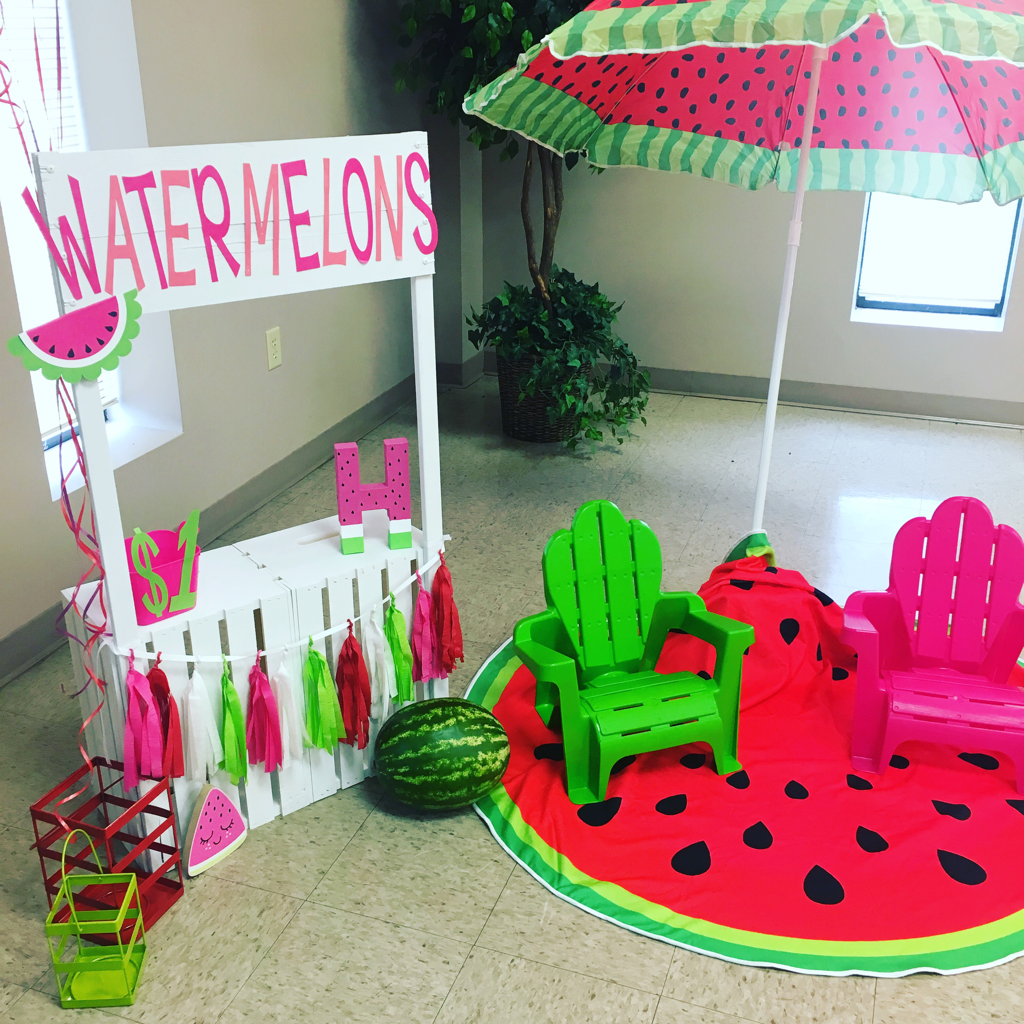
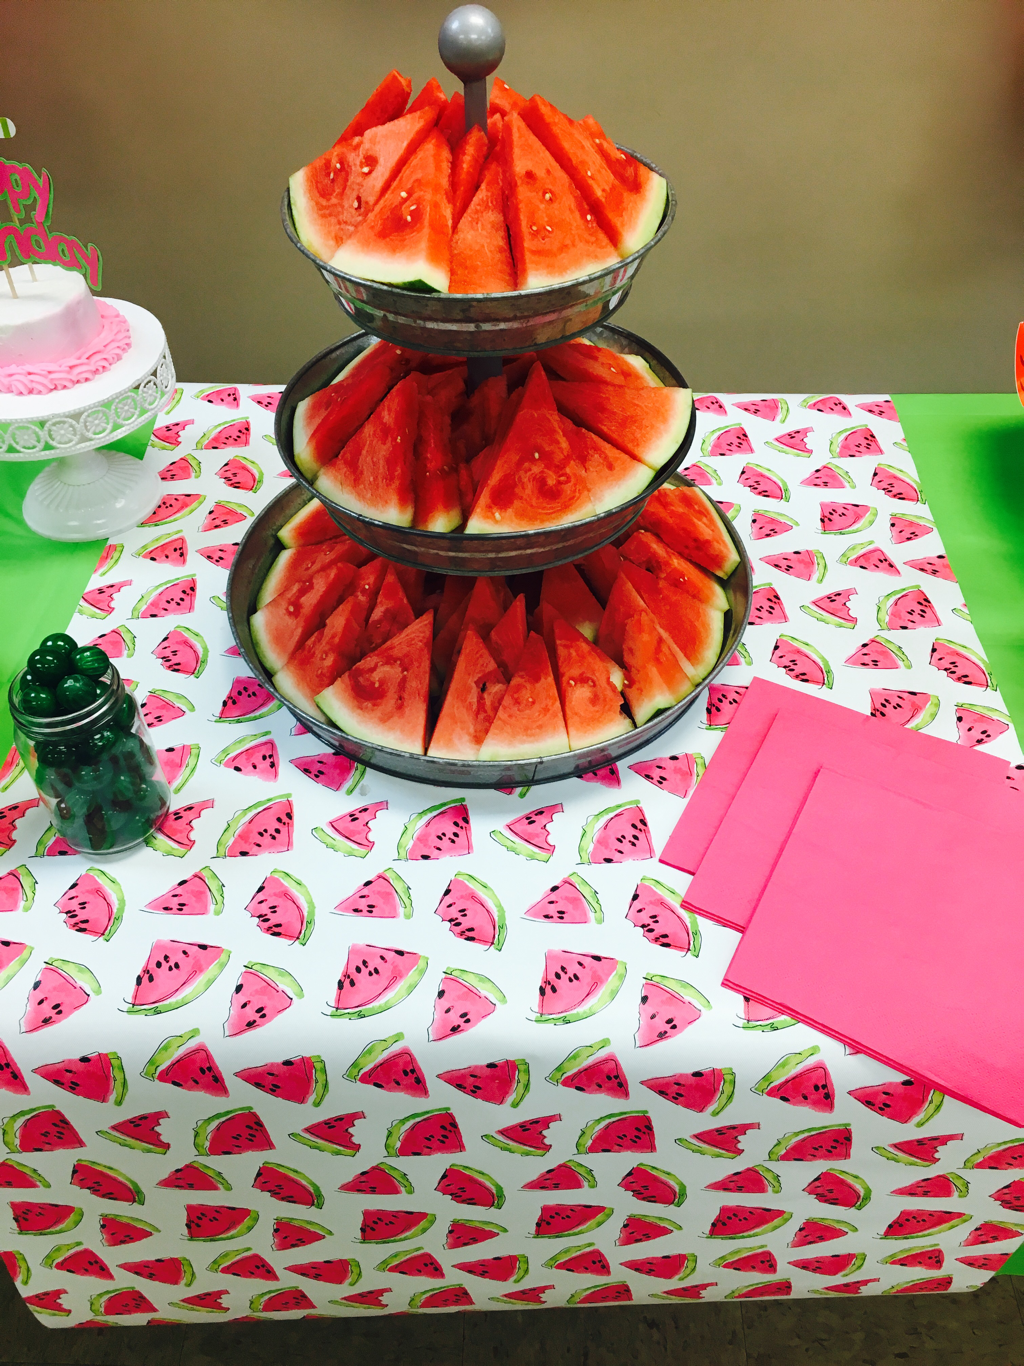
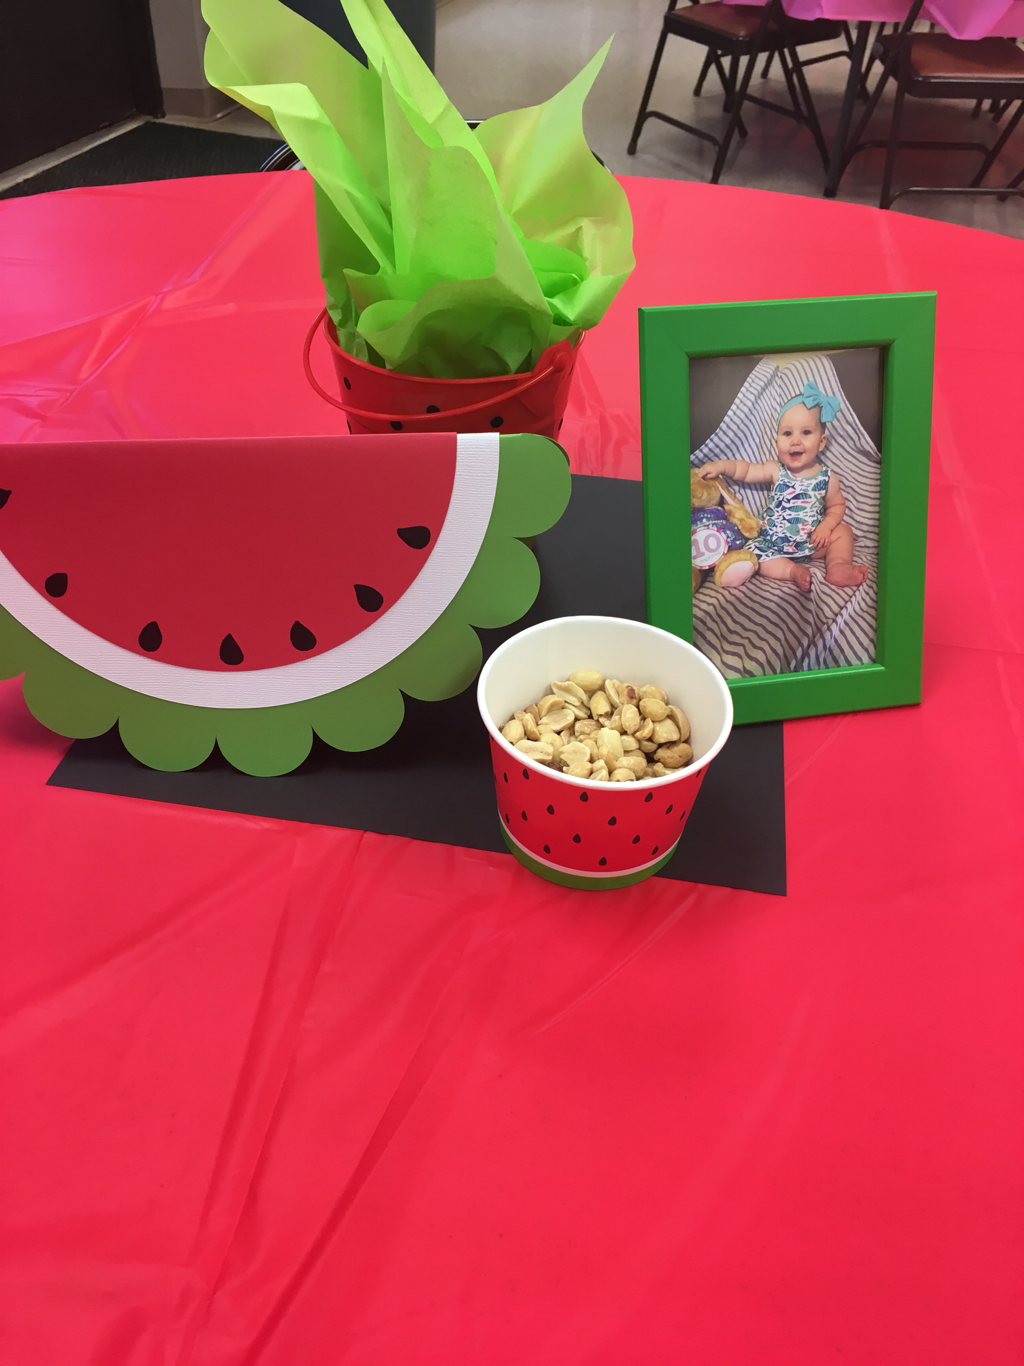
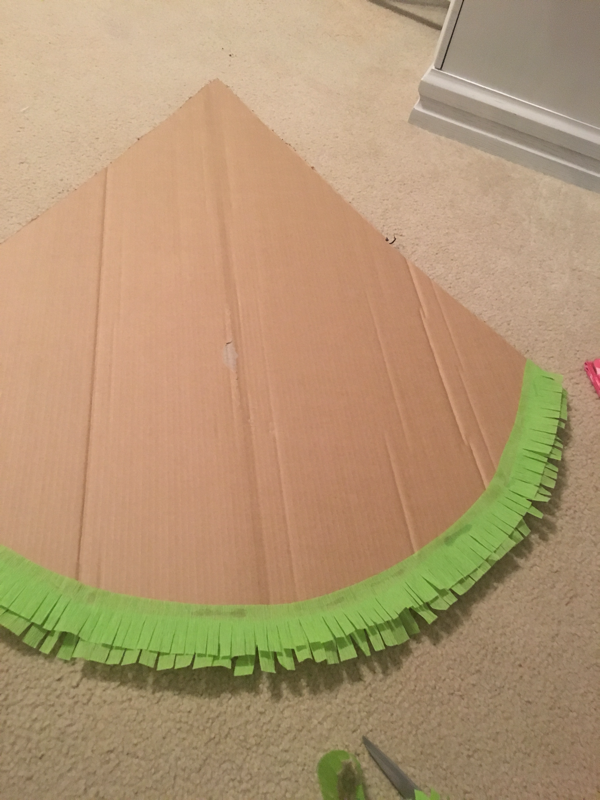
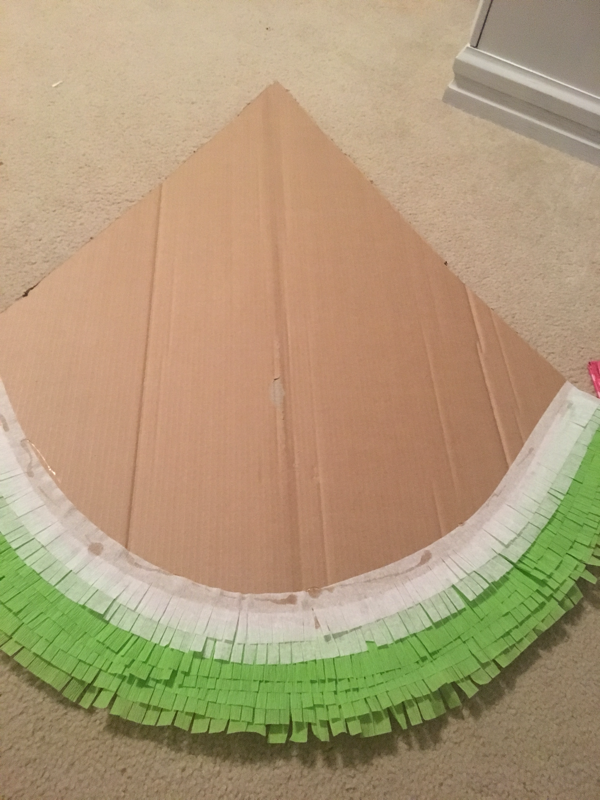
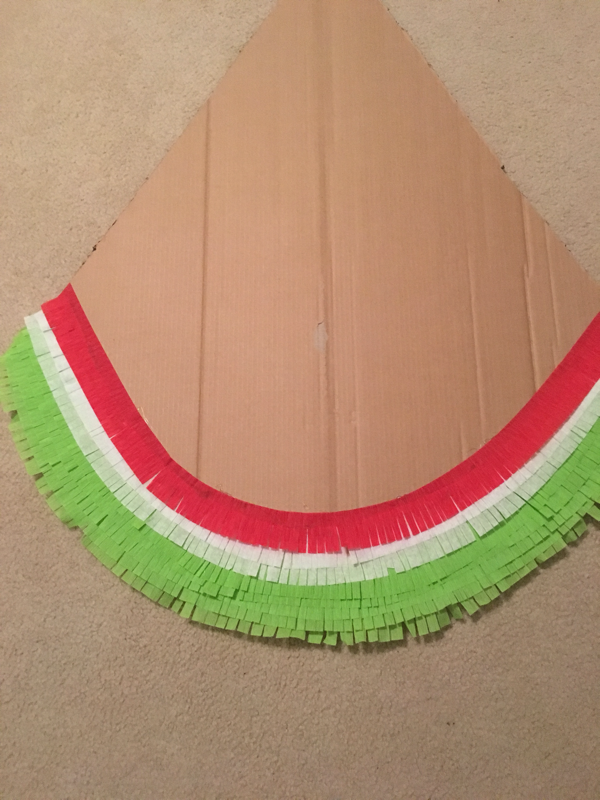
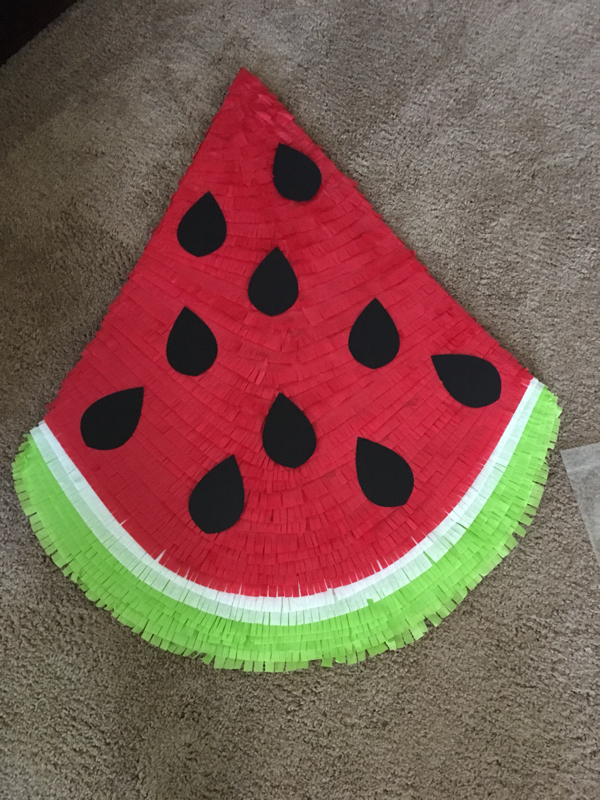
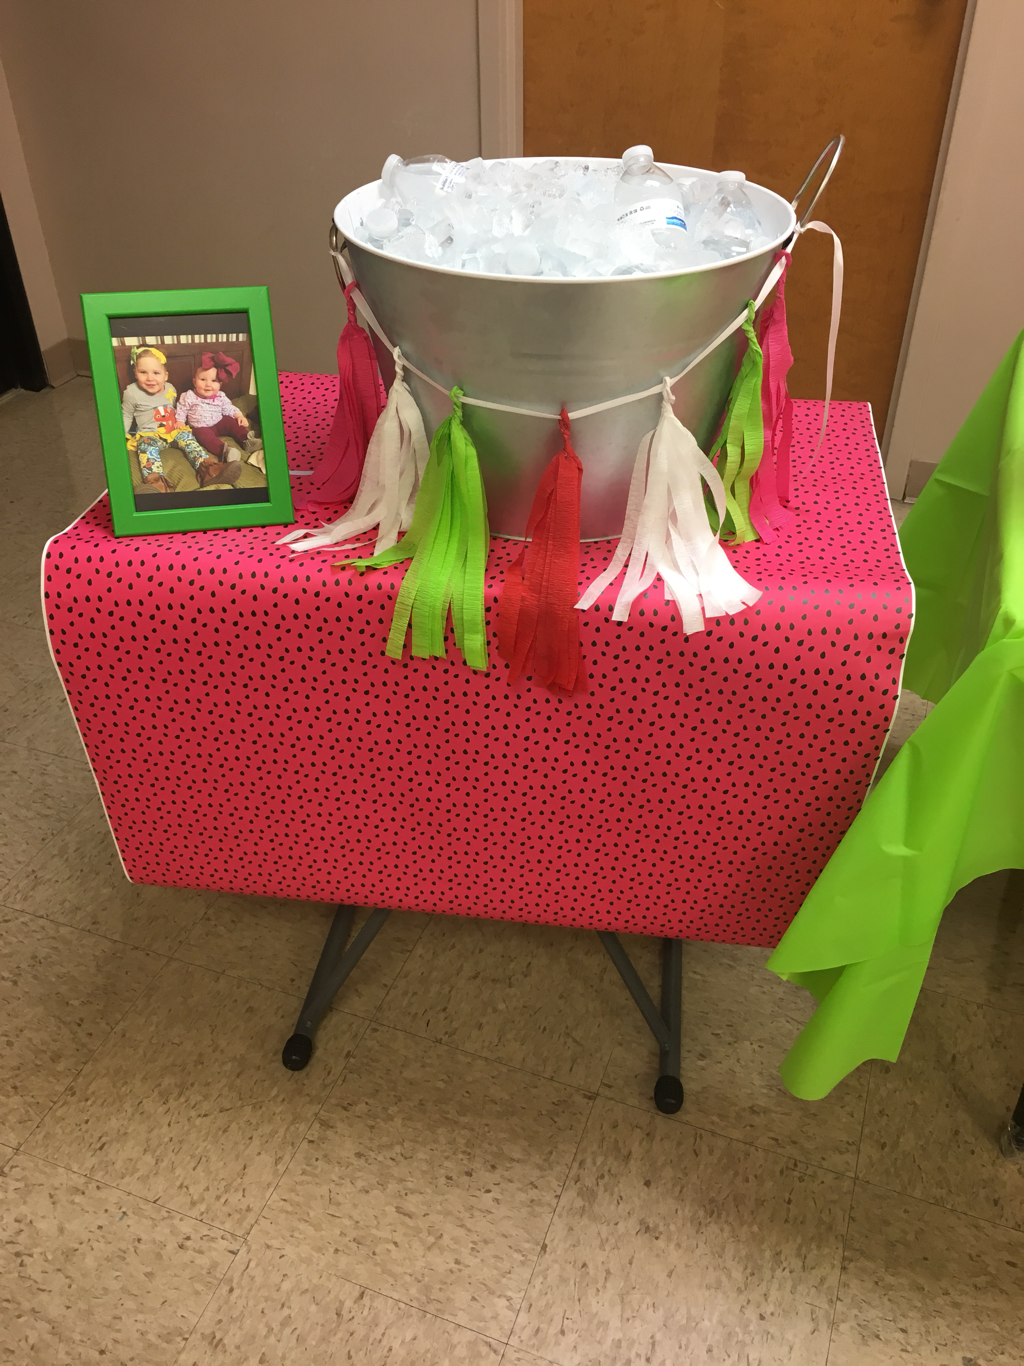
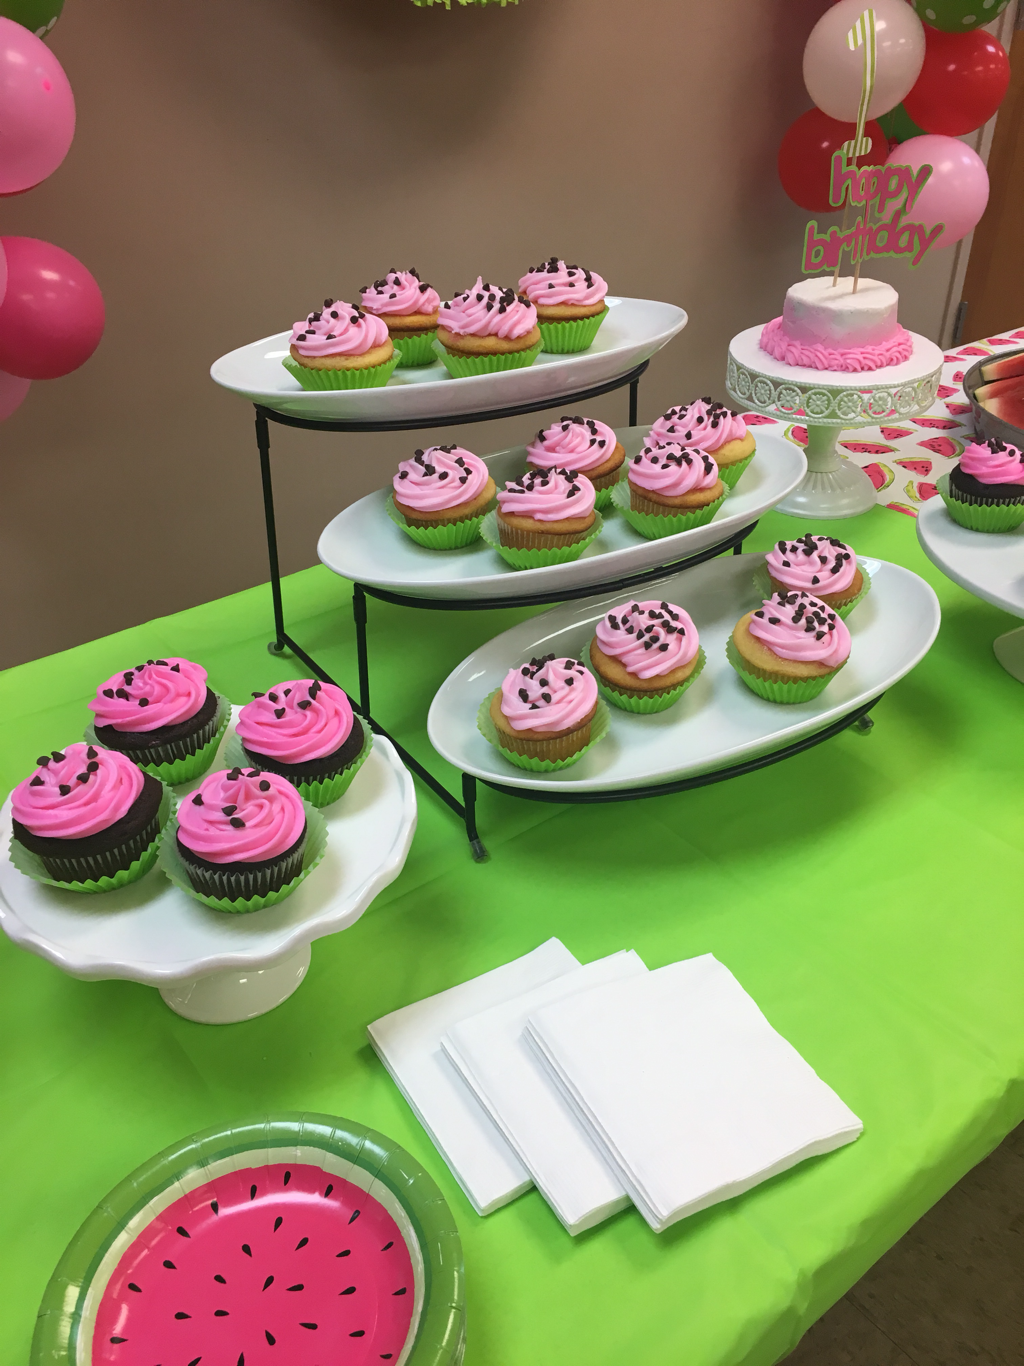
 I also utilized the coat rack for some extra decoration space. I bought the large square chalkboard at Michaels on the clearance years ago and I use it ALL.THE.TIME. I found the small pink piñata at 5Below and it inspired me to create the jumbo watermelon slices. 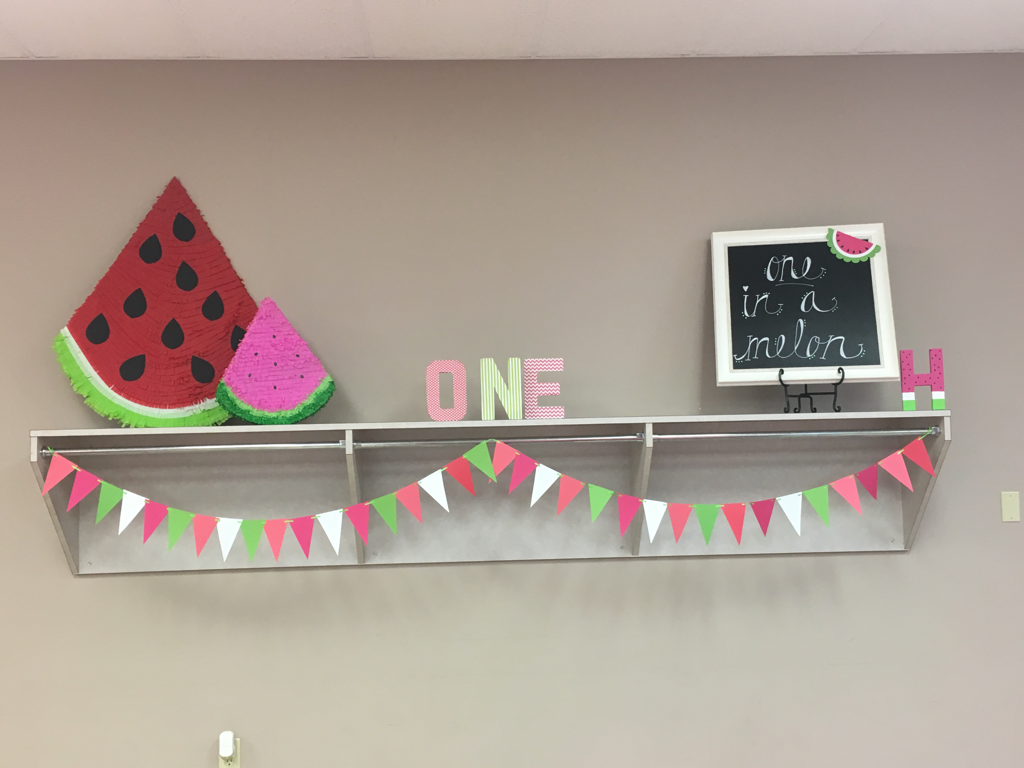 The large watermelon slices were so easy and inexpensive to make. The back is made from cardboard; the front is strips of crepe paper which I cut to fringe and simply glued in place. The large seeds are cut from black card stock. The project was a little bit tedious but so worth it in my opinion. For the food, I went with a classic birthday favorite and a few simple snacks. Chocolate and vanilla cupcakes for our guests, and a smash cake for my sweet Hattie. The cupcakes were frosted with pink buttercream, topped with mini chocolate chips, and placed in a green cupcake liner to keep with the theme of the party. I baked the cupcakes in a white liner and just placed them in the green liner before serving so the green color would remain bright. Ranch dip and chips as well as cheesy sausage dip and crackers were also on the menu. Watermelon was on the menu too because you can't have a watermelon party without it. Our guests could also choose from tropical punch or mini bottles of water to drink. I'm so glad I picked up this metal drink tub on the Target clearance at the beginning of summer; it went so well with our theme.
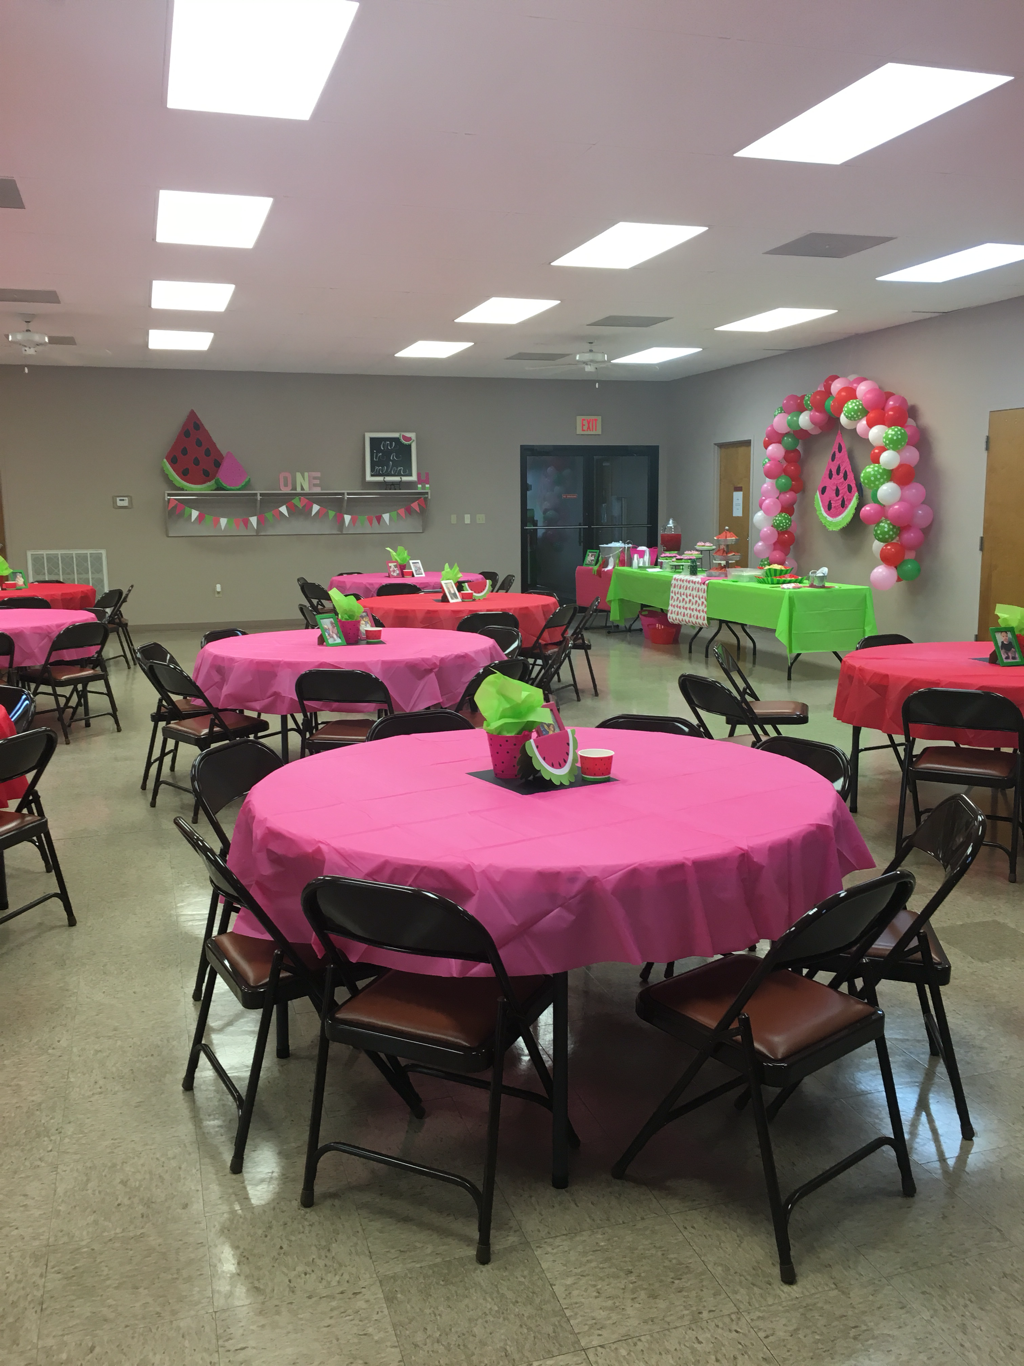
 To pull everything together, I hung the pink watermelon slice behind the table and surrounded it with a balloon garland. This may be my favorite thing ever! Balloon garlands are super easy to make, inexpensive, and they make a huge impact! I hope you enjoyed our "One in a Melon" birthday bash as much as we did. Let me know in the comments what your favorite part was! 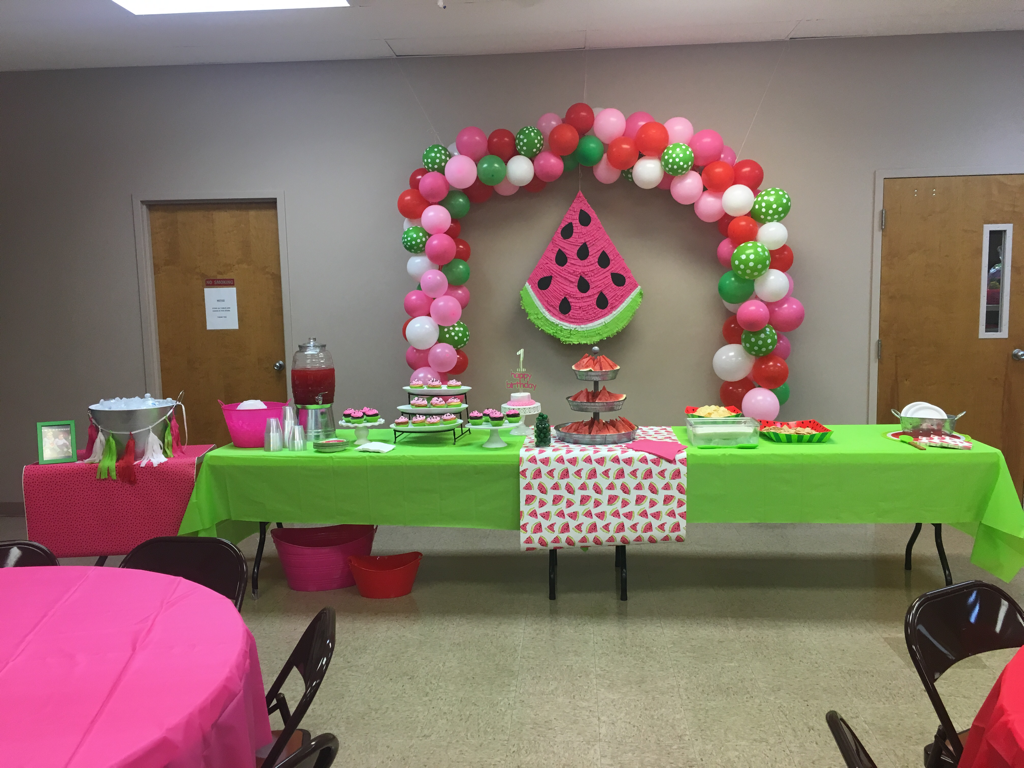 |
Archives
April 2020
Categories
All
|


 RSS Feed
