|
Do you need something yummy for dinner that screams summer? This peach and walnut salad might be just the thing you're looking for! In-season produce makes this quick side dish a real win! Check out the recipe below! 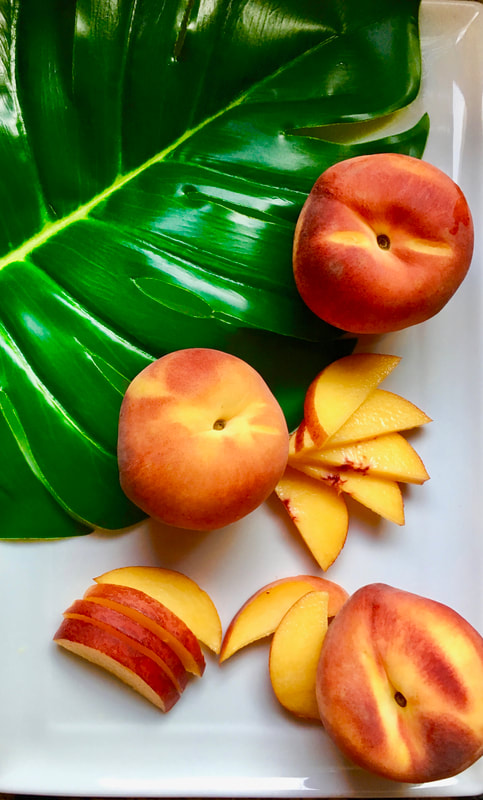 Peach and Walnut Salad 1 large romaine heart 1 small cucumber - thinly sliced 1/4 cup red onion - thinly sliced 2 large, ripe peaches - peeled and sliced 3 tbsp. bacon bits 1/4 cup walnuts - toasted 1/4 cup crumbled feta cheese Dressing: 1/4 cup olive oil 1/4 cup fresh lemon juice 1 tbsp honey 1 tsp salt 1/2 tsp pepper 1. Wash and prepare the vegetables. Toss the veggies, bacon, walnuts, and feta together in a large mixing bowl with salt and pepper to taste. 2. Place all the ingredients in a mason jar and shake well. Pour over salad just before serving and toss. 3. Serve as a side dish for all of your favorite summer meals or add some grilled shrimp to use as a main dish.
0 Comments
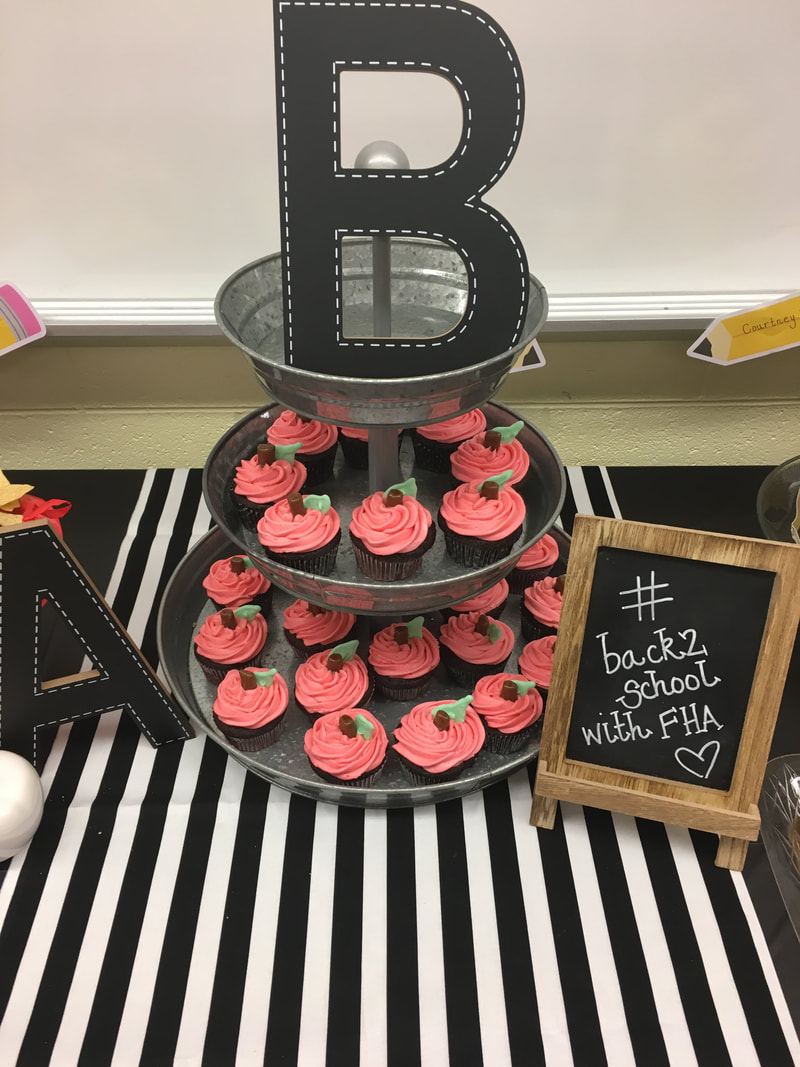
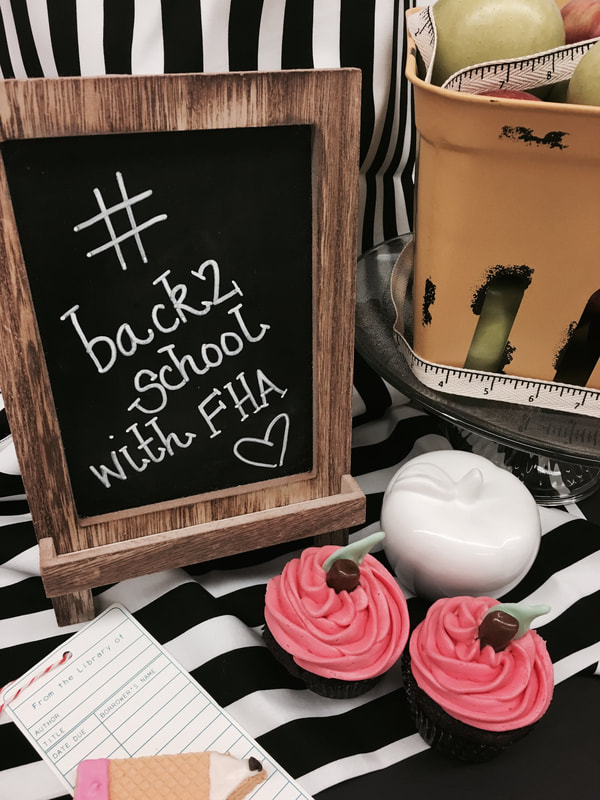
Ask me what my favorite food is. I always have 2 answers and 1 of those answers is always guacamole. l make it all the time and I really feel like there isn't anything better. Grocery store guacamole is great when you're in a rush but it's so easy to make your own! Guacamole: 3 ripe avocados 3-4 garlic cloves - minced 1/3 cup red onion - diced 1/3 cup cherry tomatoes - halved 2 tbsp jalapeno (approx. half of one small jalapeno) Juice from 2 limes 1 tsp. sea salt 1/2 tsp black pepper 1/4 cup chopped cilantro *All amounts can be adjusted for personal preference. Sometimes I like extra spicy and add double jalapeno, other times I add tons of garlic! 1. Using a food processor or hand-held chopping tool, chop garlic, onion, tomatoes, and jalapenos roughly. 2. Open avocados and remove pit. Mash avocados with a fork and add lime juice. Mix well. 3. Add chopped veggies, salt and pepper, and cilantro to avocodos. 4. Cover with saran wrap directly on the guacamole (this will help to prevent browning) and refrigerate for at least an hour before serving. The flavors will develop after refrigeration. Taste and add more lime juice or salt to fit your personal preference. I could eat tortilla chips and guacamole every single day but guacamole is also great to use in many other ways. Try adding it to sandwiches (BLT's are my favorite), use it as a salad dressing, or even add it to toast for a delicious lunch! 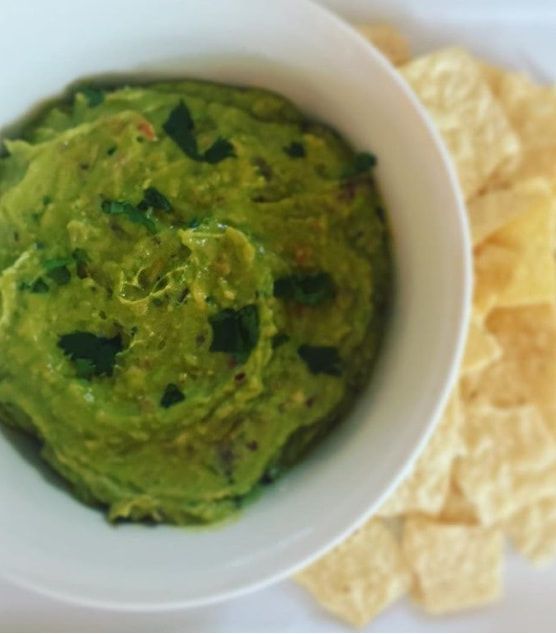 I know some people have mixed feelings about heading back to school but if the end of summer has to arrive, what better way to celebrate than with bright yellow pencils and brand new lunchboxes? If the mood should strike you and you decide to throw a back to school bash, I've got some quick and easy ideas for you! How fun would it be to have a back to school themed breakfast or dinner for your family? Or you could always surprise your fellow teachers with a back to school lunch in the lounge! Let's get started with some ideas! First up, paper goods. I love paper plates from the Dollar Tree; they're so affordable and come in a variety of great colors. I picked up the red plates and added some construction paper for the leaf and stem. The cute black and white napkins are also from Dollar Tree! 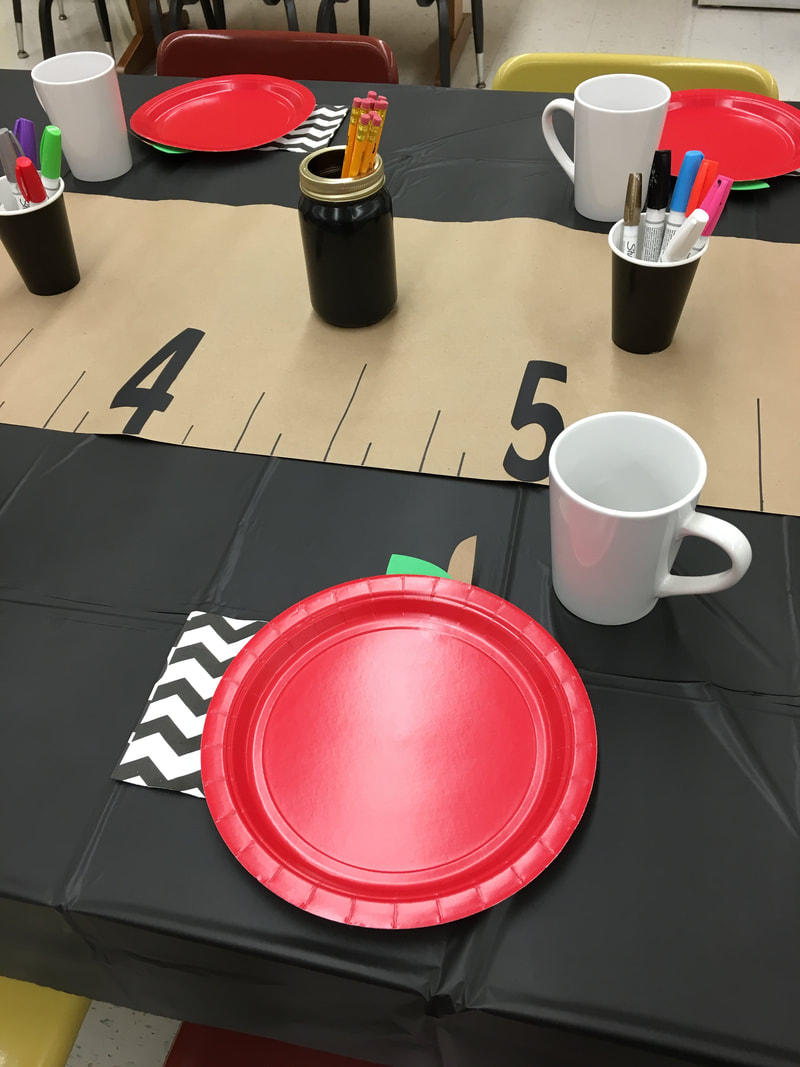 I created the table runners using brown kraft paper rolls from Dollar Tree. I love that stuff! You get so much paper for only $1 and it makes the best table runners! The mason jars are also from Dollar Tree - they were clear and I used inexpensive black spray paint to cover them. Throw some pencils in there and you have the perfect back to school centerpiece. Bonus points! It's a centerpiece that doesn't go to waste. Move that cute jar to your desk or homework area when your celebration is over and use it throughout the school year. 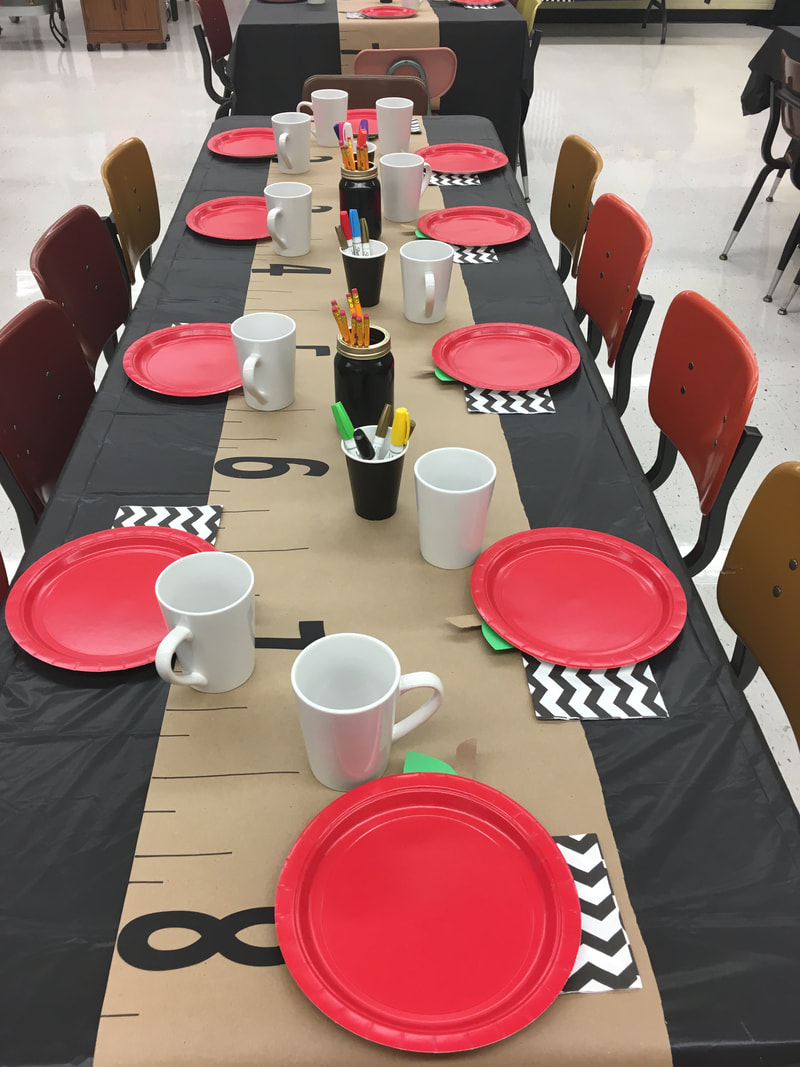 I think that black and white stripes is just the cutest pattern for a back to school party! Grab some black and white wrapping paper or fabric next time you're at the store and use it to decorate your snack table. The back to school banner was made with my silhouette machine and the sweet pencils are from the Target dollar spot. The oversized ABC letters and apple baskets are also from Target. Target always has a great back to school section. I spotted some adorable mason jars this year that are painted to resemble apples and pencils. Check Target early and often for some great deals! Tissue paper poms are still one of my favorite party decorating moves. The red ones below have construction paper stapled to the back to resemble apples. So simple and cheap and so cute! 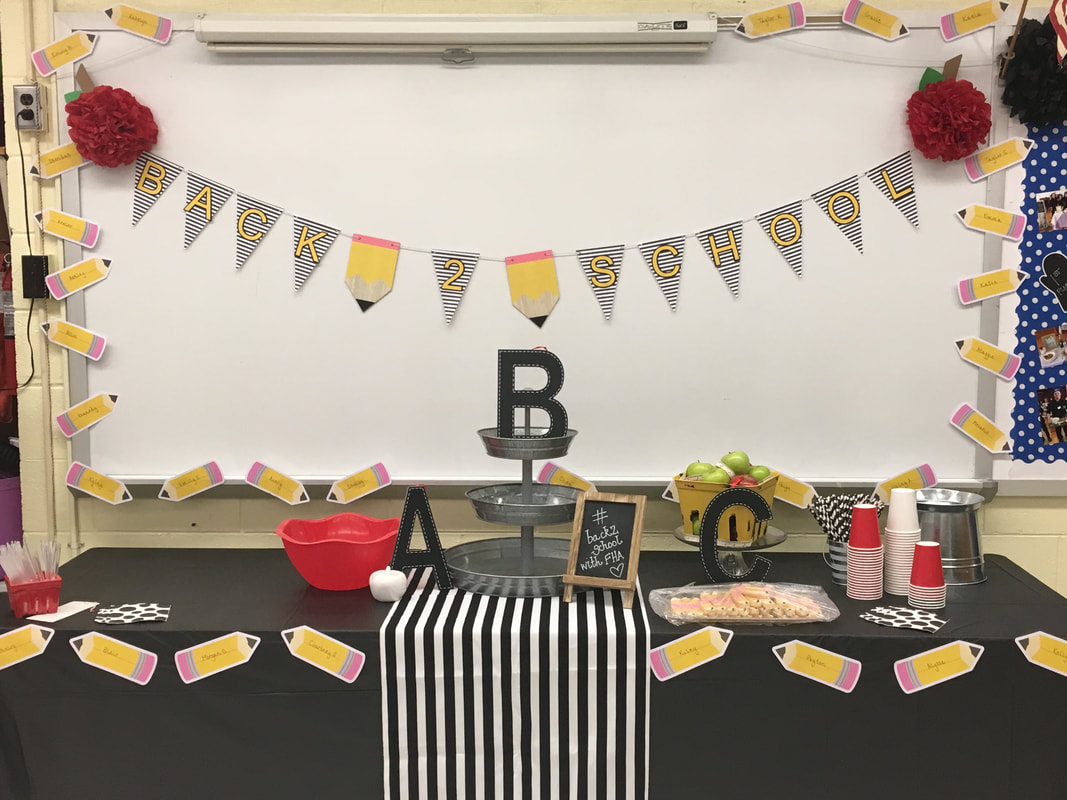 If you are in search of a treat, these "apple" cupcakes scream back to school. Grab a bag of tootsie rolls for the stems and green fondant for the leaves. Most cake decorating supply stores carry green fondant ready made but you could also purchase white and color it. Don't have time for that? The green sour straws in the candy aisle also work great! One of the best things about a back to school party is you may already have a lot of the "decorations" you need. Use school-themed items from around your house. Crayons, glue sticks, and rulers all make great vase fillers. Composition books and notebook paper look great stacked under serving trays and flash cards make perfect banners. Get creative and use those items you already have! If your school supply stash at home is looking a little depleted, head to Dollar Tree to stock up! 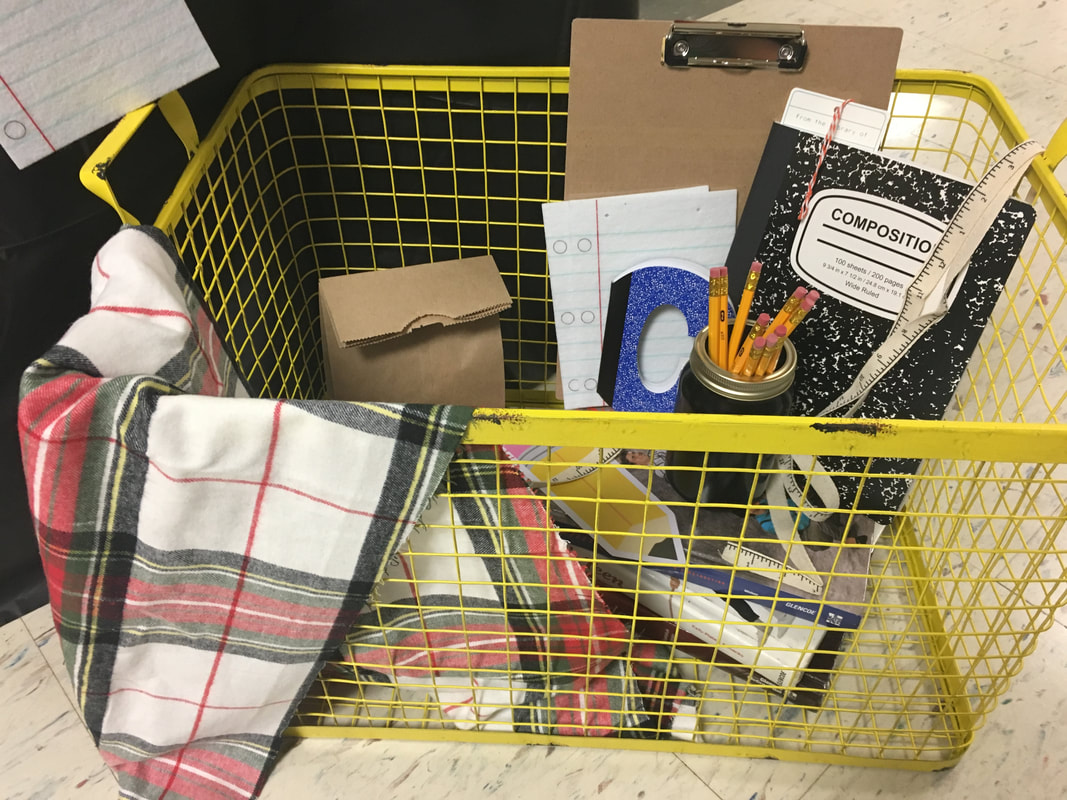 Last but not least, create a photo memory of the day! Whether it's the first day of kindergarten or high school, a photo booth is always a fun idea! I created this "school bus" using a a few cardboard boxes, some duck tape, and a lot of school bus yellow paint! I never imagined my high school students would have so much fun with it! 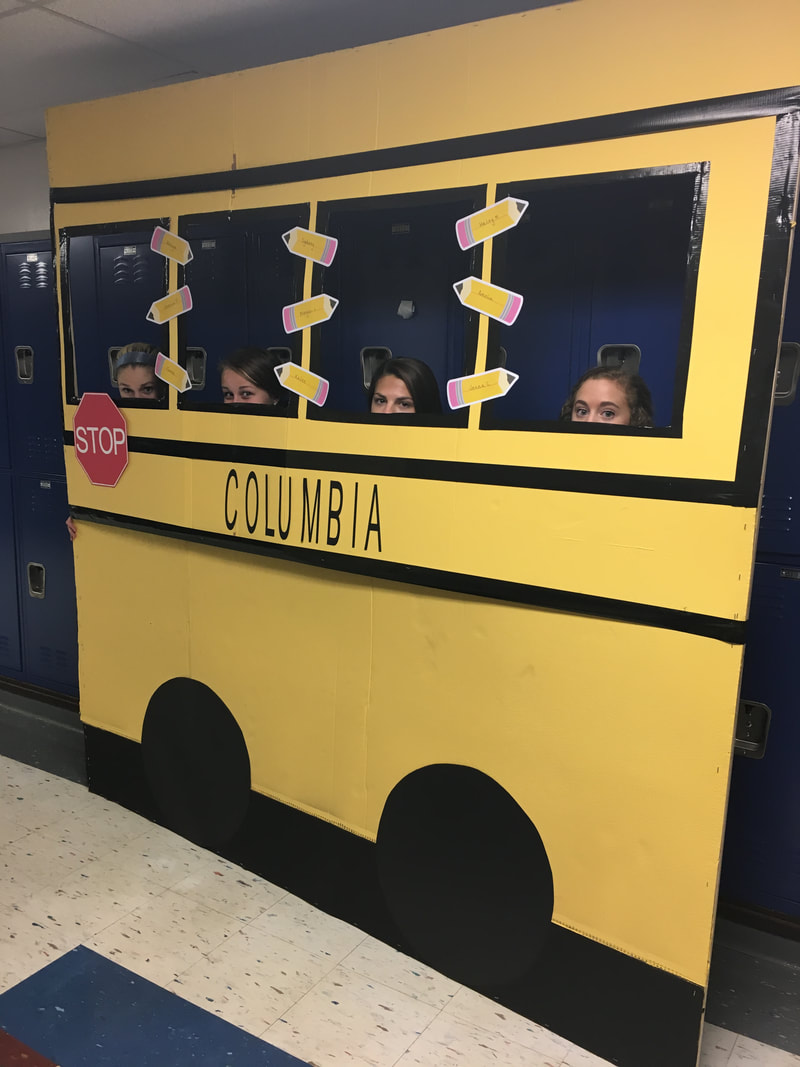 Whether we like it or not, school is on it's way so embrace it and have some fun with your people! A new school year is a great opportunity to make friends, learn something new, and most importantly start fresh. Wishing you the best year ever!
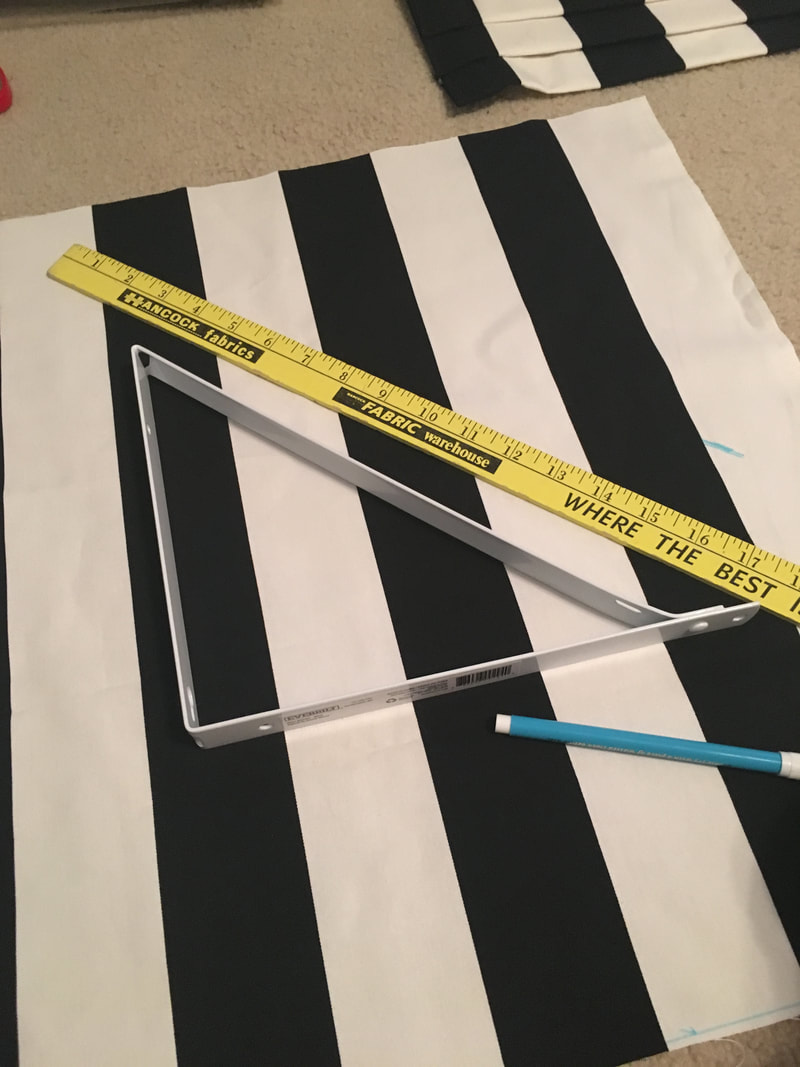
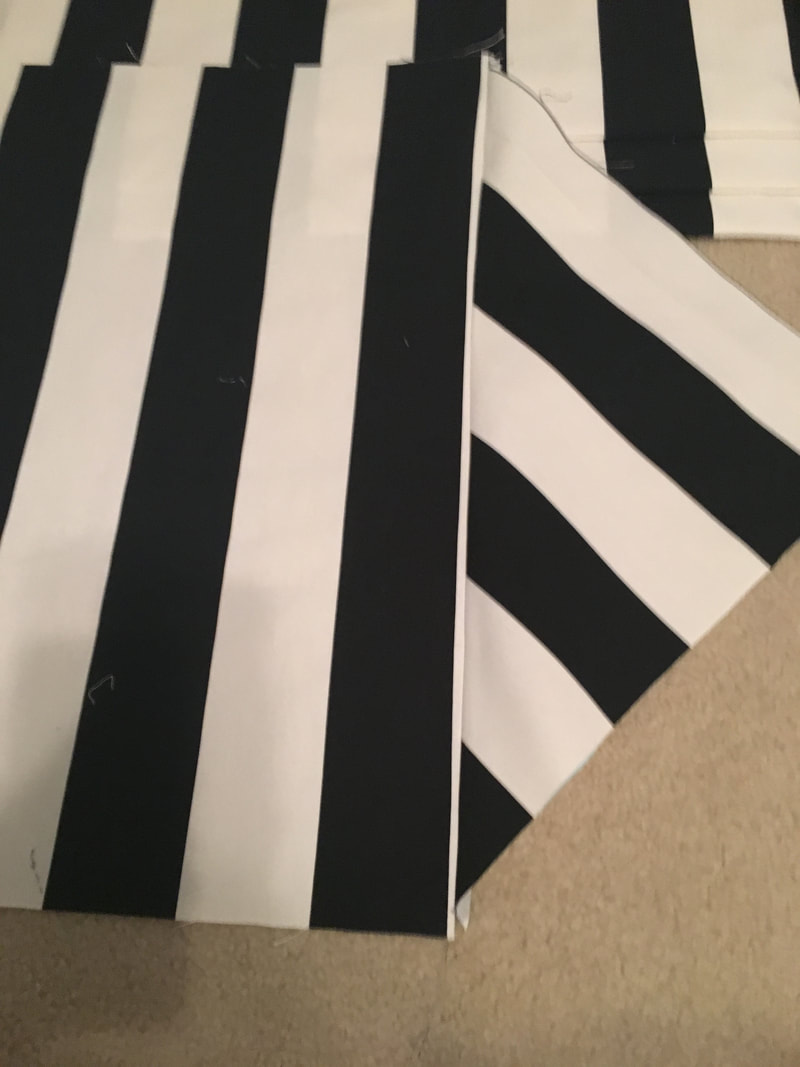
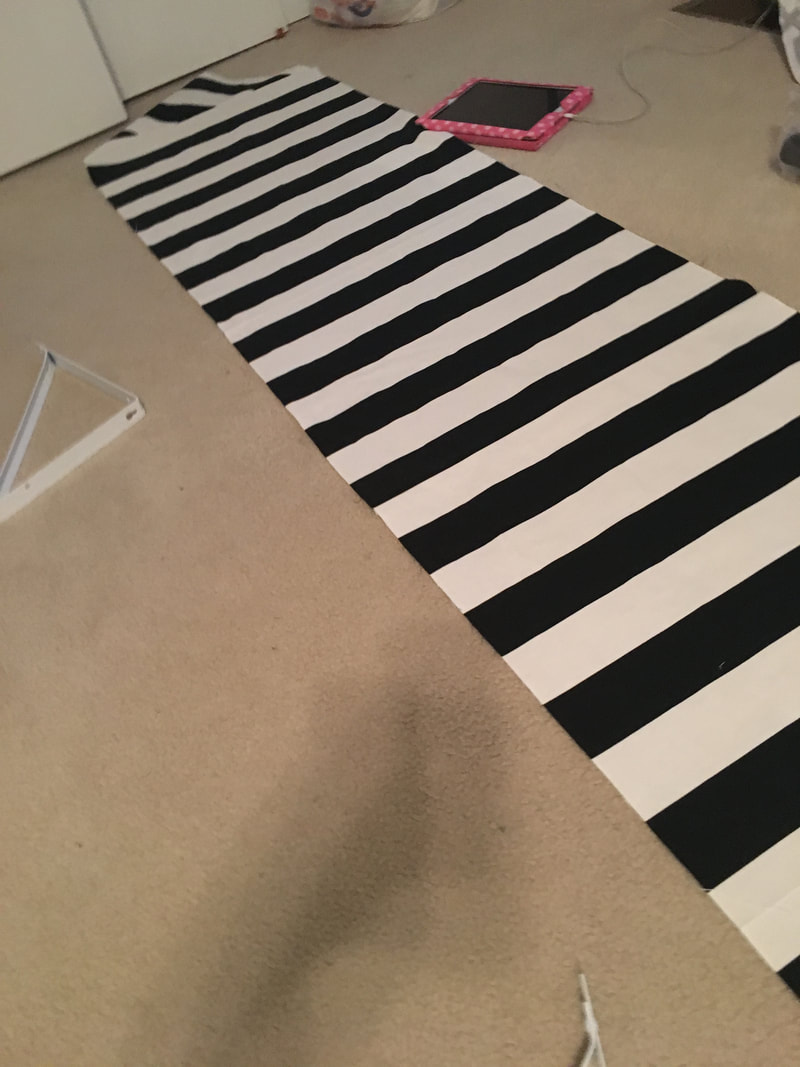
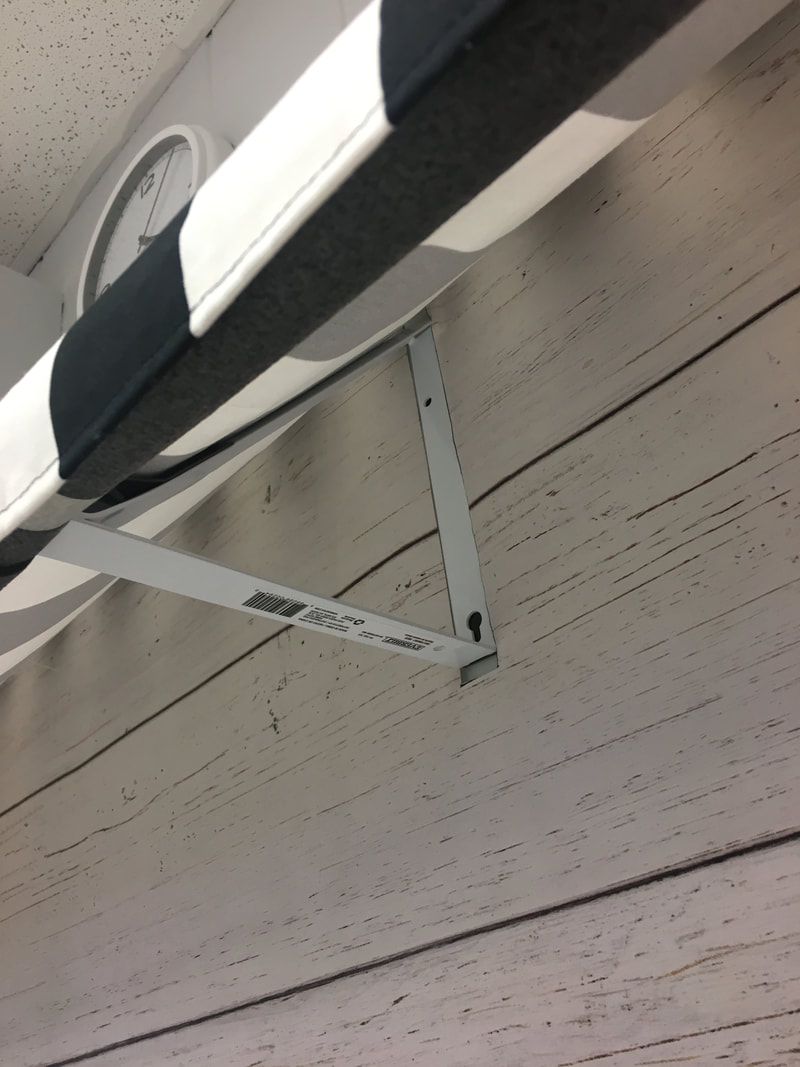
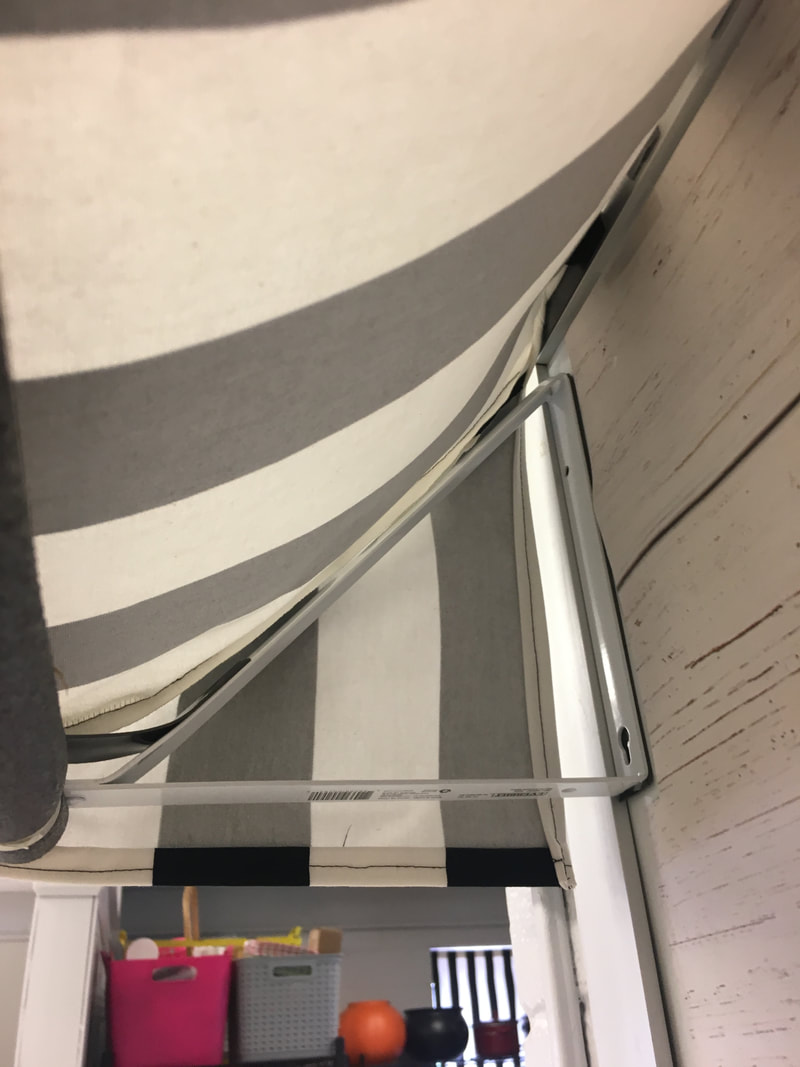
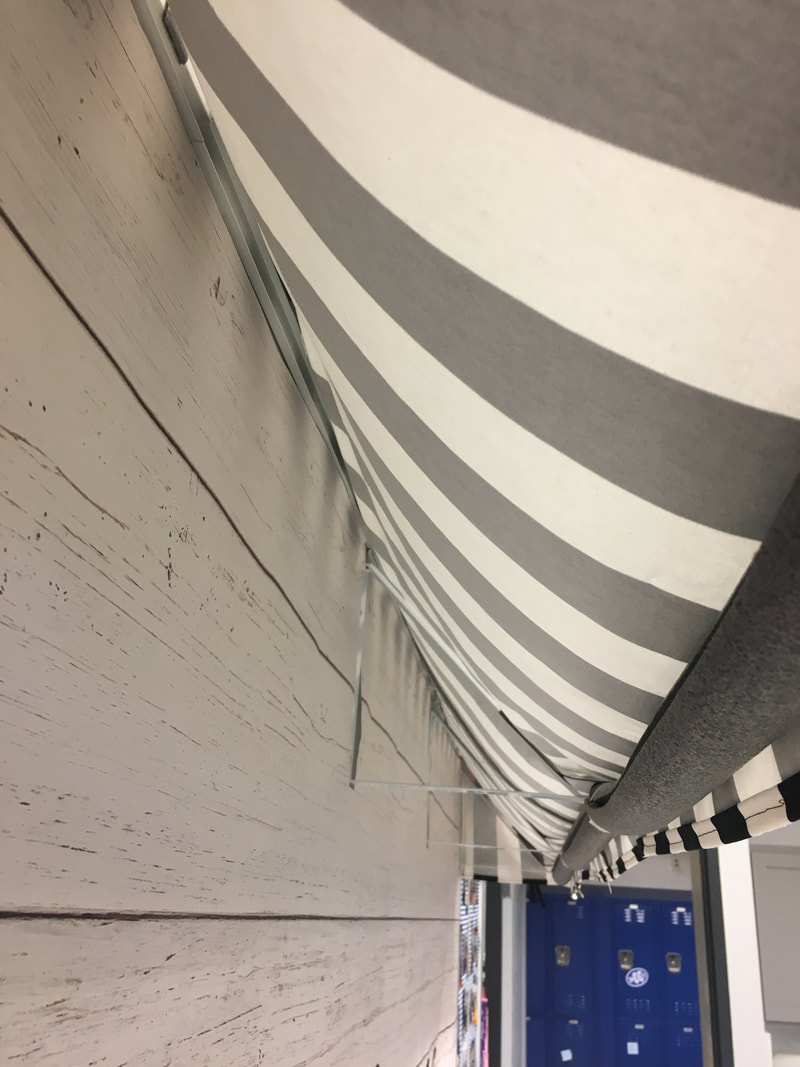
How do you plan on celebrating the new school year?? I have a dry erase board in my classroom kitchen that rarely gets used. It’s basically a giant white space that occasionally gets written on when students get ahold of a marker. Last summer I started thinking: if my classroom is getting a transformation, shouldn’t my dry erase board get a facelift too? I considered many options for the blank space including banners, garlands, and paper flowers but nothing really seemed to fit in the updated space. I had a moment of brilliance in the middle of Hobby Lobby and the awning idea was born. I was inspired by visions of sweet little French patisseries adorned with black and white stripes. It took a little planning but was actually very easy to put together! Supplies needed: 3-4 closet shelf brackets (depending on the length of your space. I used 4) fabric or paper of your choice mounting tape or screws to attach brackets to the wall (I used gorilla tape since this was going on my dry erase board) pvc pipe/insulation pipe/dowel rod - Any will work to support and create the correct shape. 1. Measure the length of your space. Add 1-2 inches to accommodate seam allowance. 2. I decided to have an awning with a length of 16 inches. My brackets were 14 inches tall. 3. Cut the fabric the length and width desired. To make the panels for the sides, I used the bracket as a diagram. Cut the triangle slightly larger that the bracket in order to have room for the seam allowances. 4. Attach the side panels to the main portion of the fabric. I placed mine right sides together and stitched. I aligned the side of the fabric with the long edge of the side panel. 5. I also hemmed all edges of the fabric for a finished look. If you are using paper, you can staple or glue paper to attach and finish edges. 6. To attach the awning, I taped the brackets to my dry erase board placing 1 on each end and 2 in the center of each half for additional support. 7. The fabric awning is taped directly to the dry erase board and rests against the brackets. 8. In order to create the correct "rolled edge" shape, I used a pipe insulator. It rests against the brackets and fabric and creates the appropriate shape. 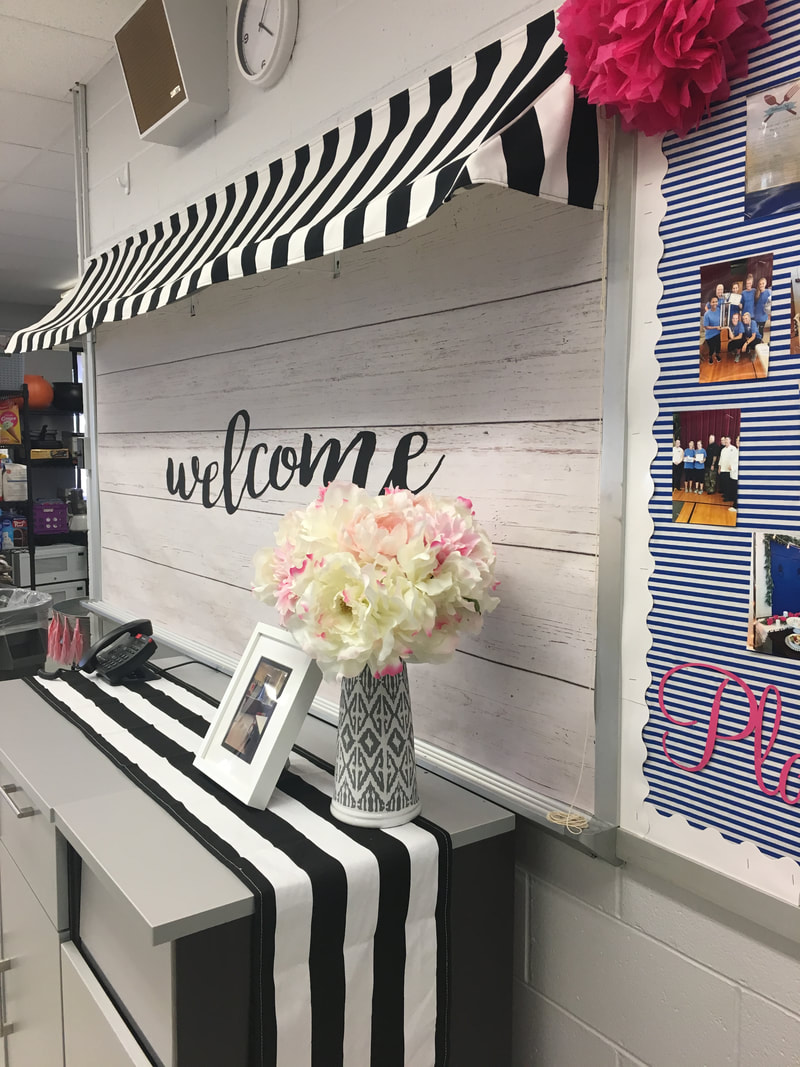 How easy was that? I'm so excited that it made such a big impact with a little price tag. Have you made your own classroom awning? Share your photos below!
What a fun classroom week it has been! My sophomore Foods and Nutrition class has successfully completed safety procedures, measuring basics, and knife skills which means it’s time for our first real lab! Even when I work with students who have some cooking knowledge, I always plan a few easy recipes at the beginning of the semester to help them get acclimated with their station and working as a group. The first cooking unit we cover is dairy. Students are educated on nutritional content, storage, and preparation of various dairy products. Earlier this week I demonstrated how to make a basic white sauce using a roux and milk. It’s such an easy technique and a great skill for my students to have. In order to practice working with dairy products, students each prepared their own mini pizza using just a tortilla shell, pizza sauce, and cheese. What a fun afternoon it was! This recipe is also a great way for my new students to practice pre-heating the oven, setting a timer, and using potholders :) Check our how great out little pizzas turned out! Want to make your own mini pizza? This super simple recipe is below!
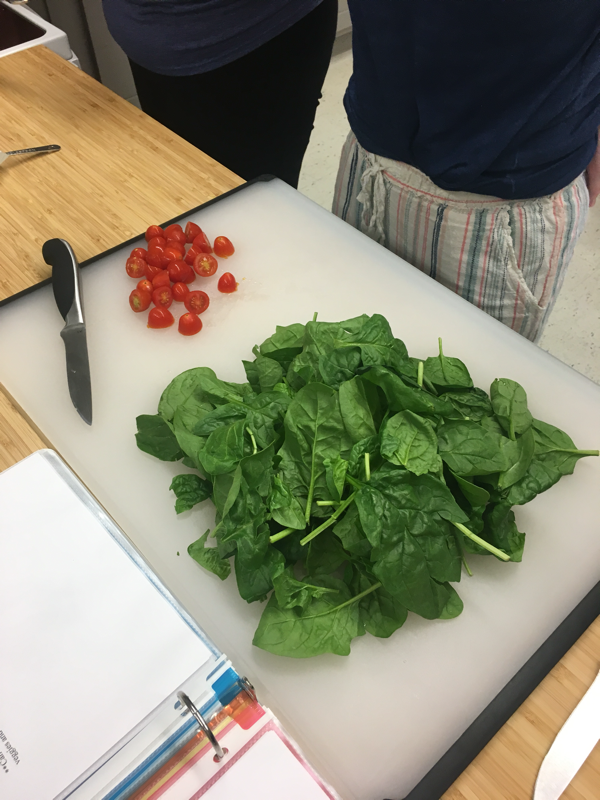
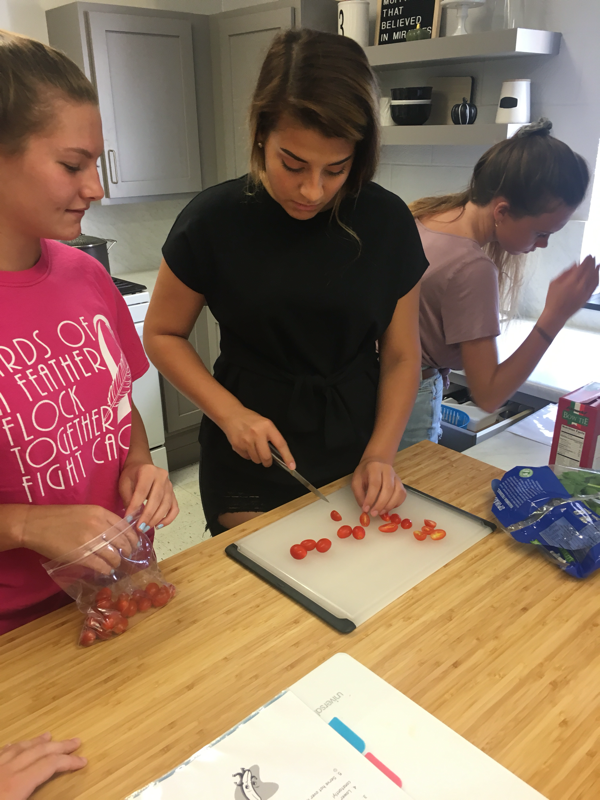
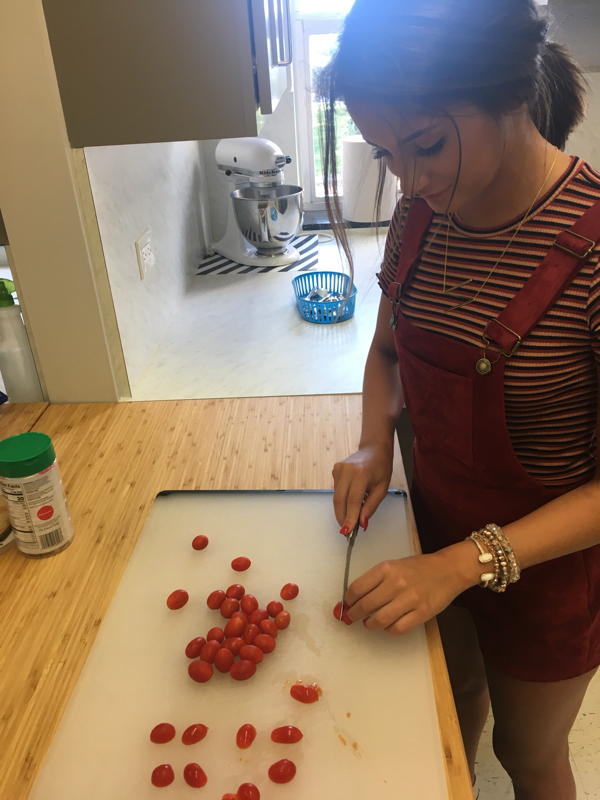
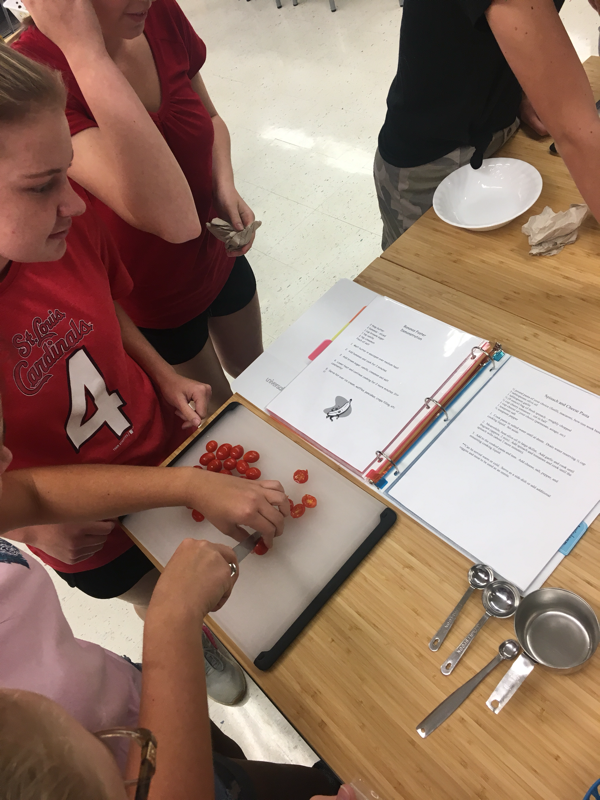
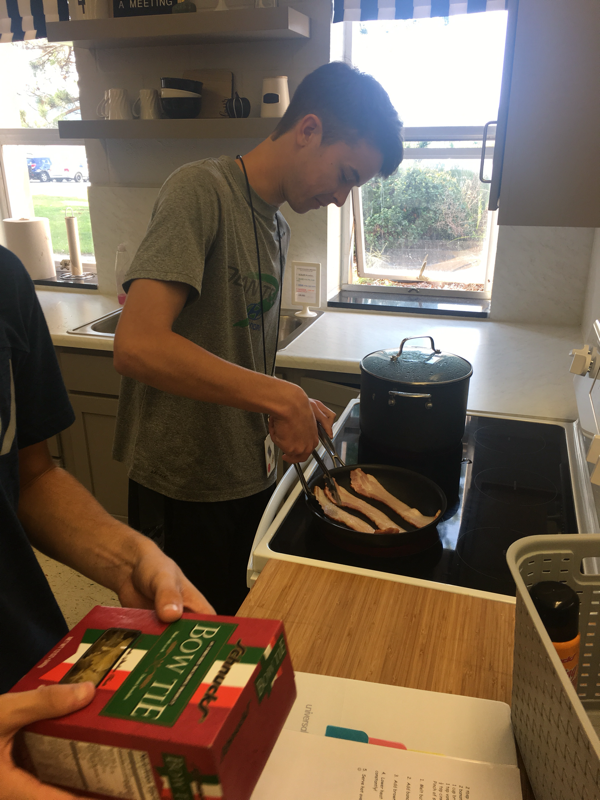
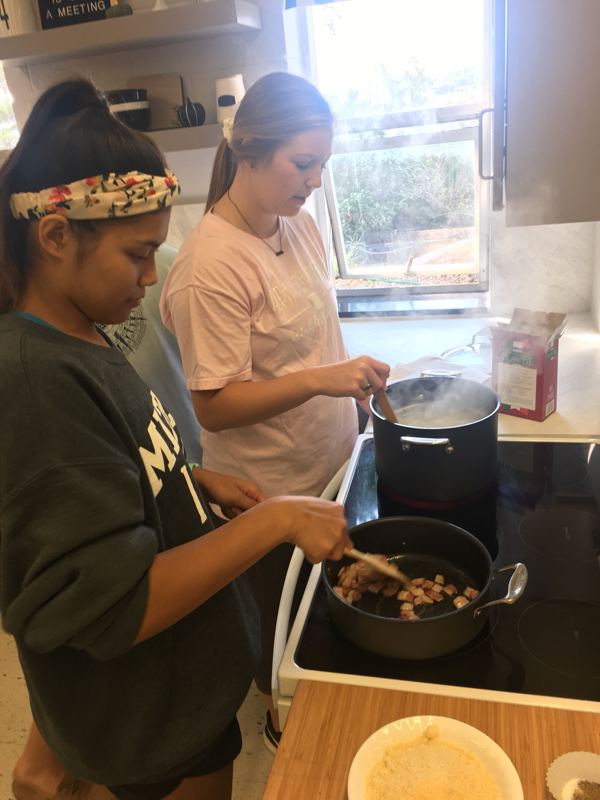
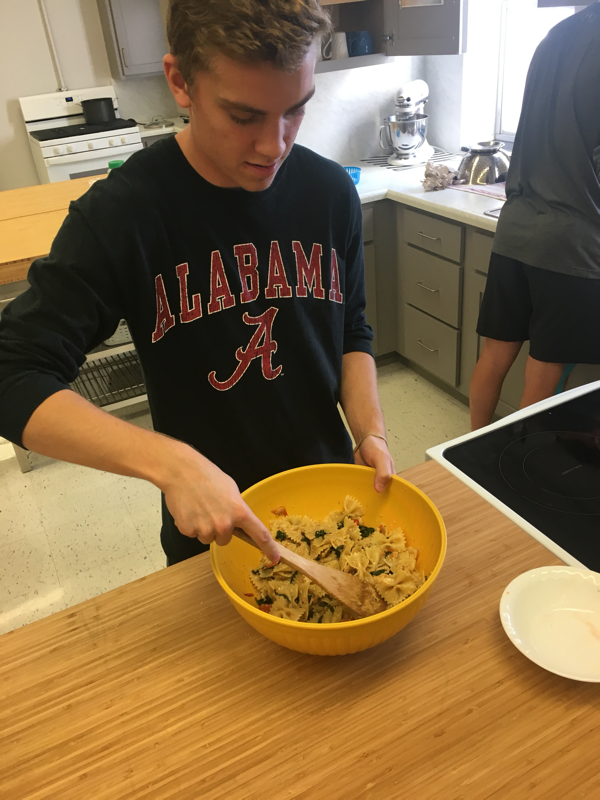
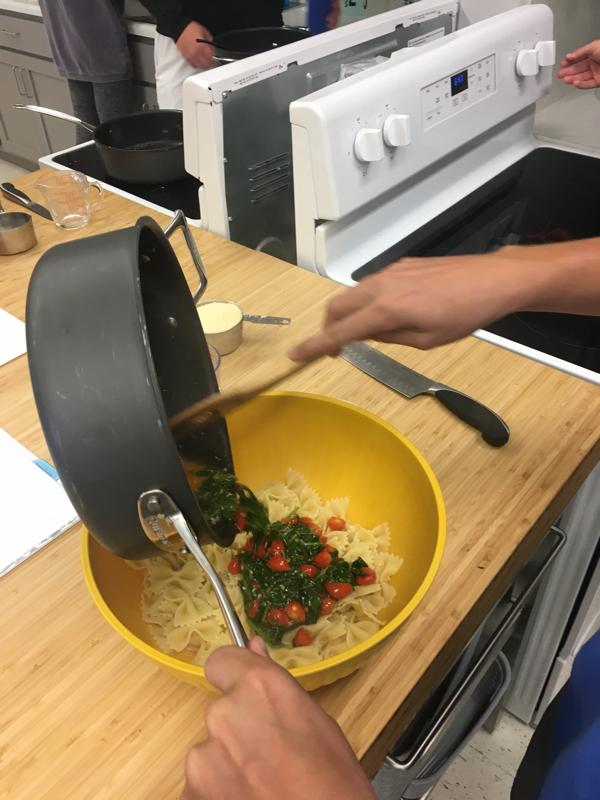
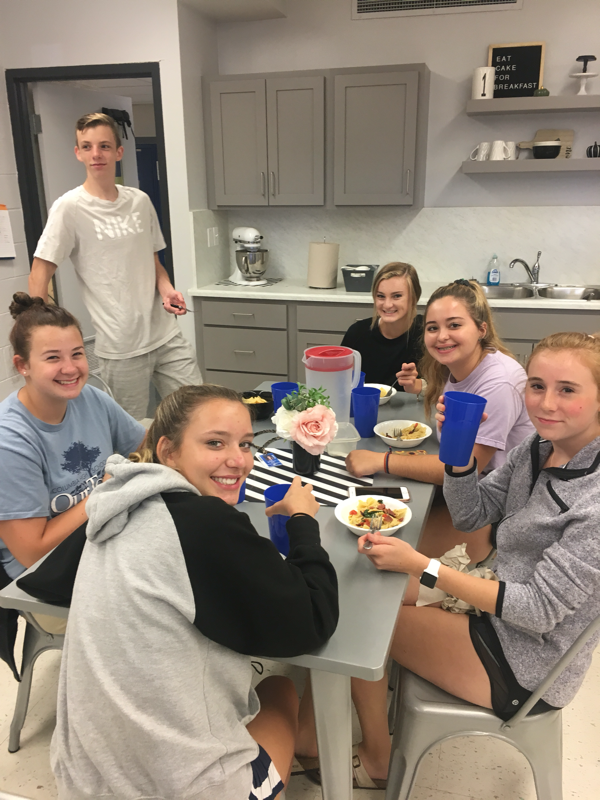
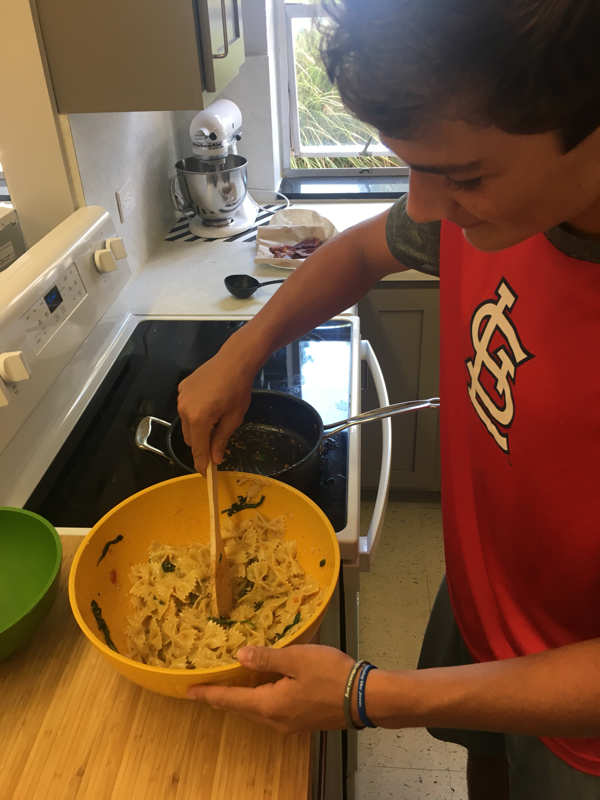
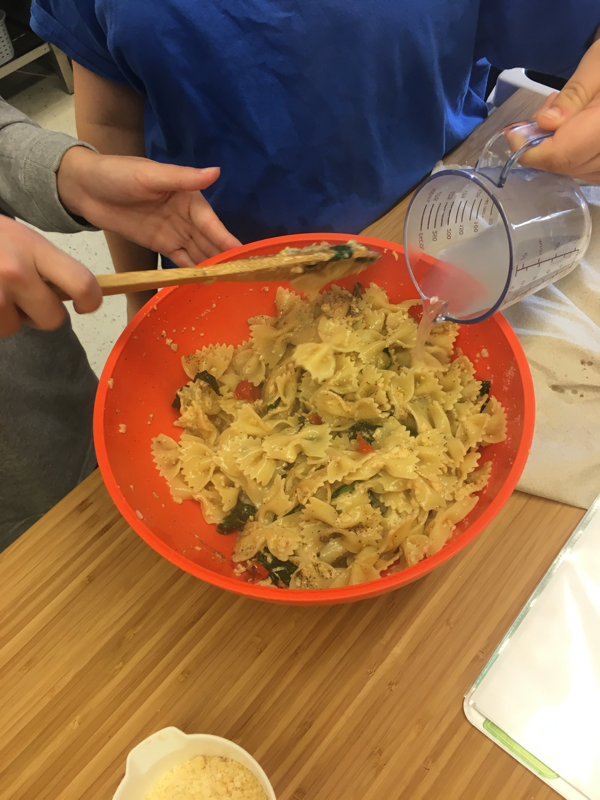
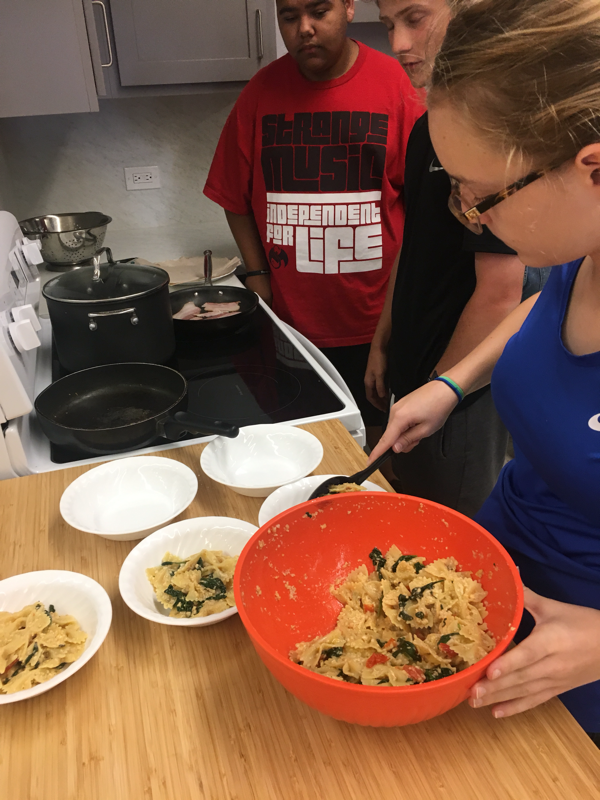
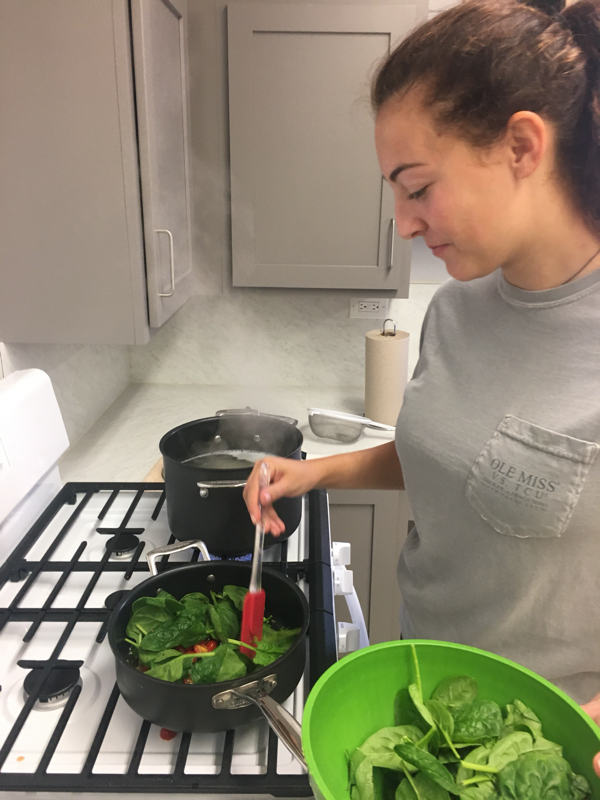
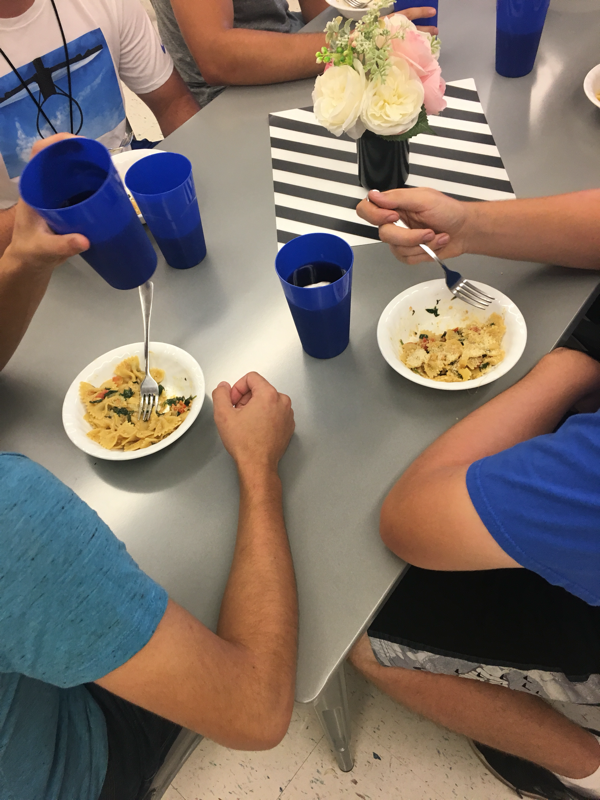
Mini Pizzas -Pizza sauce -Toppings of your choice -Shredded mozzarella cheese -Mini soft shell tortillas 1. Preheat oven to 375 degrees. 2. Place tortilla shells on a cookie sheet and bake for 5-10 minutes until slightly crispy. 3. Top with: sauce, toppings, and cheese. 4. Bake until edges are light brown and cheese is melted (approximately 10). 5. Remove with potholders; let cool for 5 minutes and serve. Mini pizzas can can be made with many different ingredients you already have at home. Biscuits, bagels, and and flatbreads work well as the crust. Barbeque, Alfredo, and hot sauce can be used in place of pizza sauce. Pie fillings or Nutella work great for dessert pizza! In my Nutrition and Culinary Arts course, our classroom adventures have led us to fruits and vegetables this week. Earlier in the week I demonstrated a couple yummy recipes which included Vegetable Parmesan Rissotto and Bananas Foster. Students have the opportunity to see the steps in preparation and sample these dishes in class. When discussing fruits and vegetables we focus on a few main items which include knife cuts, wilting and flavoring greens, caramelizing both fruit and veggies, and nutritional value. Students had the opportunity to practice their knife skills with the preparation of potato soup. The recipe was well executed and the students all gave it a big thumbs up! In in order to teach students how to wilt leafy greens, I use a simple pasta dish. This recipe makes for an easy side dish or a great entree if you add a protein source like chicken. Unlike most pasta dishes there is no heavy sauce. A lot of my students are apprehensive about this recipe because of the vegetable component but most end up really enjoying it. I always suggest adding various veggies, meats, and cheeses to this one to suit personal preference. Some of the groups added bacon to their dish today for added flavor and texture. Bacon is a classroom favorite and we use it regularly even just as a seasoning meat. Doesn't it look like we had a lot of fun today? Check out the recipe below! Spinach and Cheese Pasta 1⁄2 pound pasta of your choice (fusilli, macaroni, bow-ties work best) 3tablespoons olive oil 1 tablespoon garlic 1⁄2 (9 ounce) bag of fresh spinach – roughly chopped 1⁄2 cup cherry tomatoes – cut in half 1 cup cheese of your choice (parmesan, asiago, etc) 1 teaspoon salt 3⁄4 teaspoon pepper 1. Cook pasta in salted water until al dente. Drain water reserving 1⁄2 cup cooking liquid. Set aside. 2. Meanwhile, heat olive oil in large skillet. Add garlic and cook until fragrant (approx. 2 min). Add spinach and tomatoes and cook until the spinach wilts (about 2 more minutes). 3. Add to the cooked pasta and toss. Add cheese, salt, pepper, and remaining cooking liquid. Stir to combine and enjoy! 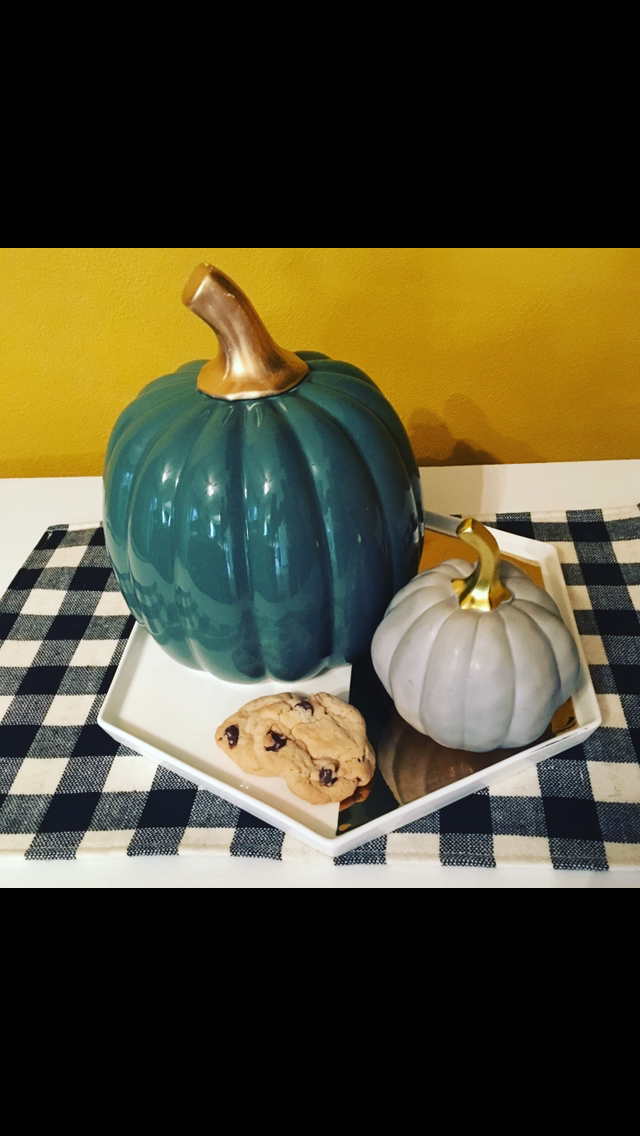 I don’t know about you but I feel like nothing compares to a big plate of freshly baked cookies. They smell just like heaven and are the perfect way to show some love. There are plenty of great pre-made dough options at the grocery store but if you’ve got a little bit of extra time, homemade cookies are so easy and so yummy!
One of my favorite cookie recipes is a classic chocolate chip cookie. I use this recipe in my classroom quite a bit because it makes a large amount of cookies with simple ingredients. I also love that the flavor of the cookie pairs well with other flavor pieces like m & m’s or any flavor of chip. Next time you feel like baking some love for your favorite people, try this recipe out. I promise it will get great reviews! Chocolate Chip Cookies 1/2 cup unsalted butter - softened 1/2 cup shortening 1/2 cup granulated sugar 1 cup brown sugar, packed 1 teaspoon vanilla extract 1/2 teaspoon baking soda A pinch of salt 2 eggs 2 1/2 cups flour 2 cups semi-sweet chocolate chips
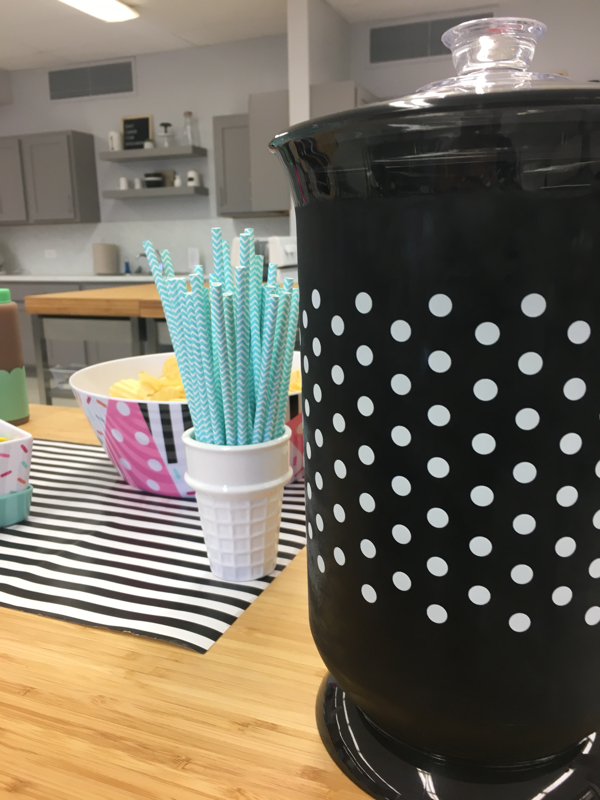
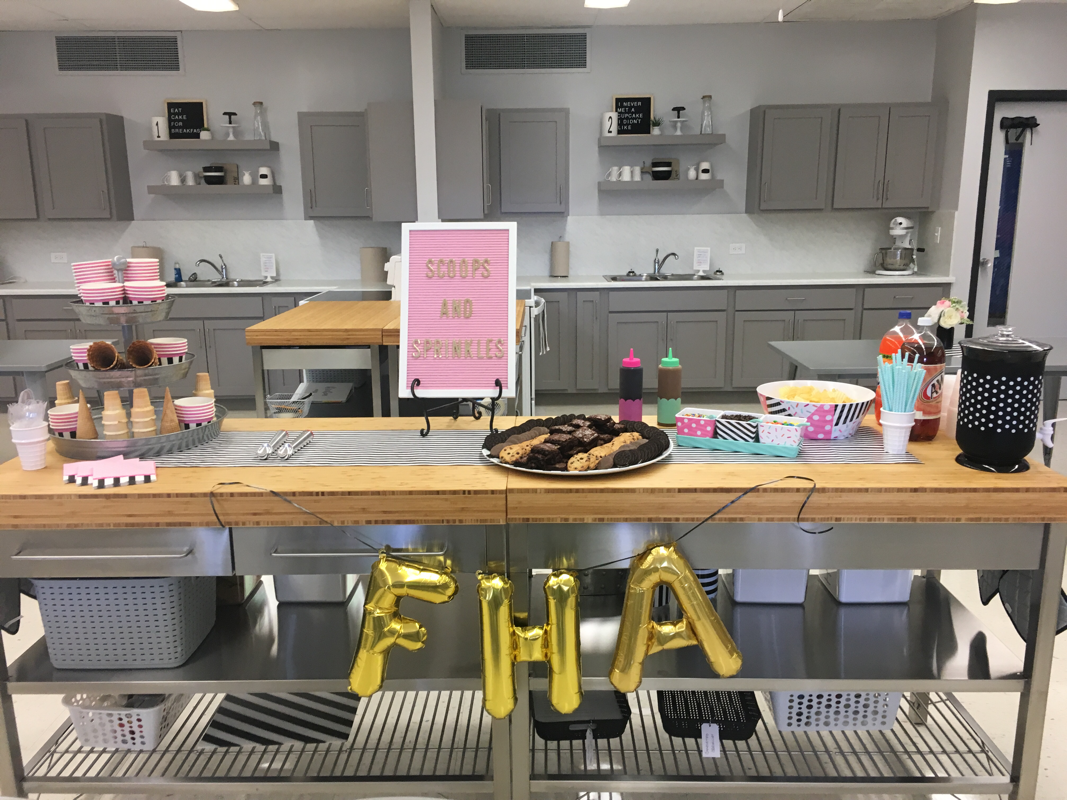
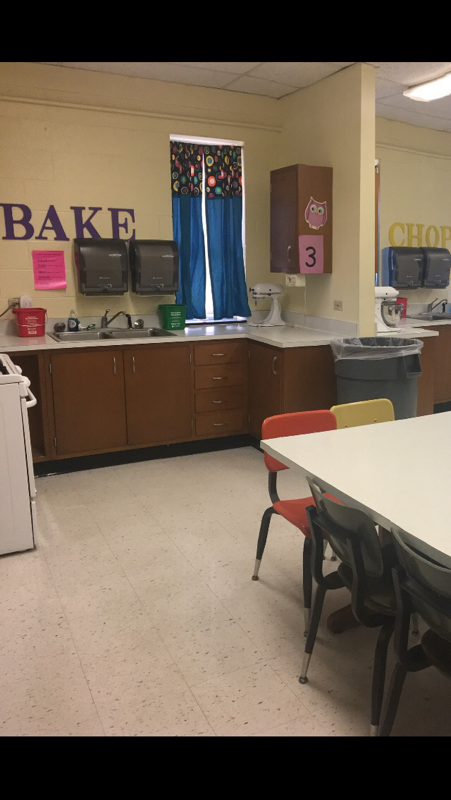
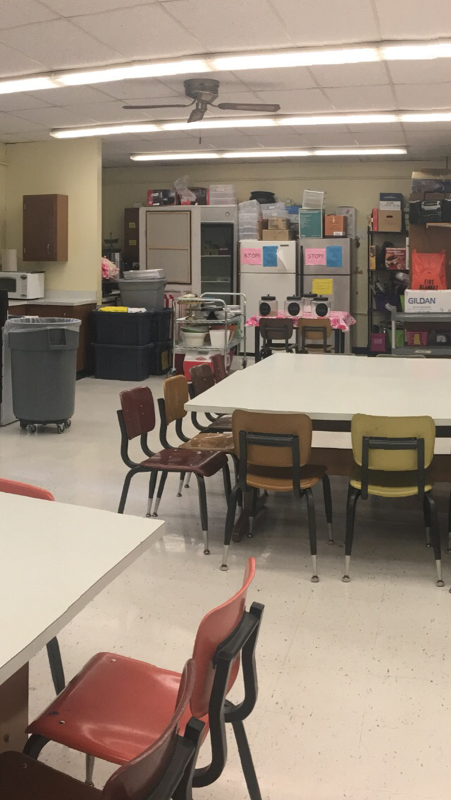
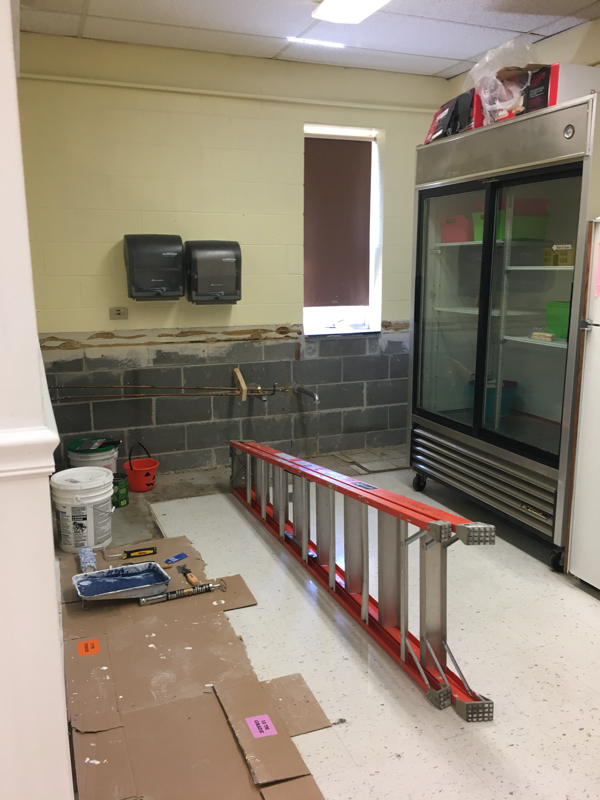
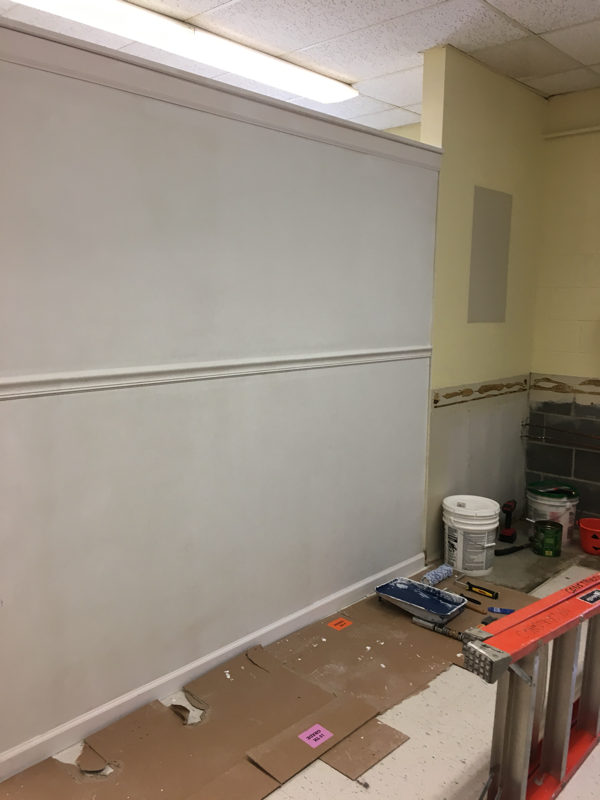
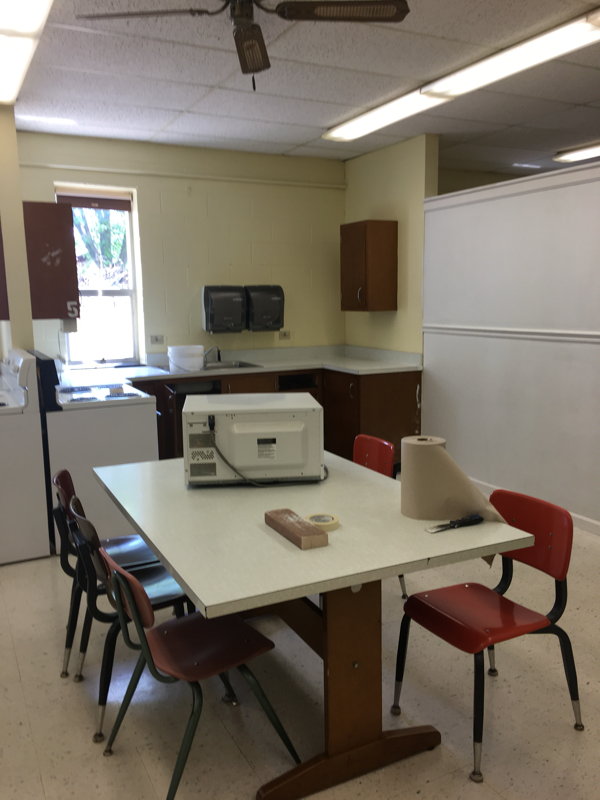
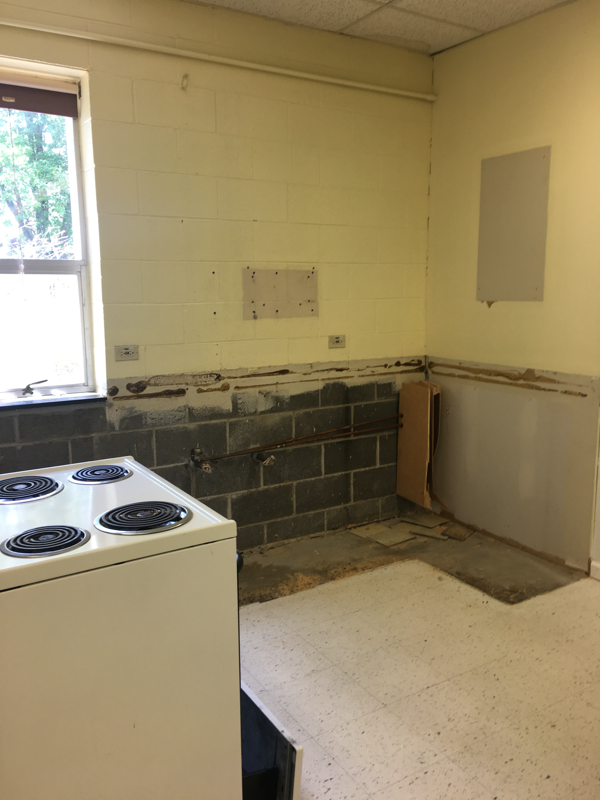
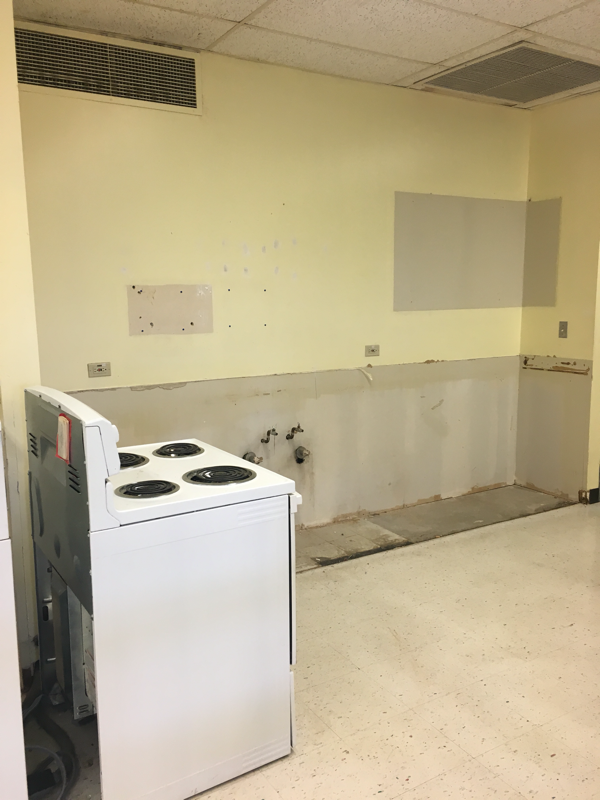
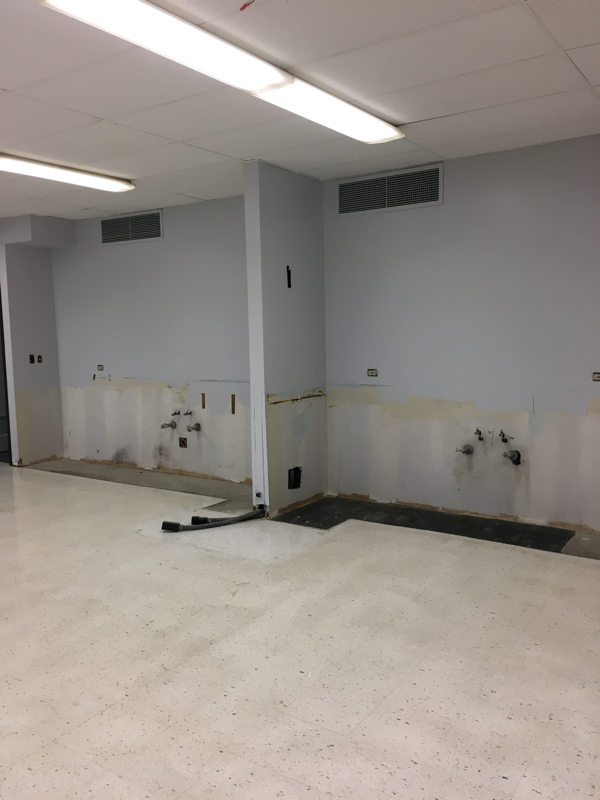
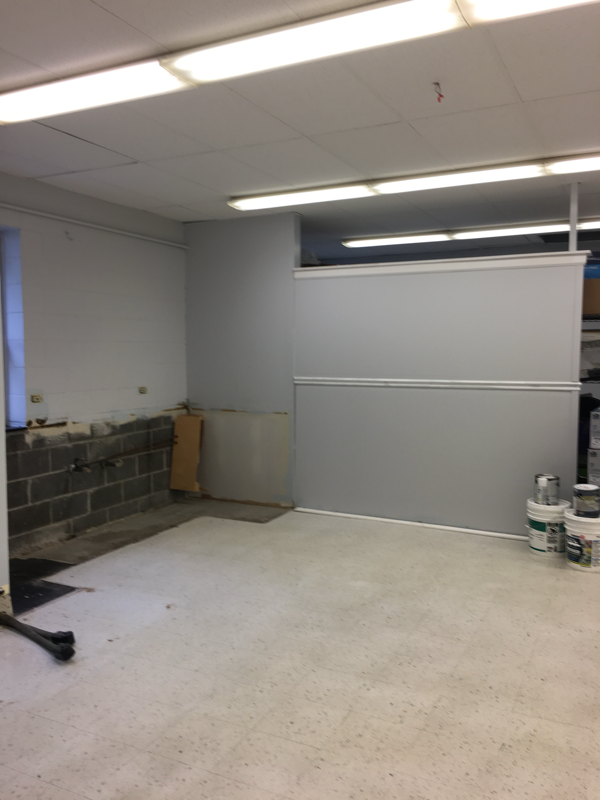
Do you guys know how much I love open shelves in a kitchen?? They are so popular right now and add the perfect amount of style to your living space. They definitely have the potential to get messy and are probably more perfect on Instagram than they ever are in real life but I still love them. I applaud those of you who are brave enough to have all open shelving in your kitchen; I’m definitely not tidy enough for that. My approach to open styling is simplistic and beautiful. Open shelves are the perfect place to showcase stylish or seasonal items. I have a set of two open shelves in my dining room; I change them frequently to display favorite glassware, cake pedestals, and serving pieces. I practically squealed when I found out that we were getting a small section of open shelving in my classroom kitchen! I spent all summer planning and shopping for them. I’m so excited to show you all the things I found! 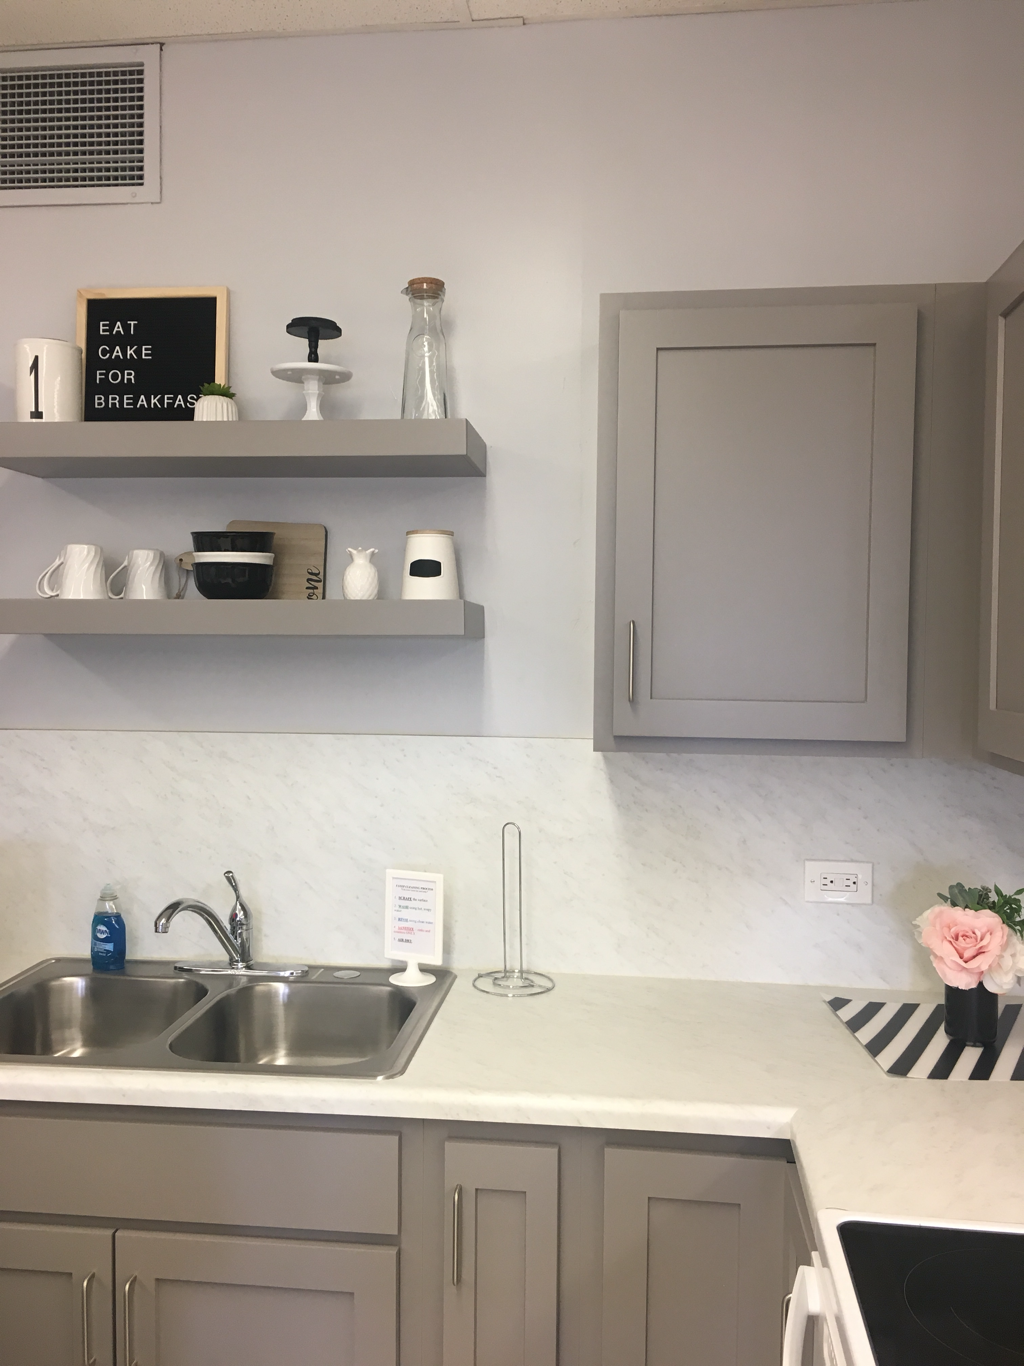 We all know I’m in love with the letterboard trend so I started with the square one from Hobby Lobby. I’m looking forward to changing it to coordinate with the season or recipe for the week. The large white canister is also from Hobby Lobby and I cut a black vinyl number on my silhouette machine to correspond with each kitchen. The mini succulent is from At Home. I just love the combination of those three pieces together! The letterboard and canister give height to the top shelf while plant makes it still feel cozy and natural. The other her top shelf items were also used to add height, color, and variety of texture. The glass carafe was found in the Target dollar section - I loved that it had the cork lid to coordinate with the canister. I always stack my cake stands. It may be my favorite way to decorate! It adds height to your shelf or table and is such a fun way to display them! The two cupcake pedestals were quick DIY projects made by yours truly. It’s amazing what happens when you combine a candlestick, a candle plate (or wood circle for the black one), and some spray paint! This candle stick and candle drip plate were both from Dollar Tree. I used super glue to hold them together and glossy white paint for the finish. Super easy! 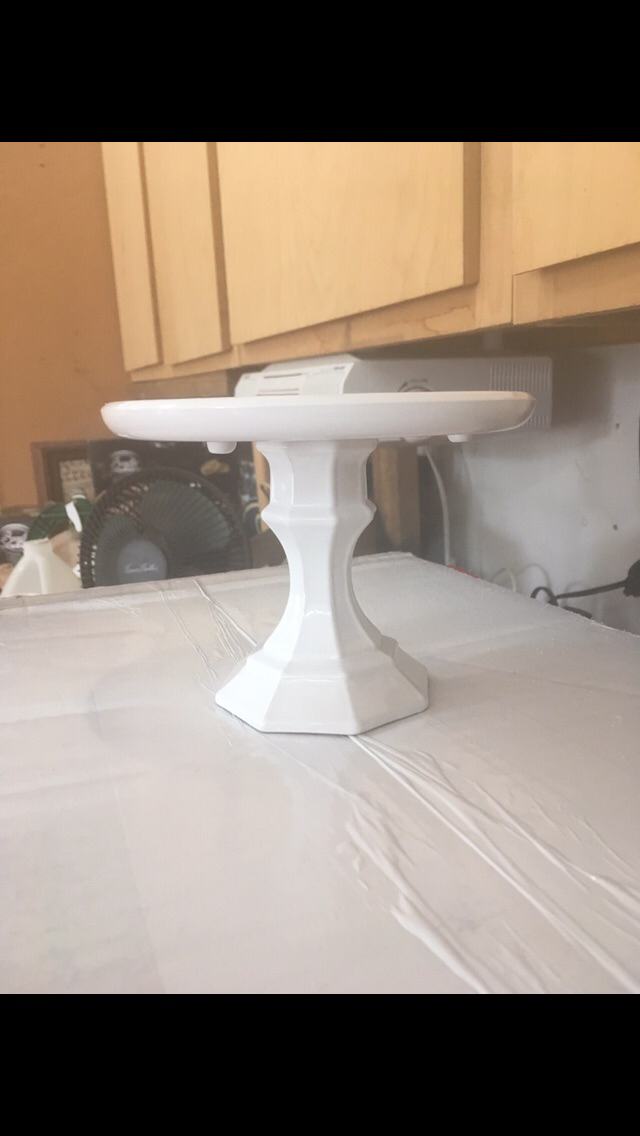 The bottom shelf in each kitchen holds some of the items that will be used more frequently. Stacking dishes creates height and using the two different colors creates an interesting pattern and focal point. The mugs are arranged in a line which creates some width for the shelf as well. The wooden cutting board and small white canister are also from the Target dollar spot. The tiny pineapple is from Dollar Tree! I will be switching it out for seasonal items when the time comes. I have already bought pumpkins and tiny Christmas trees that I can’t wait to use! If you are lucky enough to have some open shelves in your space, here are my suggestions for styling: -Choose items you love, you’re going to look at them a lot! - Use a variety of height, width, color, and texture. It’s very visually appealing! - Layer items together to create more depth (stacking things, placing the cutting board behind the dishes). - Pick items that also serve a purpose. Think serving pieces and dinnerware! - Save those receipts! You never know what you’re going to love until you get it home and look at it with your other stuff. If I like it even a little bit, I buy it and try it at home. If it doesn’t work, return it and keep searching! - Have fun shopping! The treasure hunt is my favorite part! Best of of luck with your open shelf styling! 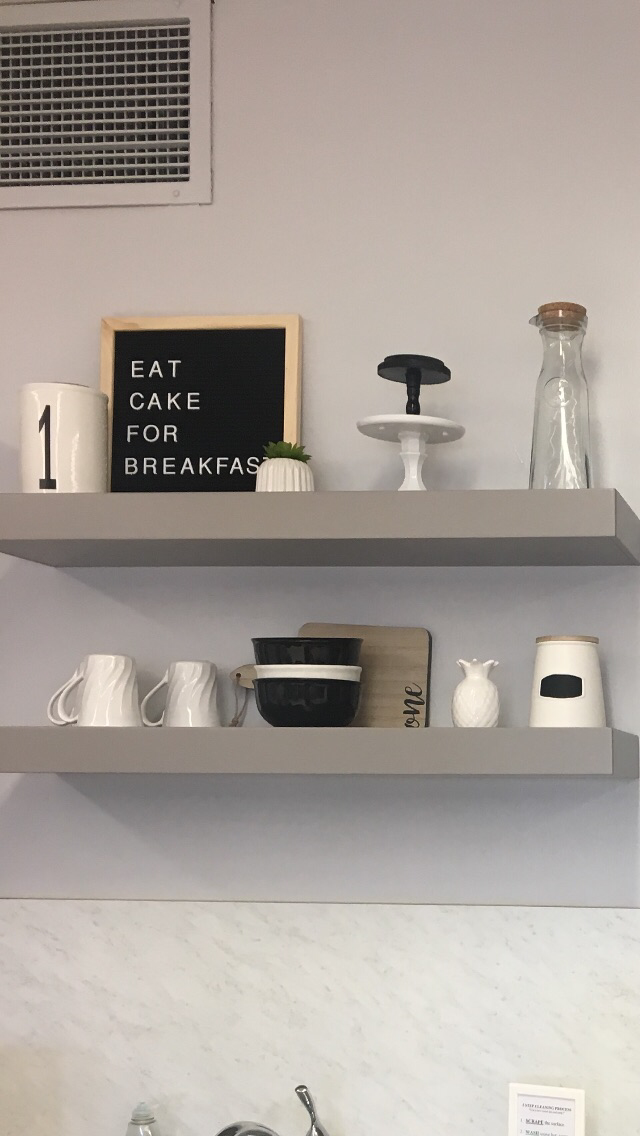 An ice cream party is just about my favorite party to host. It can be over the top or super simple, but either way people will always love it! Everyone loves ice cream, right? Each August, I host an ice cream social for the FHA girls to kick off our school year. An ice cream sundae bar is perfect for this crew; everyone gets to build the treat of their choice! We kept things simple this year with chocolate and vanilla ice cream and a few toppings. I have found in the past that excessive toppings aren’t necessary. Most people prefer the classics (cookies, chocolate syrup, brownies, and sprinkles); previously I bought things like marshmallows and gummy bears but they just didn’t get used. We we started our sundae bar with my very favorite metal serving stand - I’ve had this thing for years and I use it all the time. If you host many parties, I highly suggest you buy one if you come across them! Home Goods, TJ Maxx, and Marshall’s often have them in store. I stocked my serving stand with various ice cream cones (waffle, sugar, and classic) and bowls. The adorable striped bowls are from Hobby Lobby along with the matching napkins. Spoons were located close by in this ceramic ice cream cone - this was a $1 find in the Target dollar spot last spring. 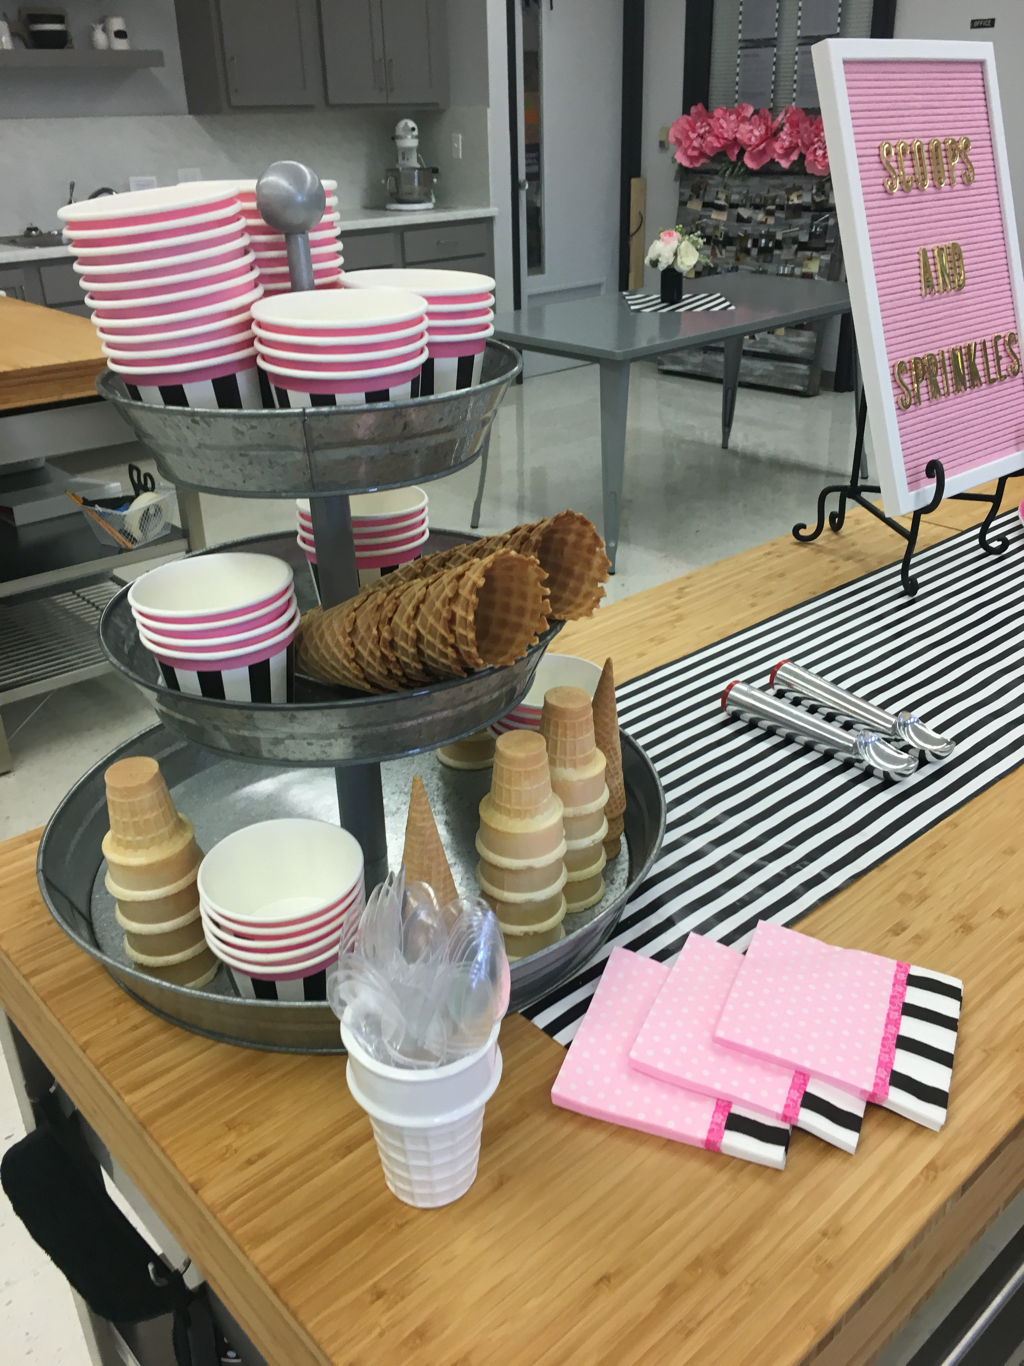 My students are old enough to scoop their own ice cream so I served the ice cream choices in the carton I purchased them in. If you are serving younger children, I absolutely love the idea of pre-scooping the ice cream and freezing it in bowls so your serving line moves quicker and there is less mess. I’m a big fan of the letterboard trend. This pink one and the gold letters are both from Hobby Lobby. 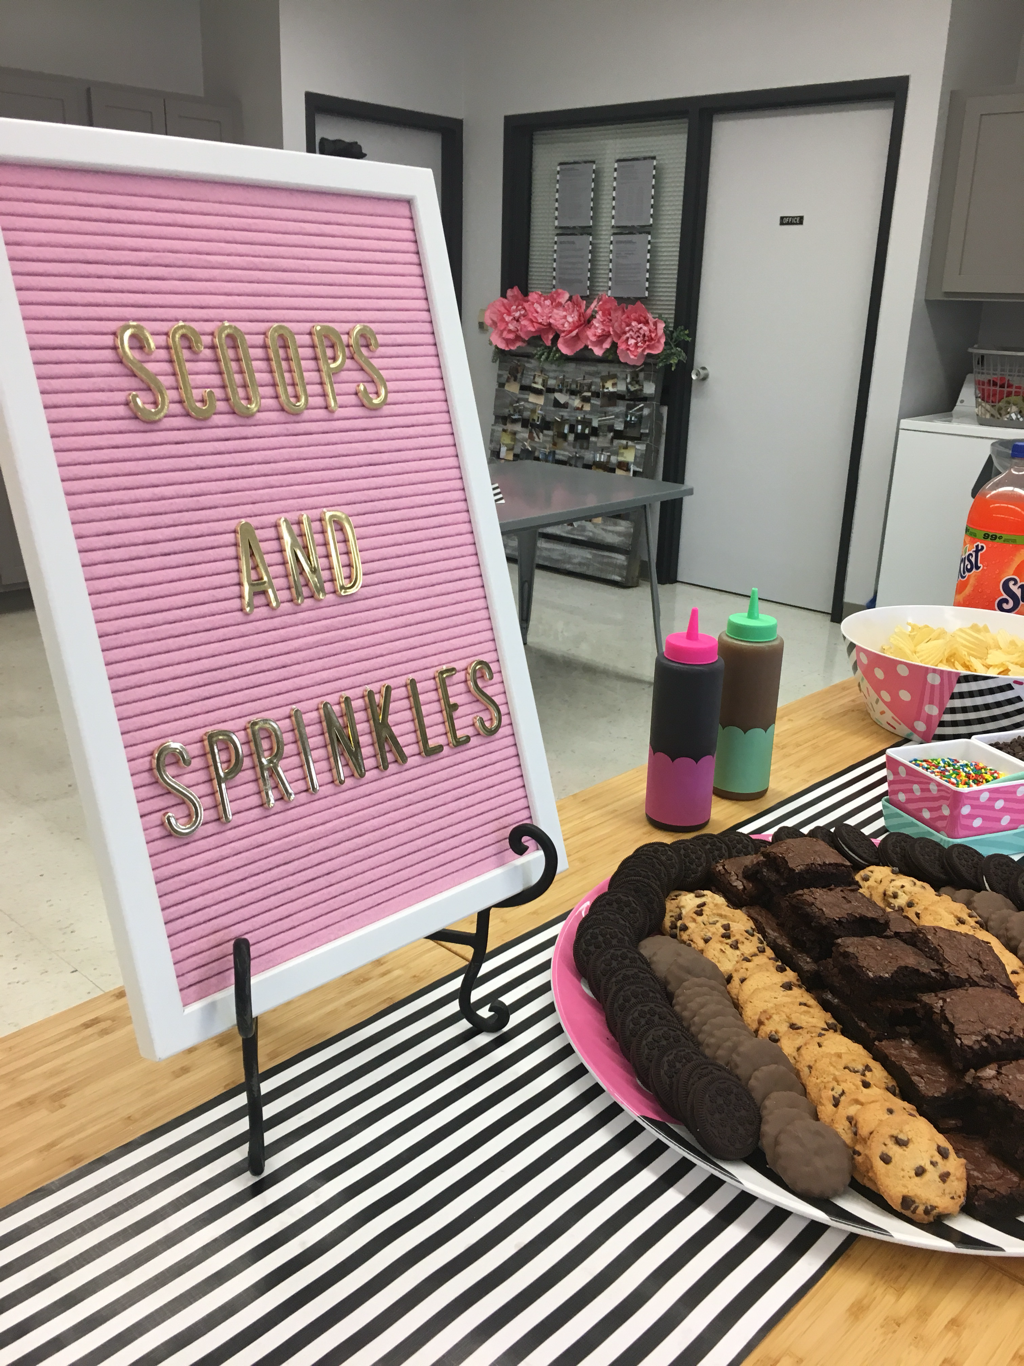 My students could also choose from a variety of brownies and cookies to top their sundaes. Chocolate and caramel syrups were served in squeeze bottles from the Target dollar spot- aren’t they just the perfect colors? Our other toppings included mini chocolate chips, m & m’s, and sprinkles. This adorable serving dish, the chip bowl, and the cookie platter are all from At Home and were party of their summer entertaining collection. 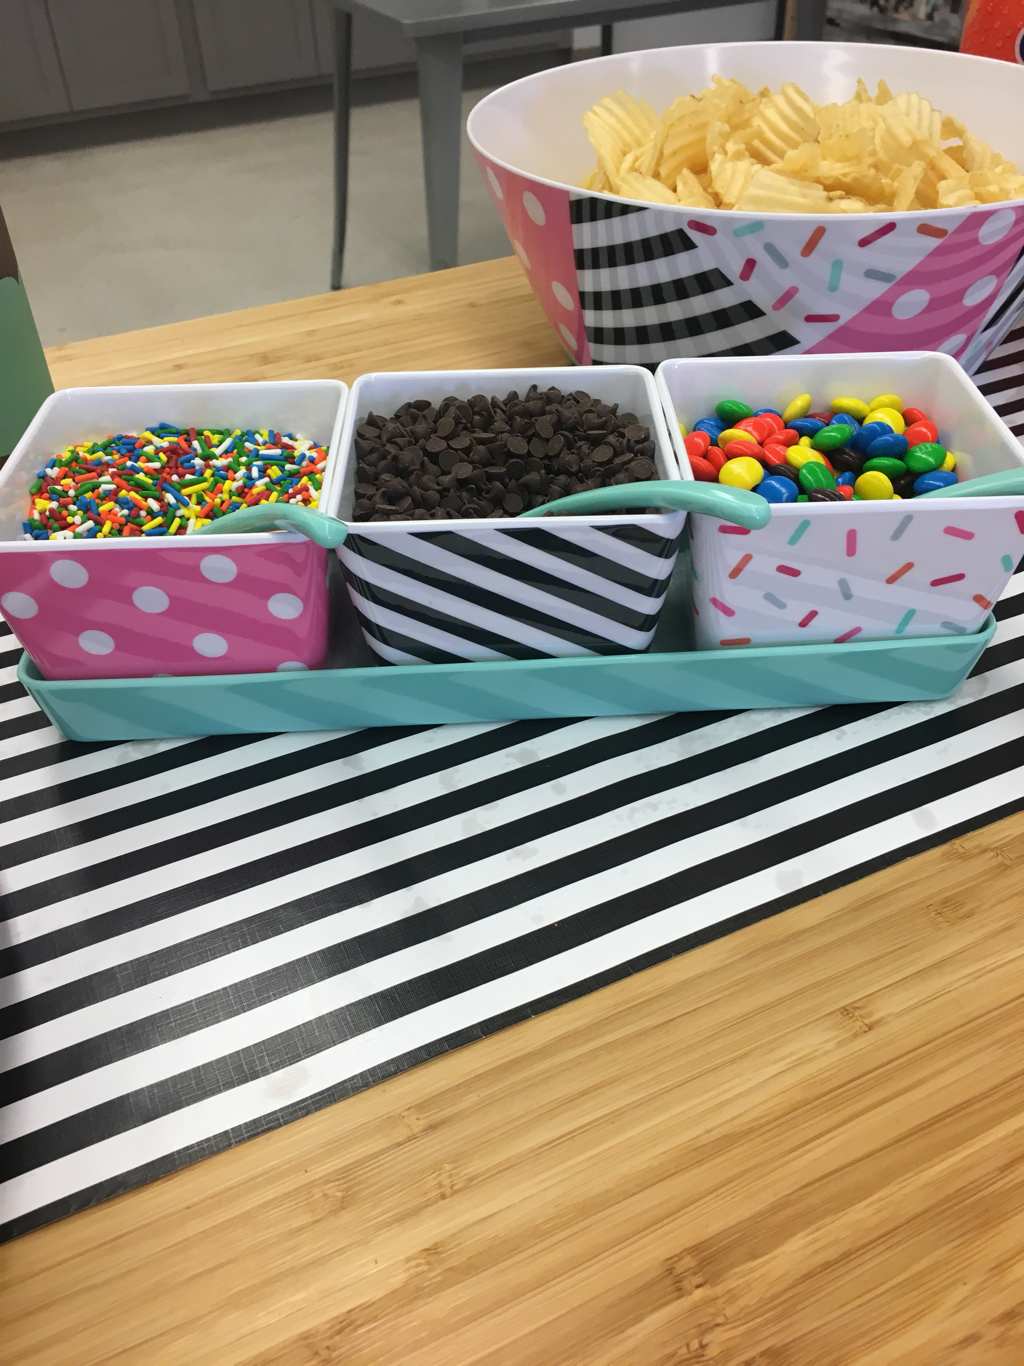 I also picked up a few bottles of soda in case anyone wanted to make an ice cream float. Paper party straws are also always a favorite for my kiddos and I just love all of the fun colors you can find them in! My polka dot drink dispenser is also from At Home and is part of their everyday melamine collection. You can find it any time of year! We used some of our IKEA prep tables for serving, I just love the beautiful bamboo top! The striped runner is wrapping paper from the Home Goods checkout lane. The gold letter balloons on the front of the table are from Hobby Lobby. They are on clearance for only 64 cents right now! Fair warning - if you’re looking for any in the St. Louis area, I probably already bought them all :) I think everyone is looking forward to a very fun school year! Throw an ice cream party sometime, I promise your guests won’t be disappointed. 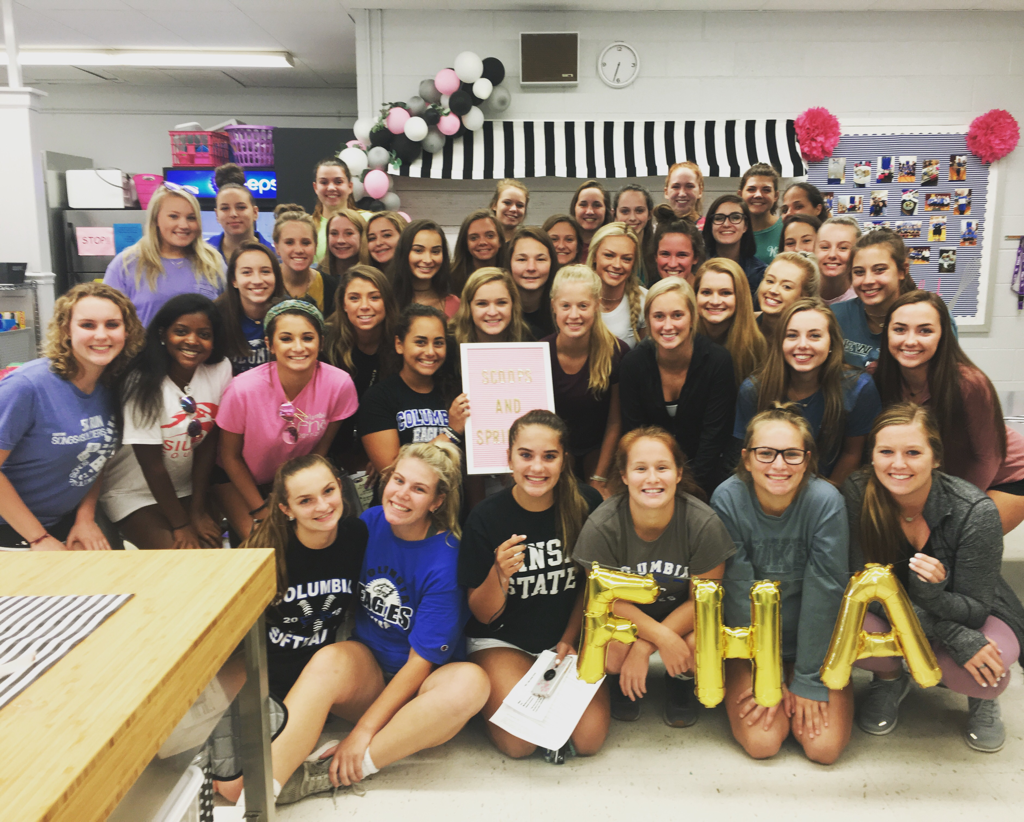 Hey guys! It’s back to school time and it sure has been a busy summer. My classroom kitchen got a huge update and I am finally ready to show you all the great things we did. The old kitchen was very well loved and served its’ purpose for many years. Aside from a facelift, my primary goal was making the space more functional for my students. The existing space had cabinets and counters that offered limited space and storage, they were in poor condition, and were extremely out of date. In the last 10 years, my class sizes have grown considerably and as a result we have added a lot more equipment. We also purchase a much larger volume of groceries and supplies to be used on a daily basis; we were desperate for more efficient storage. With the assistance of some extremely talented people, we were able to really identify and meet all of our classroom needs. Here was our previous space... Priority number one for us was creating more storage. We had a really small station that was in an awkward spot and rarely used by students; it had become a landing zone for junk and items that had no other home. With the assistance of our construction class, the station was removed and a dividing wall was added. This space has now become our pantry and storage area. Our three refrigerators are kept in this location along with our original pantry cabinet that received a fresh coat of black paint this summer. We had one wire shelving unit that worked well for storage of small appliances and equipment - 4 more of these were purchased from Menards and placed end to end to create a giant open storage unit. I’m so excited for all of the organization but I’m equally excited for the additional storage. Buying products in bulk or ordering extra supplies will now be a reality since we have somewhere to store those items. Here is a look into our storage area now: 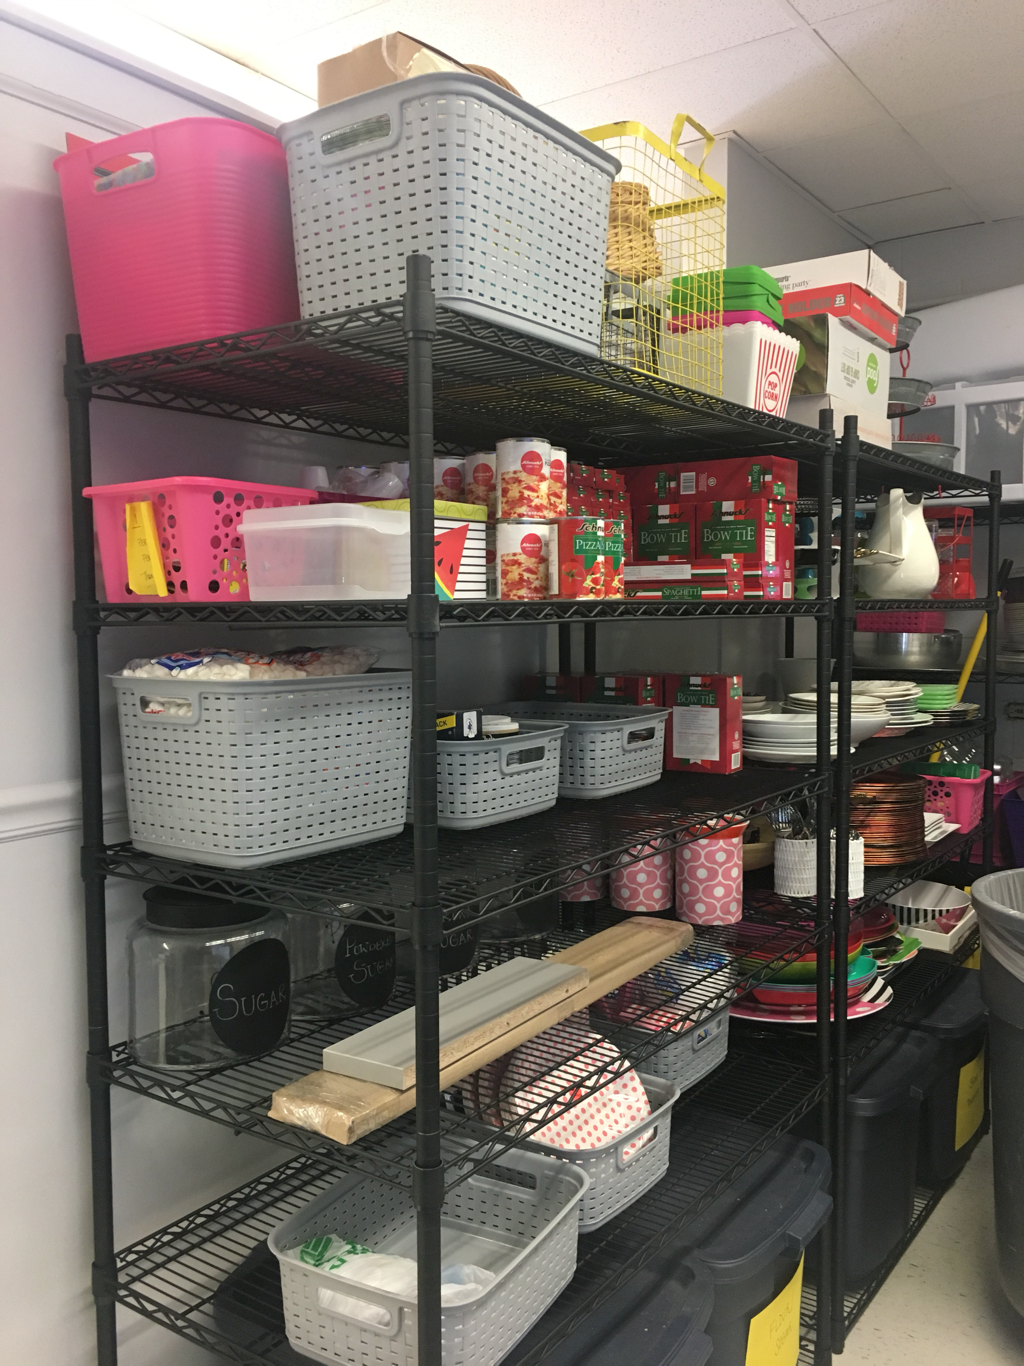 In our student stations, all of the old cabinets, countertops, and sinks were removed. The room was painted with Behr paint in Halation. We reconfigured the existing space and utilized cabinet shapes and sizes that fit our needs the most. This included adding cabinets and drawers in each station, placing a corner cabinet where the previous lazy Susan had been, and adding a tray table for storage of baking pans and cutting boards. Each kitchen received a new double-basin sink and faucet without a sprayer (if you’ve ever worked with kids in the kitchen, you know how dangerous a water sprayer can be). Previously we had the standard 4 inch countertop backsplash which didn’t give much protection to the wall/paint from things like food splatter and food coloring. The countertops were replaced using Wilsonart laminate in White Carrara finish and instead of using the standard 4 inch height, we decided to extend the counter 18 inches. It now meets the top cabinets and completely protects the wall. The laminate surface on the wall is much easier to clean than paint and is a beautiful addition to our space. Above the beautiful laminate and new sink are 2 floating shelves that offer even more storage in each student station. I am really looking forward to styling these for future seasons and holidays. Next weeks post will feature all of the open shelf styling secrets! Additional tables from IKEA were placed in each kitchen for students to use as a prep/work space. Underneath, they offer drawer and open shelving space as well. Students will dine at metal tables in groups of 6. The metal tables replaced large wooden/laminate tables that have been used for years. The new metal tables are much slimmer and offer plenty of space for students to sit and enjoy their meal but are much more appropriate size for our space. The curtains in each station are a Roman shade made from IKEA fabric. More details on curtains in a future post! 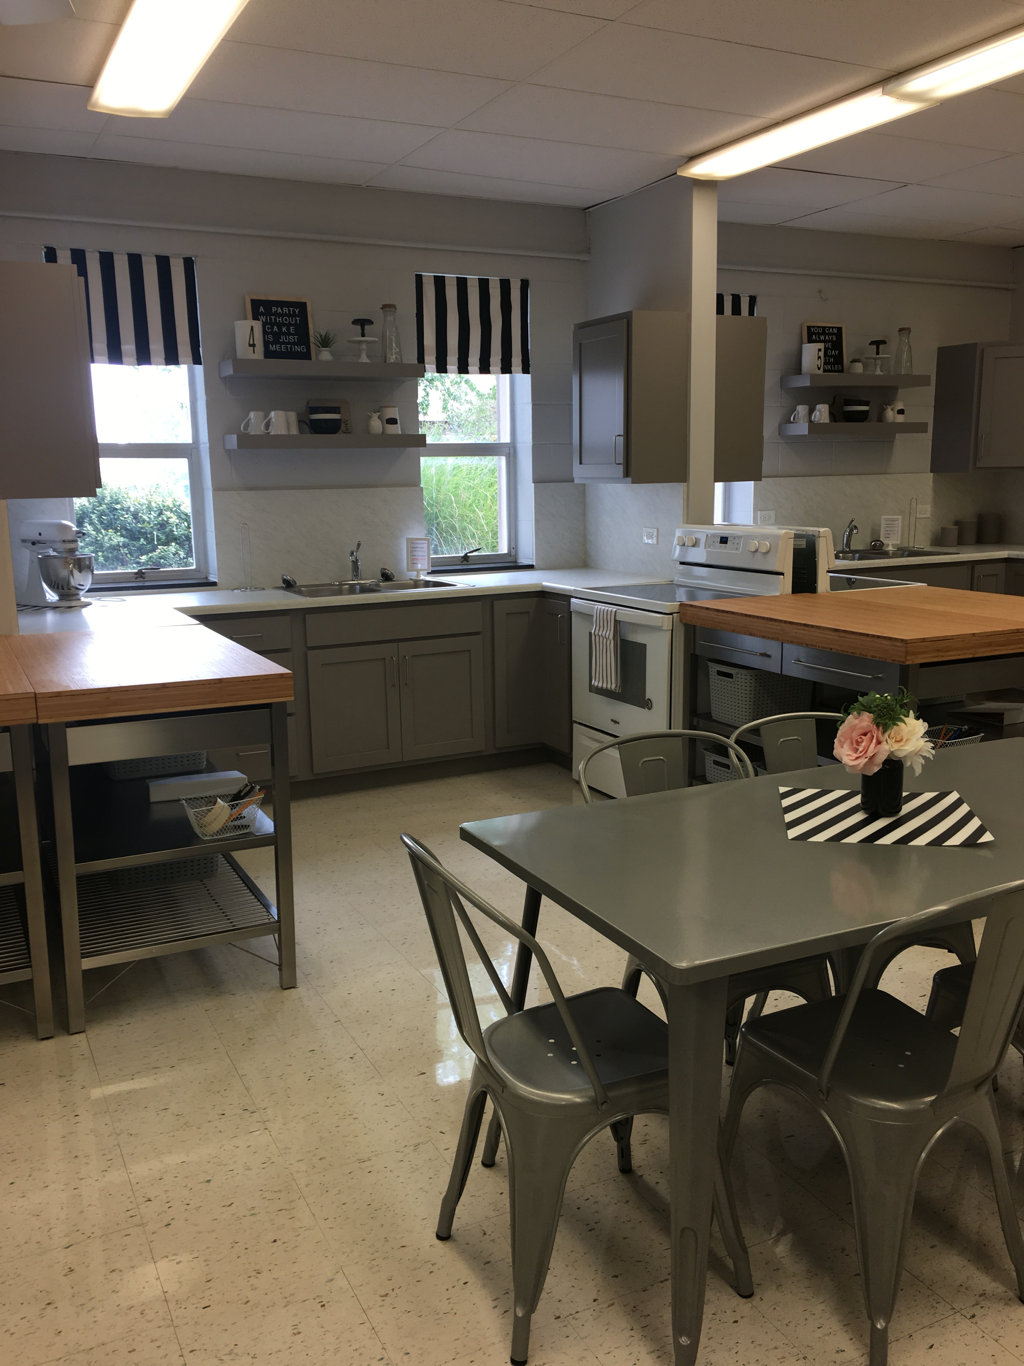 Instead of leaving microwaves in each kitchen and taking up valuable space, students will now be able to use the microwave station. This cabinet was purchased from Wayfair and the microwaves will be kept on top; our recycling center is also underneath! I made the sweet little awning using the same IKEA fabric as I used on the curtains. Details on the awning, shiplap, and balloon garland soon! 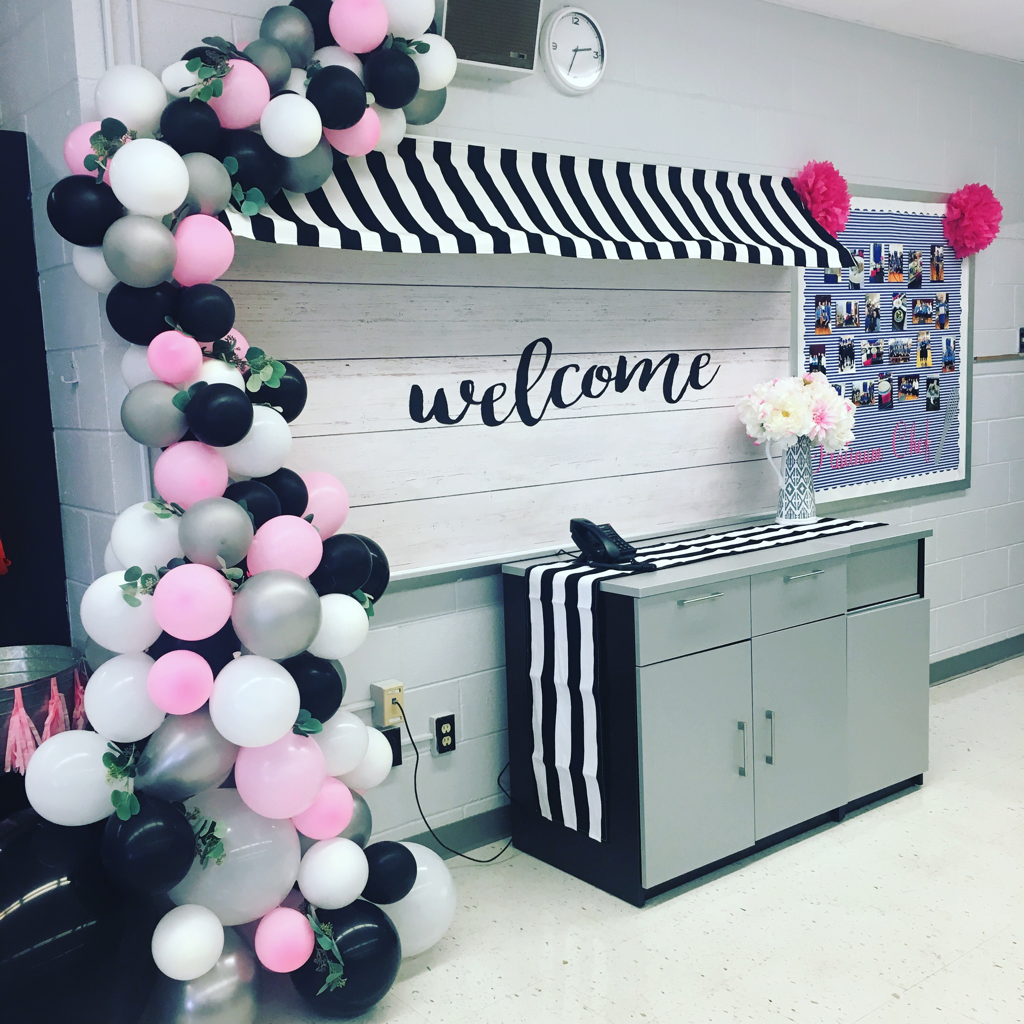 Can you believe how lucky I am? I’m so in love with every detail in this space! I’m excited for all of the classroom adventures we are going to have in here for years to come. Check out pictures from the whole process below! |
Archives
April 2020
Categories
All
|


 RSS Feed
